 STITCH ROUND
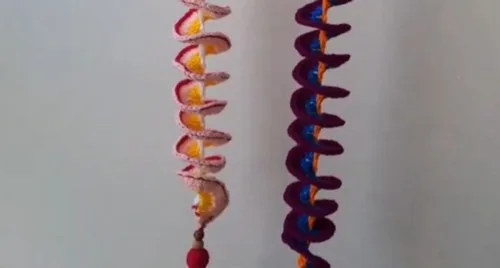
 Colorful crochet wind spinner pattern for the porch
3 rounds to tick off for a layered crochet wind spinner in four colors.
- Skill
- Intermediate
- Rounds
- 3 rounds
- Yarn weight
- Worsted
- Hook
- 4.5 mm
- Time
- 4-6 hours

Intermediate
What the original page called it. Nothing here is graded a second time.

3 rounds
Each one gets its own line, with a box beside it to tick as you go.

Worsted
What the sample was made in. Any weight works — the size moves with it.
About this pattern
This wind spinner builds from a single long strip that grows a new color with every round, three rounds in total to tick off before it goes outside. The base row sets the length with a single crochet chain, and each round after that adds body and color until the spiral has enough weight to catch a breeze.
- Start with a long single crochet foundation strip in white to set the spinner's base length.
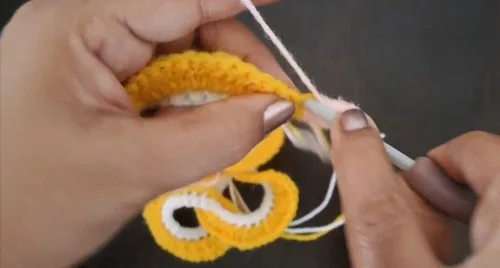
- Work a double crochet round into the white strip, placing two double crochets in every stitch to widen it.
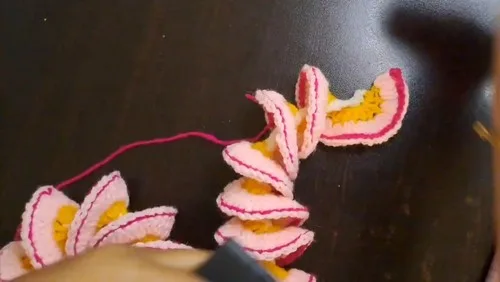
- Join and fasten off the yellow round, then attach light pink yarn to begin the final round.
- Twist the finished strip into a spiral shape once all rounds are complete.
- Add a tassel to the bottom and let the spinner hang to find its balance.
What goes wrong
- Loose color-change joins Pull the new slip knot snug against the previous fastened-off end before working the first stitch. A loose join will show as a gap once the strip is twisted into a spiral.
- Uneven double crochet counts Count stitches across the row before joining each double crochet round. Missing a stitch here throws off how evenly the strip widens for the spiral twist.
- Skipping the fasten-off between colors Fasten off and cut the yarn fully at the end of each round rather than carrying colors up the side. Carried yarn adds bulk that keeps the spiral from twisting cleanly.
- Rushing the final spiral shape Hang the finished strip and let it settle before deciding it is balanced. Adjust the twist gradually rather than forcing it into shape all at once.
Yarn, hook and the rest
Copied from the source pattern's own materials list.
- Four colors of acrylic yarn
- 4.5 mm crochet hook
- Scissors
- Yarn needle
Progress tracker
0 of the 3 rounds on this page are ticked.
The pattern, round by round
Kept in the order and the wording the source used. Tick a round as you finish it; the ticks stay on this device.
Main Pattern
Round 1
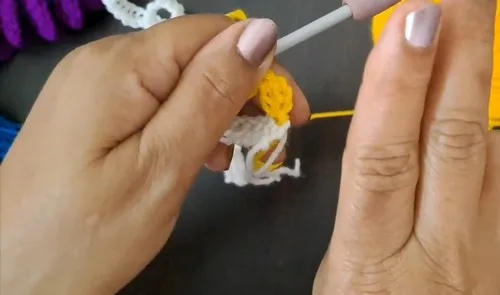
Foundation Chain and Single Crochet (White Yarn) Create a slip knot with white yarn.Chain 80 (adjust length for desired size).Skip the first chain, then single crochet in each chain across (79 stitches).Fasten off and cut the yarn.
Round 2
Double Crochet (Yellow Yarn) Attach yellow yarn with a slip knot. Chain 3 (counts as one double crochet).Make another double crochet in the same stitch.Work 2 double crochets in each stitch across the row.Join and fasten off.For Round 3: Triple Double Crochet (Light Pink Yarn)Attach light pink yarn.Chain 3 (counts as one double crochet).Make 2 more double crochets in the same stitch (3 total in first stitch).Work 3 double crochets in each stitch around.Join and fasten off.
Round 4
Slip Stitch Border (Dark Pink Yarn) Attach dark pink yarn. Chain 1, then slip stitch in the same stitch.Slip stitch in each stitch around to form the border.Fasten off and weave in all yarn ends.
Creating the Tassel (Dark Pink Yarn)
Wrap yarn around a small box or item 40 times.
Cut a separate piece of yarn to tie through the top of the loops.
Thread it through and tie securely before removing from the box.
Wrap yarn several times around the top section to form a tassel head.
Tie securely, trim ends, and cut bottom loops to form a fringe.
Attaching the Tassel and Finishing Attach the completed tassel to the bottom of the wind spinner.
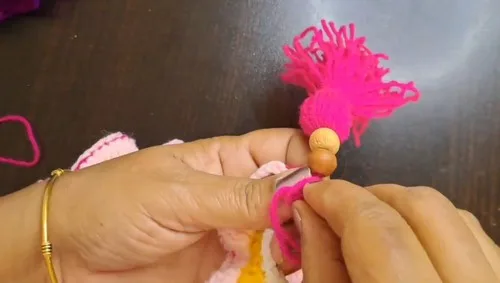
Optional: Add beads to the tassel for extra flair.
Ensure all ends are neatly woven in.
Join
Step 1Attach the completed tassel to the bottom of the wind spinner.
Step 2Optional : Add beads to the tassel for extra flair.
Step 3Ensure all ends are neatly woven in.
Step 4Adjust the spinner to achieve a well-balanced spiral effect.
Finish
- Weave in every loose end from each color change along the strip before twisting it into shape.
- Attach the tassel securely to the bottom edge of the spiral so it hangs straight.
- Adjust the twist of the finished spiral by hand until it balances evenly for outdoor hanging.
Bigger or smaller
- Larger
- Lengthen the starting chain beyond 80 stitches for a longer strip, which produces a bigger spiral once twisted and hung.
Photographs of this one
Every photograph on this page was taken by whoever published the pattern, and they are printed in the order the source listed them.
FAQs
Asked and answered
These answers came from whoever first published the pattern, kept word for word.
Can the chain length be changed from the pattern?
Yes, the chain 80 starting point is meant to be adjusted for the desired size. A shorter or longer chain changes the final length of the spiral before it is hung.
How is the tassel attached to the spinner?
The tassel attaches to the bottom of the completed wind spinner after the main rounds are finished. Beads can be added to the tassel at this stage for extra flair.
What yarn works best for an outdoor wind spinner?
The pattern calls for acrylic yarn in four colors, which holds up well against outdoor moisture and sun compared to natural fibers. Acrylic also keeps the finished piece lightweight enough to spin easily.