 STITCH ROUND
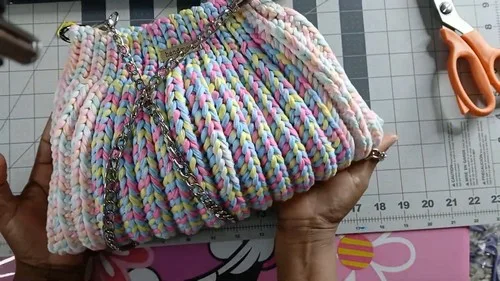
 Beginner bubble stitch crochet bag with chain handle
5 rounds to tick off for a bubble stitch crochet bag with chain handle and magnetic clip.
- Skill
- Beginner
- Rounds
- 5 rounds
- Yarn weight
- Worsted
- Hook
- 6 mm
- Time
- 4-6 hours

Beginner
What the original page called it. Nothing here is graded a second time.

5 rounds
Each one gets its own line, with a box beside it to tick as you go.

Worsted
What the sample was made in. Any weight works — the size moves with it.
About this pattern
This bag is built from a single main pattern covering 5 rounds, worked flat before folding into shape. The textured panel comes from alternating slip stitches with a special single crochet, giving the piece its bubbled surface without any complicated shaping. Three yarn colors let the rounds read as clear bands, so progress is easy to see and easy to tick off one round at a time.
The shaping happens late, when the straight panel turns a corner through a run of decreases on each side before the final row closes it off with more decreases. Slow down through the corner rounds and the finishing row, since the decrease counts change the stitch count and rushing here is where the bag edge goes uneven. Everything before that is a steady repeat, so the corners and the close are the only spots that need full attention.
- Chain a long foundation row and set it up with slip stitches and special single crochets to start the first round.
- Turn and repeat the back-loop slip stitch and special single crochet pattern row after row to build the panel.
- Keep repeating that turn-and-work row until the panel reaches the length given for the side.
- Shape the bottom corners by working across in slip stitches and dropping in a set of decreases partway through.
- Work a final shaping row with more decreases, then cut and hide the yarn to finish the piece.
- Seam the corners together, add the magnetic clip and chain handle, then finish with any optional tags or charms.
What goes wrong
- Losing the back-loop-only rule Check each slip stitch and special single crochet goes into the back loop only once the repeat rows start. Working into both loops by accident flattens the texture that makes this panel distinctive.
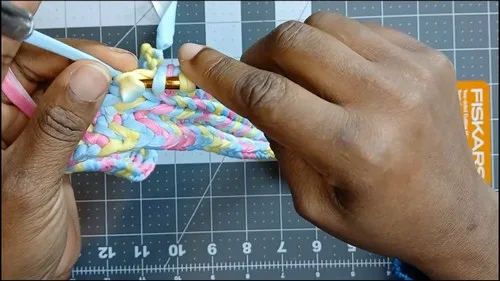
- Mixing up the special single crochet Remember the special single crochet works one loop at a time, picking a loop, pulling through, then moving to the next loop before repeating. Treating it like a standard single crochet changes the bubble effect across the 48-stitch sections.
- Skipping the stitch markers Place markers at the end of the first set of slip stitches and the start of the second set every round. Without them it is easy to lose track of where the slip stitch section ends and the special single crochet section begins.
- Rushing the corner decreases Count carefully through the four decreases on the first corner row and the five decreases on the final row. Missing a decrease here throws off the seam line when the corners get sewn together.
Yarn, hook and the rest
Copied from the source pattern's own materials list.
- Three yarn colors of your choice
- 6 mm crochet needle
- Scissors
- Stitch markers
- Pins
- Keychain
- Chain for the bag
- Hook to hang the chain
- Magnetic clip for closure
Optional
- "Handmade" tag (from Amazon)
Progress tracker
0 of the 5 rounds on this page are ticked.
The pattern, round by round
Kept in the order and the wording the source used. Tick a round as you finish it; the ticks stay on this device.
Main Pattern
Round 1
Create a slip knot; Chain 65; Work under the bumps of the chain; Make 8 slip stitches, starting from the second chain from the hook; Mark the end of these slip stitches with a stitch marker; Continue with 48 single crochets using the special single crochet stitch (for each stitch: pick the first loop, insert the hook, yarn over, and pull through, pick the next loop and repeat the process); After completing the 48 special single crochets, make 8 slip stitches; Mark the beginning of these slip stitches.
Round 2
Chain 1 and turn your work; Work 8 slip stitches in the back loop only; Mark the last slip stitch; Continue with 48 special single crochets in the back loop only.Repeat Row 2 until your work reaches approximately 31 cm in length.Creating the Bag Corners: this row begins the shaping for the bottom corners of the bag.
Round 3
Make 30 slip stitches; Work four decreases by pulling through multiple loops at once; Finish the row with 30 slip stitches.Final Row for the Side: this row completes the shaping for the first side of the bag before the yarn is cut.
Round 4
Chain 1 and turn; Make 28 slip stitches; Perform five decreases; End with 28 slip stitches; Cut and hide the yarn.Repeating for the Other Side: the same corner and final row shaping is worked again on the opposite side of the bag.
Round 5
Repeat the same decrease pattern on the opposite side of the bag.
Join
Step 1Leave a long yarn tail.
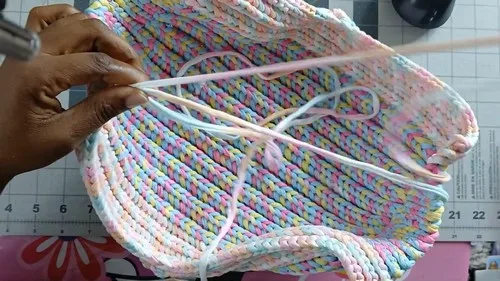
Step 2Use a needle to stitch the corners together using back loops only.
Step 3Turn the bag inside out and hide any remaining yarn.
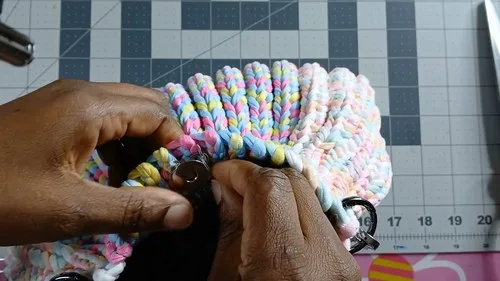
Step 4Attach the magnetic clip to the center of the bag opening.
Step 5Hook the chain handle onto the designated rings.
Step 6Add optional decorations like the "handmade" tag or keychains.
Finish
- Weave in the yarn tail left at the end of the final row before any seaming begins.
- Use a needle to join the bag corners together through the back loops only, then turn the bag right side out and bury any leftover ends.
- Attach the magnetic clip at the center of the opening and hook the chain handle onto its rings to complete the bag.
Bigger or smaller
- Smaller
- Stop repeating the turn-and-work row sooner than the length given for the side, which shortens the panel and gives a smaller bag body before the corner shaping begins.
Photographs of this one
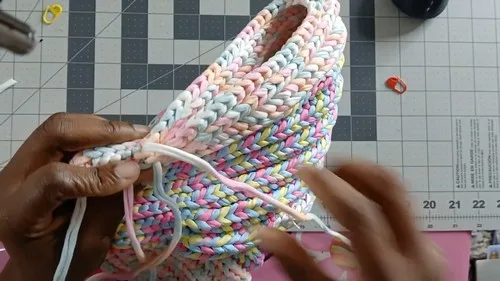
Every photograph on this page was taken by whoever published the pattern, and they are printed in the order the source listed them.
FAQs
Asked and answered
These answers came from whoever first published the pattern, kept word for word.
What does the special single crochet actually look like?
It is worked one loop at a time rather than through both loops together, which is what raises the bubble texture on the panel. It takes the same hook and yarn as the rest of the piece, just a different insertion method.
Why are there two sets of slip stitches in every round?
The slip stitch sections at each end of the row form the folded sides of the bag, while the special single crochet section in the middle carries the bubble texture. Keeping them separate is what lets the corners fold and seam cleanly later.
Is the magnetic clip sewn or snapped in?
The clip attaches at the center of the bag opening after the corners are seamed and the bag is turned right side out. No stitching through the clip itself is needed, just positioning it at the center point.