 STITCH ROUND
 Easy oval trapillo yarn bag crochet pattern
6 rounds build an oval trapillo yarn bag with back-loop texture and corner shaping.
- Skill
- Intermediate
- Rounds
- 6 rounds
- Yarn weight
- Super Bulky
- Hook
- 5.5 mm
- Time
- 4-6 hours

Intermediate
What the original page called it. Nothing here is graded a second time.

6 rounds
Each one gets its own line, with a box beside it to tick as you go.

Super Bulky
What the sample was made in. Any weight works — the size moves with it.
About this pattern
This bag starts as a simple oval base and grows through six rounds of the main pattern, worked in continuous spirals rather than turned rows. Thick trapillo cotton and a 5.5 mm hook build up fabric fast, so each round ticks off a visible chunk of the bag body. Stitch markers keep track of the three corner increase points carried over from the starting chain, which is the detail that turns a flat oval into a rounded bag shape.
The shaping lives entirely at the corners: back loop only stitches create the ridged texture, while the number of plain stitches between increases shifts every round. Slow down at the start of each new round to confirm the increase stitch markers before working into them, since a missed or shifted increase at a corner compounds quickly and skews the oval out of shape by the time the two sides are joined.
- Chain a base length and work single crochet around both sides to create a long oval ring.
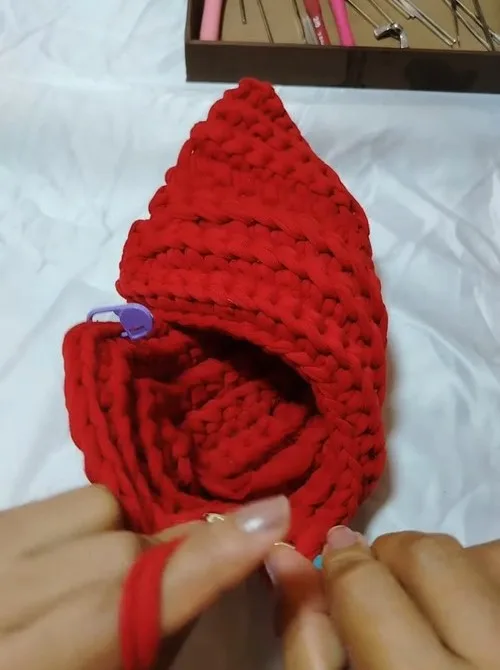
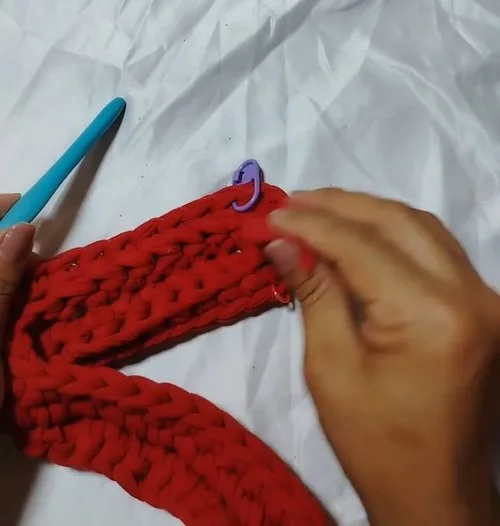
- Mark the corner stitches so the increase points stay easy to find round after round.
- Work every round through the back loop only to build a subtly ribbed, sturdy fabric.
- Repeat the corner increase pattern each round, shifting how many plain stitches sit between increases as the bag widens.
- Join the two sides with slip stitches worked into the inner loops to close the bag shape.
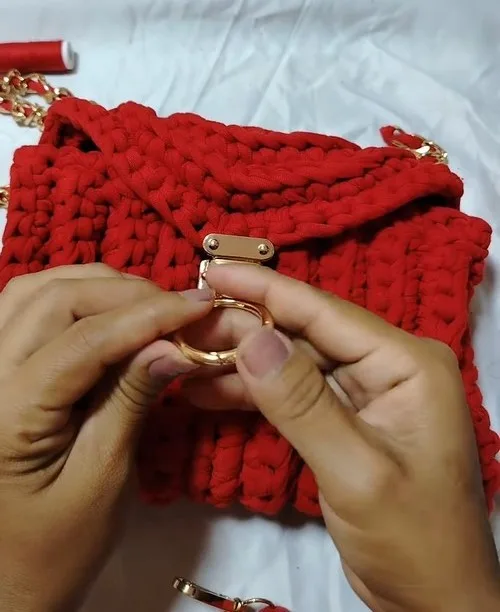
- Finish by attaching the clasp, chain strap and tassel to turn the fabric into a finished bag.
What goes wrong
- Losing track of corner increases Mark each corner increase stitch with a stitch marker before working into it, and move the marker up every round so the correct point to increase into is always obvious.
- Tension too loose with trapillo Keep stitches snug around the 5.5 mm hook, because thick trapillo cotton can leave gaps if it is worked loosely, making the bag walls look uneven.
- Uneven starting chain Count the chain carefully and keep it flat before working the first single crochet round, since an uneven starting oval carries through every later round.
Yarn, hook and the rest
Copied from the source pattern's own materials list.
- Trapillo cotton yarn (thick)
- 5.5 mm crochet hook
- Stitch markers
- Yarn needle
Optional
- Bag clasp, chain strap, tassel
Progress tracker
0 of the 6 rounds on this page are ticked.
The pattern, round by round
Kept in the order and the wording the source used. Tick a round as you finish it; the ticks stay on this device.
Main Pattern
Round 2
At each of the 3 increase stitches from the previous round, make 2 SC in each stitch (6 stitches total in the corner section).
Round 3
Alternate between: 1 SC, then 2 SC in next stitch (increase) around each corner.For Round 4 Follow this pattern at corners: 2 SC, then increase, then 3 SC, then increase , repeat this sequence.
Round 5
Pattern: Increase 3 SC , repeat around each corner.
Round 6
Pattern: 2 SC, increase, 4 SC, increase , repeat sequence. For Round 7 Pattern: Increase, 5 SC , repeat around.
Round 8
Pattern: 3 SC, increase, 6 SC, increase , repeat sequence.
Round 9
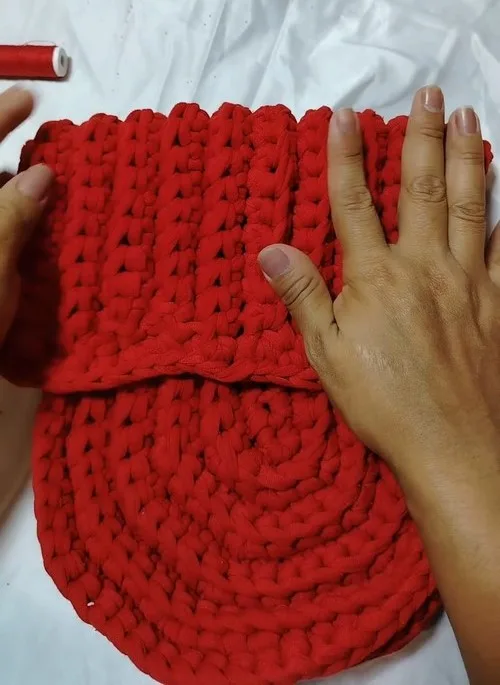
Pattern: Increase 7 SC , repeat around. For Round 10 Pattern: 4 SC, increase, 8 SC, increase , repeat sequence.Continue rounds until the base reaches approx. 20 cm in width .Finishing the Base Edge Work 1 round of single crochet (SC) all around the edge.Be sure to place SC in each stitch, especially in the corners, for a neat finish.Assembly – Forming the Bag Folding the Bag Fold the piece along the points of the last increase rounds to shape the bag.Joining the Sides Use slip stitches (SL ST) to join the sides.Insert the hook into the inner loops of stitches on both sides and make SL STs across.
Final Touches Secure and cut the yarn.
Weave in all loose ends with a yarn needle.
Join
Step 1Use slip stitches (SL ST) to join the sides.
Step 2Insert the hook into the inner loops of stitches on both sides and make SL STs across.
Finish
- Weave in any loose yarn ends from the start of the oval and from joining new strands of trapillo.
- Slip stitch the two sides together through the inner loops to close the bag into its final shape.
- Attach the bag clasp, chain strap and tassel once the slip stitch seam is secure.
Bigger or smaller
- Larger
- Repeat one of the straight rounds without corner increases before moving on to the next shaping round, which adds height to the bag without changing the oval width.
- Smaller
- Drop to a lighter yarn and a smaller hook than the specified 5.5 mm, which shrinks each stitch and produces a more compact bag using the same round sequence.
Photographs of this one
Every photograph on this page was taken by whoever published the pattern, and they are printed in the order the source listed them.
FAQs
Asked and answered
These answers came from whoever first published the pattern, kept word for word.
Can a different yarn replace trapillo cotton?
Any thick, cord-like yarn that matches the 5.5 mm hook gauge works in place of trapillo. Expect a slightly different drape and texture, since trapillo's flat cotton strip gives the bag its distinctive chunky look.
Why work in back loop only instead of both loops?
Back loop only stitching leaves the front loop as a visible horizontal ridge, giving the bag body a textured, basket-like surface. Working both loops instead would produce a smoother, flatter fabric.
What does joining through the inner loops do?
Slip stitching through the inner loops on both sides creates a neat, nearly invisible seam along the join. It keeps the bulky trapillo yarn from adding extra thickness at the seam line.
How are the clasp, strap and tassel attached?
They are sewn or clipped on after the slip stitch seam is complete, using a yarn needle for any stitched attachments. Positioning them after closing the bag keeps the oval shape intact while finishing details are added.