 STITCH ROUND
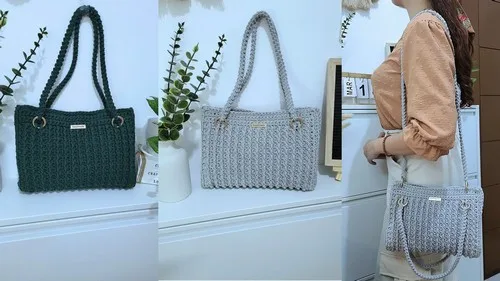
 Convertible crochet bag with strap options and ribbed band
Nine rounds build a convertible bag with swap-out straps and a ribbed top band.
- Skill
- Intermediate
- Rounds
- 8 rounds
- Yarn weight
- Worsted
- Hook
- 6 mm
- Time
- 4-6 hours

Intermediate
What the original page called it. Nothing here is graded a second time.

8 rounds
Each one gets its own line, with a box beside it to tick as you go.

Worsted
What the sample was made in. Any weight works — the size moves with it.
About this pattern
This convertible bag starts from a single center panel worked flat in nine rounds, from the foundation chain to the finished top band. Rows build steadily in single crochet before the ribbing pattern takes over, giving the panel body before the top band locks in the shape. Each round is a clear checkpoint, so progress is easy to track from chain to closed top.
- Work the ribbed rows in alternating SC and FPDC to give the panel texture and structure.
- Add the top band in straight SC rows to finish the upper edge cleanly.
- Crochet the two side panels separately, shaping them with decreases as directed.
- Make the straps as twisted cord or crocheted i-cord to the length wanted.
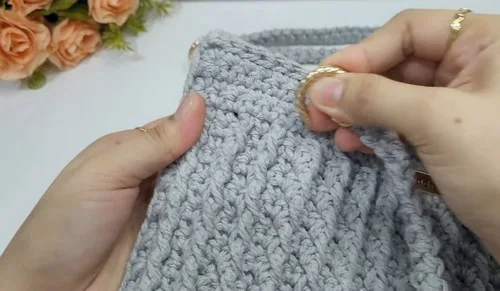
- Join everything using the side edge loops, spring rings, and magnetic buttons for a convertible closure.
What goes wrong
- Skipping the back ridge on the foundation chain Work into the back ridge of each chain as directed, not the top loop, or the base edge will twist and the stitch count will drift.
- Losing the FPDC pattern placement Keep stitch markers in place through the ribbing rounds so the front post stitches land consistently and the rib stays even.
- Uneven side edge loops Space the loops along the side evenly as the panel grows rather than adding them all at the end, since they need to line up with the side panels later.
- Magnetic buttons placed without checking fit Mark and double-check the closure position before sewing on the magnetic buttons, since they are attached early (right after the metal plate, before the side panels and straps are joined) and can't easily be moved once assembly continues.
Yarn, hook and the rest
Copied from the source pattern's own materials list.
- Three-ply cotton macro cord (approx. 420g, medium/size 4)
- 6 mm crochet hook (foundation)
- 5 mm crochet hook (main)
- Metal plate for embellishment
- Magnetic buttons (18 mm)
- 4 spring rings (19 mm)
- Sewing thread and needle
- Scissors
- Darning needle
- Stitch markers
Progress tracker
0 of the 8 rounds on this page are ticked.
The pattern, round by round
Kept in the order and the wording the source used. Tick a round as you finish it; the ticks stay on this device.
Center Panel
Round 1
Using 6 mm hook, chain 32; switch to 5 mm hook; skip first chain, single crochet (SC) into the back ridge of each chain across (31 SC); place stitch markers in the first and last stitches.
Rounds 2–6
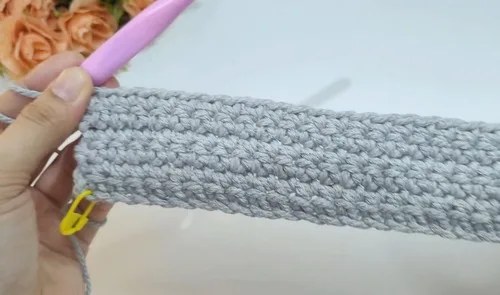
Slightly pull up the working loop, turn; SC across each row for a total of 6 rows.
Round 7
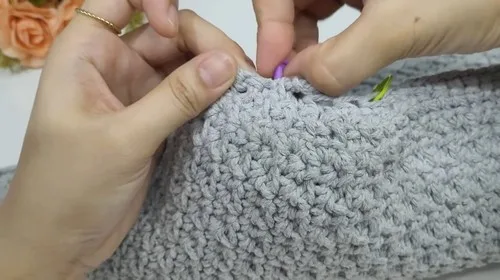
Ribbing Pattern Turn work; SC into first stitch; alternate: Front Post Double Crochet (FPDC) into next stitch, then SC into next, repeat across.
Round 8
Subsequent Rows Alternate between SC rows and FPDC ribbing rows until desired length; create 26 side edge loops evenly along the sides.
Round 9
Top Band Crochet 4 rows of SC across the top.
Round 10
Edging Work SC and slip stitches around the entire panel to create a clean border.
Side Panels
Round 1
Create left and right panels using SC and decreases for shaping.
Straps/Handles
Round 1
Cord Construction Create desired length of strap or handle using twisted cord or crocheted i-cord.
Join
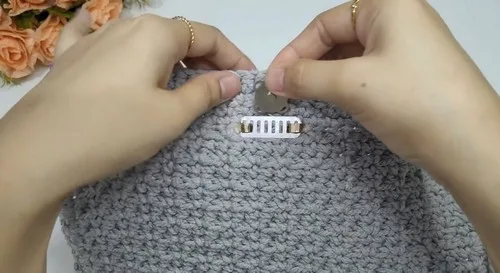
Step 1Sew on metal embellishment plate.
Step 2Attach magnetic buttons securely to the panel.
Step 3Align with side edge loops of center panel and join securely.
Step 4Secure spring rings to both ends of each strap.
Step 5Attach straps using the spring rings to side loops.
Step 6Adjust for shoulder, crossbody, or remove for clutch-style use.
Finish
- Weave in all loose ends along the inside seams of the center panel and side panels before assembly.
- Attach the metal embellishment plate and secure the magnetic buttons to the panel for a clean closure.
- Join the side panels to the center panel's side edge loops, then fit spring rings to the straps for the final convertible hookup.
Photographs of this one
Every photograph on this page was taken by whoever published the pattern, and they are printed in the order the source listed them.
FAQs
Asked and answered
These answers came from whoever first published the pattern, kept word for word.
Can the straps be swapped for different lengths?
Yes, the straps are made as a separate twisted cord or i-cord, so length is flexible. Attach them with spring rings so they can be replaced or adjusted for shoulder or crossbody wear.
What does the FPDC ribbing actually do?
Alternating front post double crochet with single crochet creates a textured, stretchy band within the panel. It breaks up the plain SC rows and adds structure to the sides of the bag.
Does this bag only work as a shoulder bag?
No, the spring ring and magnetic button setup lets the straps be adjusted or removed entirely. That makes it convertible between shoulder, crossbody, or clutch-style use.