 STITCH ROUND
 Crochet lace milkmaid top with ruched bust panels
9 rounds to tick off across four parts make this ruched lace milkmaid top.
- Skill
- Intermediate
- Rounds
- 9 rounds
- Yarn weight
- Worsted
- Hook
- 4 mm
- Time
- 4-6 hours

Intermediate
What the original page called it. Nothing here is graded a second time.

9 rounds
Each one gets its own line, with a box beside it to tick as you go.

Worsted
What the sample was made in. Any weight works — the size moves with it.
About this pattern
This top builds from four parts and nine rounds total, starting with a base panel worked in straight double crochet rows. The back panel takes three rounds to reach bust height, then two matching bust panels of two rounds each pick up the sides in single crochet. A one-round drawstring in a highlighting color and a three-round bottom lace panel round out the count, so every section has a clear stopping point before moving on.
- Work the back panel in double crochet rows until it reaches the marked bust height.
- Turn at the top edge and single crochet across, adding extra stitches at each row edge.
- Repeat the single crochet rows for one bust panel, finishing off before starting the second.
- Mirror the same single crochet panel on the other side so both sides match.
- Chain a separate drawstring in the highlighting color for the cinched section.
- Join the bust panels at the top with slip stitches and thread the drawstring through.
What goes wrong
- Uneven single crochet row edges Count two single crochets into every double crochet row edge on both panels. Skipping this step leaves one side shorter than the other.
- Mismatched bust panels Work the second bust panel with the same row count as the first before finishing off. Lay both panels side by side to check symmetry before joining.
- Drawstring pulled too tight or too loose Thread the drawstring through loosely first, then adjust the gather once it is in place. Retighten after trying the top on rather than guessing the pull before sewing anything else.
- Lace panel attached off-center Pin the lace panel to the base before sewing so both edges line up evenly. Sew slowly with the needle rather than rushing the seam.
Yarn, hook and the rest
Copied from the source pattern's own materials list.
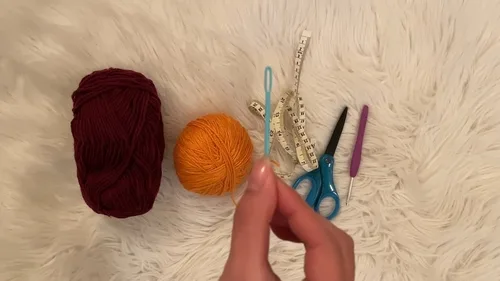
- Base color yarn (acrylic recommended, Loops and Threads Impeccable mentioned, 285 yards per ball, two balls used)
- Highlighting color yarn for the bow
- Flexible measuring tape
- Scissors
- 4mm crochet hook
- Sewing needle (for attaching the lace panel)
Progress tracker
0 of the 9 rounds on this page are ticked.
The pattern, round by round
Kept in the order and the wording the source used. Tick a round as you finish it; the ticks stay on this device.
Back Panel
Round 1
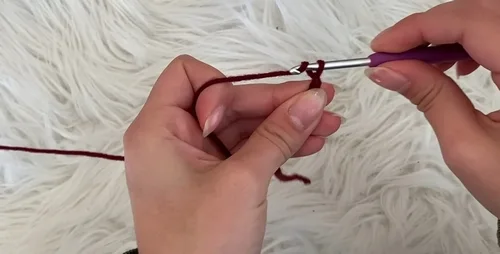
Start with a slip knot using the base color yarn; chain the length of half your rib cage measurement.
Round 2
Chain 2 (does not count as first dc), then double crochet into the third chain from the hook and every chain across.
Round 3
Repeat Round 2 until the panel reaches your bust height.
Bust Panels
Finish off and cut the yarn after completing each side.
Repeat the same steps for the second side, making sure it is symmetrical.
Round 1
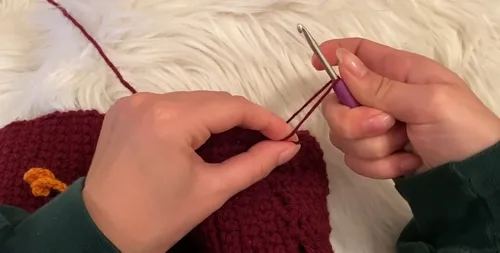
Chain 1 at the end of the back panel, turn your work, and start single crocheting across the top edge; for every double crochet row edge, insert two single crochets.
Round 2
Continue with single crochet rows, turning your work each time with a chain 1, until the panel reaches half the length of the full back panel.
Drawstring
Round 1
Use your highlighting color yarn to crochet a long chain that serves as a drawstring for the cinched part of the top.
Bottom Lace Panel
Round 1
Make a chain that fits loosely around your rib cage.
Round 2
Follow a lace pattern that matches or complements the top's design.
Round 3
Crochet the lace panel until it reaches the desired length.
Join
Step 1Insert the drawstring through the single crochets you've made on the bust panels to create a ruched effect.
Step 2With the base color yarn, join the top of the bust panels together with slip stitches to create the neckline.
Step 3Pull up loops along one side of the neckline and thread the drawstring through to create the cinched front.
Step 4Sew the lace panel onto the bottom of the top.
Step 5Weave in any loose ends.
Step 6Optional: Block the piece for a neat finish.
Finish
- Weave in every loose end left from finishing off each bust panel and the drawstring.
- Thread the drawstring through the single crochets on both bust panels, then pull along the neckline edge to cinch the front.
- Sew the bottom lace panel onto the base with a sewing needle and block the piece if a neater drape is wanted.
Bigger or smaller
- Larger
- Move up a hook size and use a slightly heavier yarn to loosen the gauge, which widens the back and bust panels without changing the round count.
- Smaller
- Drop to a smaller hook or repeat fewer rows within the bust panel round before finishing off, which tightens the fit through the ribcage and bust.
Photographs of this one
Every photograph on this page was taken by whoever published the pattern, and they are printed in the order the source listed them.
FAQs
Asked and answered
These answers came from whoever first published the pattern, kept word for word.
How much yarn is needed for the base color?
Two balls of the recommended yarn, at 285 yards per ball, cover the back panel, both bust panels, and the bottom lace panel. The highlighting color is only needed for the drawstring, so a small amount goes a long way.
What if the bust panels come out different lengths?
Unravel back to the last matching row and continue with the same row count as the first panel. Checking length against the first panel before finishing off avoids this.
Is a sewing needle really necessary?
Yes, it is used to attach the bottom lace panel to the base once both pieces are finished. A yarn needle works in place of a standard sewing needle if that is easier to source.