 STITCH ROUND
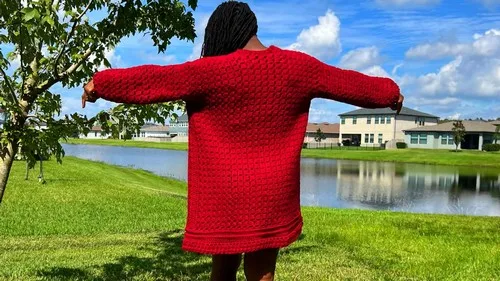
 Block stitch cardigan pattern for a fall wardrobe
19 rows tick off each front panel of this made-to-measure Block Stitch fall cardigan.
- Skill
- Intermediate
- Rounds
- 18 rounds
- Yarn weight
- Worsted
- Hook
- 6.0 mm
- Time
- 4-6 hours

Intermediate
What the original page called it. Nothing here is graded a second time.

18 rounds
Each one gets its own line, with a box beside it to tick as you go.

Worsted
What the sample was made in. Any weight works — the size moves with it.
About this pattern
This cardigan builds from a Foundation Double Crochet row into a repeating Block Stitch, with each front panel ticking off after 19 rows of the pattern. The open, airy texture comes from alternating a spaced single crochet row with a shell-like double crochet row, so the fabric grows quickly once the two-row rhythm is set.
- Start each front panel with a foundation double crochet row set to the required multiple of three plus one.
- Work the two-row Block Stitch pattern back and forth, repeating it until the panel reaches its full row count.
- Measure the armhole depth on the body and mark that point along the working edge before moving on.
- Seam the shoulders together with a whip stitch once the front and back panels are complete.
- Attach yarn at the armhole and work the sleeve cuff in the round, continuing the same Block Stitch pattern.
What goes wrong
- Losing the foundation chain multiple Count the starting chain before working the first Block Stitch row, since it needs to land on a multiple of three plus one. A foundation off by even one stitch throws off every chain-2 space that follows.
- Skipping the wrong stitch in Row 2 Row 2 skips three double crochets before placing the single crochet in the space between posts, not in a stitch top. Miscounting here shifts the whole shell pattern out of alignment for the rest of the panel.
- Working the third loop incorrectly The ridge stitch rows of the ribbing call for HDC in the third loop below the front loop, not the usual top-loop insertion. Check the loop before working each stitch, since the ridge texture only shows up when this loop is used consistently.
- Guessing the armhole depth The armhole marking is based on a direct body measurement, not a preset stitch count. Measure against the actual wearer before marking stitches, since this determines where the sleeve cuff attaches.
Yarn, hook and the rest
Copied from the source pattern's own materials list.
Yarn
- Medium 4-weight yarn (e.g., Loops & Threads Impeccable)
Hook
- 6.0 mm (or size to obtain gauge)
Notions
- Measuring tape (cardigan is made to measure), stitch markers, darning needle, scissors
Gauge
- The foundation chain must be a multiple of 3 + 1 stitches.
Progress tracker
0 of the 18 rounds on this page are ticked.
The pattern, round by round
Kept in the order and the wording the source used. Tick a round as you finish it; the ticks stay on this device.
Main Body (Front, Back, Front Panels)
The body is worked flat in rows, starting with the first front panel.
First Front Panel
Round 1
Foundation Work a row of Foundation Double Crochet (FDC) stitches. For the example, 91 stitches were used.
Row 2
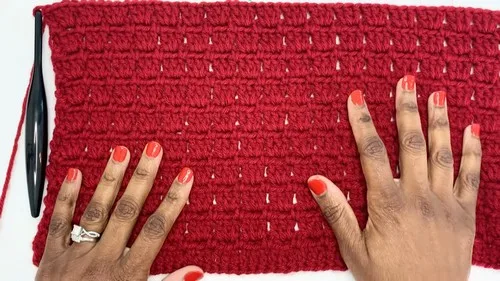
Block Stitch Repeat 1 No turning chain. Place 2 Single Crochets (SC) in the 1st stitch. * Chain 2, Skip 3 Double Crochets, SC in the next space (between the posts) *. Repeat from * to * across the row. End the row with 2 SC in the last stitch.
Row 3
Block Stitch Repeat 2 No turning chain. Start with a Stacked Single Crochet in the 1st stitch (counts as a Double Crochet). Insert 3 Double Crochets (DC) into the next Chain-2 space. Repeat from * to * across the row. End the row with 1 DC in the last stitch.Repeat Row 2 and Row 3 until you have completed 19 rows for the first front panel.
Armhole and Back Panel
Mark Armhole Measure your armhole depth (e.g., 8 inches / 28 stitches). Mark the number of stitches required for the armhole depth from the current working edge.
Armhole Row 1
Armhole 1 Turn your work. Work Extended Single Crochet (ESC) stitches until you reach the armhole marker. Chain 28 (or your armhole stitch count) for the first armhole.
Back Panel
Back Panel Turn your work. DC across the chain and the rest of the body stitches (starting with a Stacked SC/DC). Continue the Block Stitch pattern (Row 2 and Row 3 repeats) for the desired back panel length.
Armhole Row 2
Armhole 2 Mark 28 stitches (or the armhole count) from the working edge. Work ESC until you reach the marker. Chain 28 (or the armhole stitch count) for the second armhole.
Second Front Panel
Complete Panel
Turn your work and continue the Block Stitch pattern (Row 2 and Row 3 repeats) for a total of 19 rows for the second front panel.
Bottom Ribbing
The ribbing is worked along the bottom edge of the completed body panels.
Round 1
Base Turn the work upside down. Work a row of Half Double Crochets (HDC) across the entire bottom edge, inserting 2-3 HDC in the last stitch to prevent bunching.
Rounds 2–5
Ridge Stitch Work a regular HDC in the first and last stitch. For the stitches in between, work HDC in the Third Loop (the loop just below the front loop).
Round 6
Base Work a row of regular Double Crochets (DC).
Rounds 7–8
Ribbing Alternate Front Post Double Crochet (FPDC) and Back Post Double Crochet (BPDC).Fasten Off: Cut the yarn and fasten off.
Sleeve Cuff (Work in the Round)
Round 1
Base Attach yarn to the armhole. Work a round of Double Crochets (DC) evenly around the armhole, ensuring the stitch count is a multiple of 3 + 1 (example used 52 DC). Join with a slip stitch.
Rounds 2–14
Block Stitch Continue the Block Stitch pattern (Rows 2 & 3 equivalent) in the round for 14 rounds.
Round 15
Decrease Chain 1. Work Single Crochet Two Together (SC2TOG) around the entire round. Join with a slip stitch.
Round 16
Base Chain 2 (counts as DC) and work a round of regular Double Crochets (DC).Join with a slip stitch.
Rounds 17–18
Cuff Alternate Back Post Double Crochet (BPDC) and Front Post Double Crochet (FPDC).Join with a slip stitch.Repeat: Repeat steps 1-5 for the second sleeve.
Neckline/Front Border
Row 1
Base Attach yarn to the front opening/neckline edge. Work a row of regular Double Crochets (DC).
Rows 2–3
Ribbing Alternate Front Post Double Crochet (FPDC) and Back Post Double Crochet (BPDC).Finishing: Weave in all loose ends.
Join
Step 1Seam Shoulders: Fold the cardigan and seam the shoulders using the Whip Stitch or a similar method with a darning needle to join the front and back panels.
Finish
- Weave in all yarn ends from panel changes, armhole joins, and ribbing color or row transitions before seaming.
- Seam the shoulders using the whip stitch to join the front and back panels into one body shape.
- Block the finished cardigan lightly to even out the Block Stitch spacing and flatten the ribbed edges.
Bigger or smaller
- Larger
- Add more repeats of Row 2 and Row 3 to lengthen each front panel and the corresponding back panel, which increases overall body length before the armhole is marked.
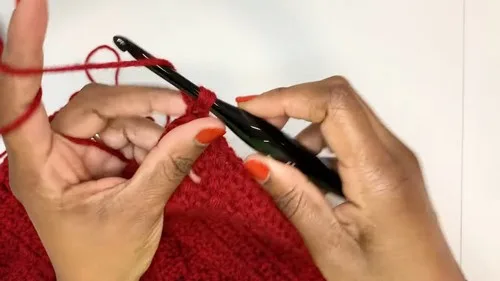
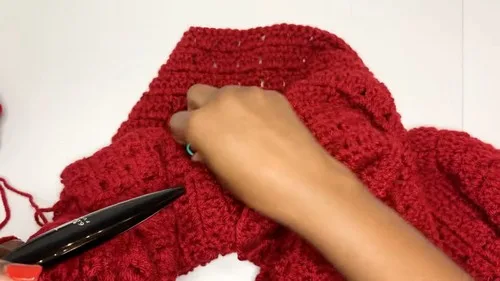
Photographs of this one
Every photograph on this page was taken by whoever published the pattern, and they are printed in the order the source listed them.
FAQs
Asked and answered
These answers came from whoever first published the pattern, kept word for word.
Why does the pattern use a body measurement instead of a fixed stitch count for the armhole?
The cardigan is made to measure, so armhole depth is taken directly from the wearer rather than a standard size. This keeps the fit accurate across different body shapes using the same panel construction.
What is a Stacked Single Crochet used for in this pattern?
It opens Row 3 and stands in for a double crochet at the edge of the row. It keeps the edge stitch height consistent with the double crochets worked into the chain-2 spaces beside it.
How does the ribbing connect to the Block Stitch body?
The ribbing is worked afterward along the bottom edge of the completed panels, starting with the work turned upside down. A base row of half double crochets sets up the ridge stitch and post stitch rows that follow.