 STITCH ROUND
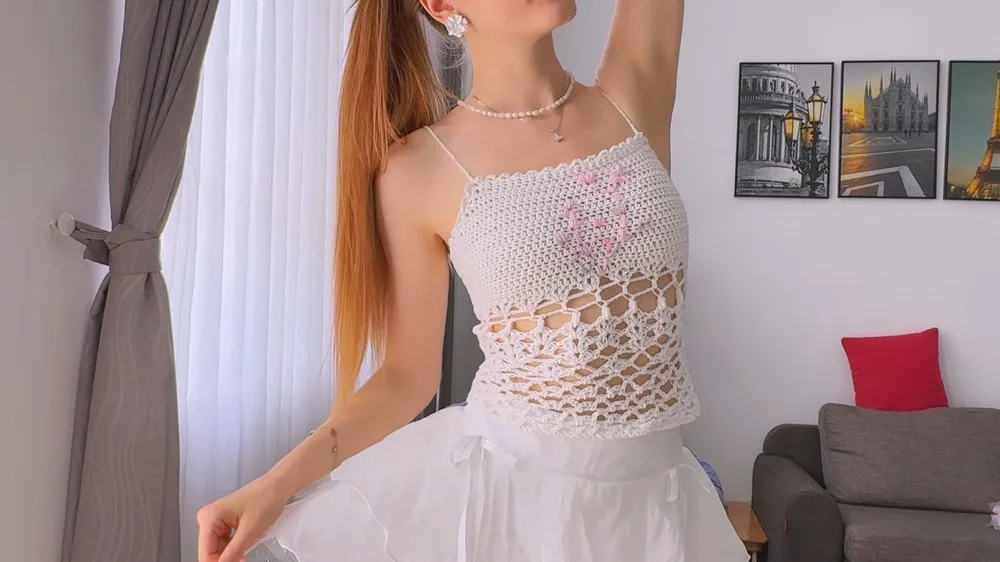
 Lace arch crochet top for confident beginners
8 rounds tick off a lacy arch-stitch crochet top with scalloped edging.
- Skill
- Intermediate
- Rounds
- 8 rounds
- Yarn weight
- DK
- Hook
- 4 mm
- Time
- 4-6 hours

Intermediate
What the original page called it. Nothing here is graded a second time.

8 rounds
Each one gets its own line, with a box beside it to tick as you go.

DK
What the sample was made in. Any weight works — the size moves with it.
About this pattern
This lace top builds from a single foundation chain into an airy, arch-filled body over 8 rounds. The opening round sets up alternating short and long chain spaces, and every round after simply repeats and extends that arch pattern until the piece reaches the needed height, then shifts gears into fan stitches to finish. Cotton or milk cotton keeps the fabric light and breathable, which suits the open, lacy structure this pattern is built around.
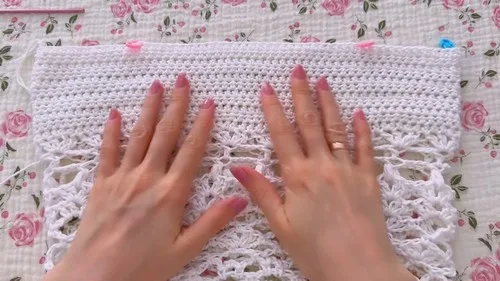
The real shaping happens at the transition from plain arches to fan stitches partway through the piece, where two double crochets plus a chain replace the simple single-crochet-and-chain rhythm used earlier. Slow down there and check that fans land at the start of each arch, since a missed placement throws off the alignment for every round that follows. The final rounds alternate fans and chains to widen the lace before the edging closes things out.
- Start with a long foundation chain sized to fit the chest, then join it into a ring without twisting.
- Work an early round of single crochets and alternating chain arches to set the lace grid.
- Repeat that arch pattern over several rounds, building height before changing stitch style.
- Continue alternating fans and chains in later rounds to widen the lace pattern outward.
- Finish with puff stitches and a scalloped single crochet edging to close the piece.
What goes wrong
- Twisted foundation chain Lay the chain flat before joining and check both ends line up straight. A twist here throws off every arch round that follows.
- Uneven arch sizes Keep the chain-four and chain-three arches loose and consistent in length. Mixing tight and loose arches makes the lace grid look lopsided.
- Losing track of round height Lay the work flat and measure occasionally while repeating the early arch rounds. Stopping too soon or too late changes where the fan transition lands.
Yarn, hook and the rest
Copied from the source pattern's own materials list.
Yarn
- Cotton or milk cotton, 50g/105m per skein (3 skeins for size S)
Crochet Hooks
- 4 mm and 3.5 mm (optional)
Tools & Notions
- Scissors, needle, markers, and yarn for embroidery
Progress tracker
0 of the 8 rounds on this page are ticked.
The pattern, round by round
Kept in the order and the wording the source used. Tick a round as you finish it; the ticks stay on this device.
Main Pattern
Round 1
Make a chain of 95 stitches (or any number divisible by five that fits your chest circumference); ensure the chain does not twist before joining; insert the hook into the first stitch, pull yarn through and complete a slip stitch; chain 1 and start a single crochet into the same stitch; chain four, skip three stitches, single crochet in the fourth; chain three, skip next three stitches, single crochet into the next; repeat until the end of the row.
Round 2
Chain five (loosely), single crochet in the first arch; chain four (loosely), skip the smaller arch, single crochet in the larger arch; continue until the end of the row.
Rounds 3–9
Repeat the pattern from row two, creating arches and chaining in between as established; by row nine, the height of this part should be 7 cm.
Round 10
Start making fans (two double crochets, chain one, two double crochets) in the established stitches; continue with fan pattern at the start of the arch; chain five between each arch.
Round 11+
Each subsequent row alternates fan designs and simple chains to expand and establish the lace pattern; continue with fans and end with puff stitches; finalize with a simple edging.
Round 12
Using a smaller hook, switch to half double crochets; for the first row, make increases in strategic spots depending on size.
Rounds 13–23
Continue for 11 rows or until desired length.
Round 24
Calculate placements by current stitches, begin decreasing towards these markers until the desired width for straps; crochet a chain of air loops for each strap and secure properly.
Join
Step 1Create a simple single crochet edging around the top, adding additional chains for a soft scalloped edge.
Step 2Add embroidery details as desired for a personalized touch.
Photographs of this one
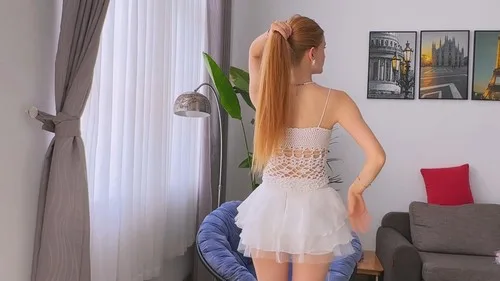
Every photograph on this page was taken by whoever published the pattern, and they are printed in the order the source listed them.

FAQs
Asked and answered
These answers came from whoever first published the pattern, kept word for word.
Can this top be made in a different yarn weight?
Cotton or milk cotton is recommended because the lace holds its shape best in a crisp, plant-based fiber. A different weight would change the drape and require recalculating the foundation chain.
Why does the pattern mention two hook sizes?
The 4 mm hook is the main working size, while the 3.5 mm is listed as optional for tighter tension or edging work. Use whichever gives the desired fabric density.
How is the chest size adjusted before starting?
The foundation chain can be any number divisible by five, so the starting chain is chosen to match the intended chest circumference before round one begins. This is the main sizing decision made upfront.
Is embroidery necessary to finish the top?
No, the embroidery is optional and listed as a personalized touch. The piece is complete once the scalloped edging is worked around the top.