 STITCH ROUND
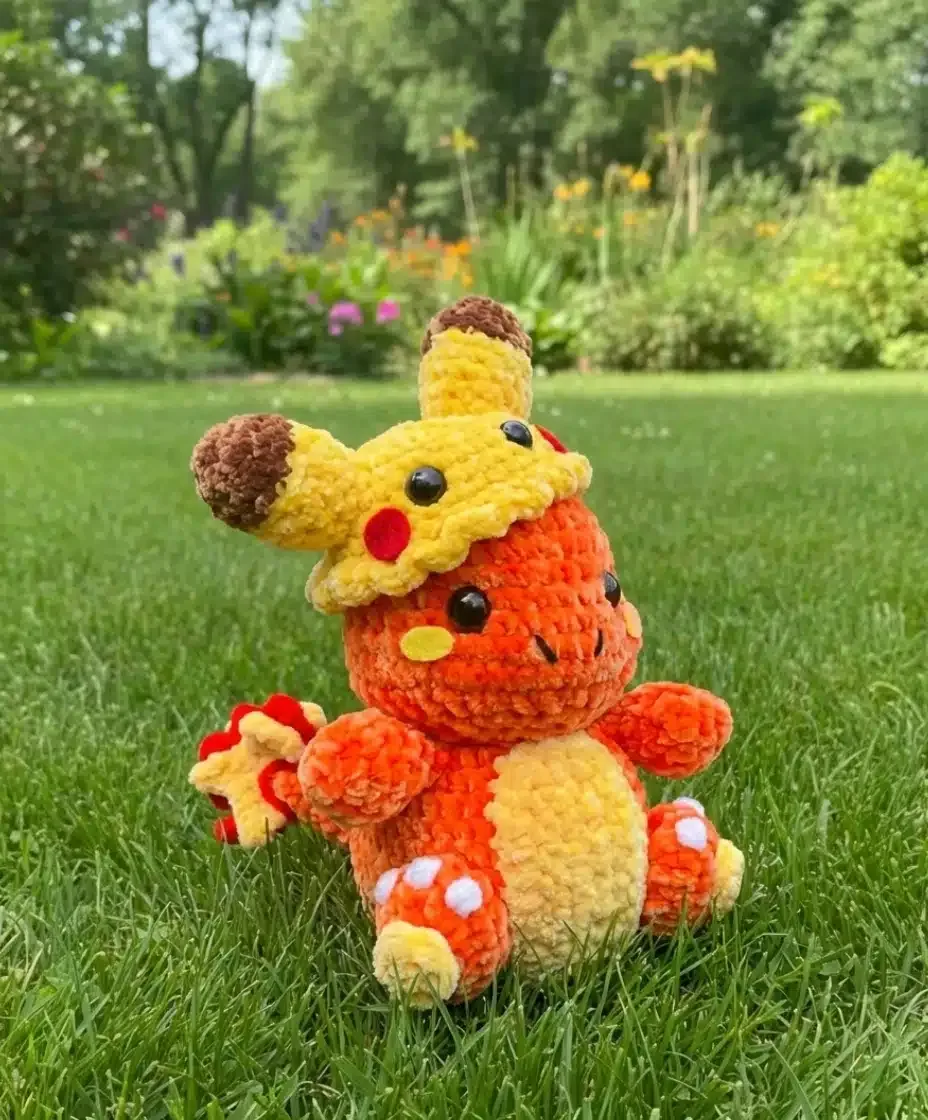
 Charmander Amigurumi Crochet Pattern With Flame Tail
Tick off 24 rounds for the head and body, then crochet arms, legs, tail, and flames for this amigurumi Charmander.
- Skill
- Intermediate
- Rounds
- 69 rounds
- Yarn weight
- Worsted
- Hook
- 5 mm
- Time
- 4-6 hours

Intermediate
What the original page called it. Nothing here is graded a second time.

69 rounds
Each one gets its own line, with a box beside it to tick as you go.

Worsted
What the sample was made in. Any weight works — the size moves with it.
About this pattern
This Charmander build starts with the head and body worked as one continuous piece over 24 rounds, the single biggest chunk of the project. From there the pattern splits into smaller, quicker pieces — arms, legs, a long tail, tiny yellow feet, a belly panel, and the two-tone flame tip — so the round count never feels overwhelming even though nine pieces need finishing in total.
The shaping load sits in the early increase rounds of the head and body, where stitch counts climb fast and a dropped stitch is easy to miss. Slow down again on the tail, since its 14 rounds taper from a wide base toward a narrow tip that has to hold its shape once the flame is attached. The chain-based start on one of the limb pieces also deserves care, since working back along a starting chain is where stitch counts most often slip.
- Work the head and body first as a single continuous piece through its full set of rounds.
- Crochet the arms and legs as separate small pieces, keeping stitch counts steady through the shaping.
- Build the tail on its own, letting it taper gradually before the flame pieces go on top.
- Make the yellow feet and belly as flat accent pieces sized to sit on top of the body.
- Crochet the yellow and red flame sections separately so the color change stays crisp.
- Bring every piece together by sewing limbs, tail, and accents onto the stuffed body.
What goes wrong
- Setting safety eyes after stuffing Place the toy safety eyes into the head while it is still unstuffed or lightly stuffed. Once stuffing is packed in, pushing the posts through cleanly gets much harder.
- Losing count on the increase rounds The early rounds of the head and body climb quickly as stitches multiply. Count stitches at the end of every round before moving on, rather than waiting until the count looks obviously wrong.
- Miscounting stitches on the chain-start piece Working back along a starting chain and turning to the other side is where stitch counts slip most easily. Mark the first and last stitch of the chain before turning so both sides match.
- Overstuffing the tapered tail Packing the tail as firmly as the body can distort its narrow tip. Use less stuffing toward the last few rounds so the tail stays flexible enough to hold the flame pieces.
Yarn, hook and the rest
Copied from the source pattern's own materials list.
Yarn
- Orange (main body color)
- Yellow (belly and accents)
- Red (flame details)
- White (toe details)
- Brown (optional, for Pikachu hat ears)
Other Supplies
- Crochet hook (any size appropriate for your chosen yarn; 5mm recommended for chenille yarn)
- Toy safety eyes
- Felt (for facial details and cheeks)
- Toy stuffing
- Scissors
- Sewing needles
- Craft glue
- Pins (helpful for positioning pieces before sewing)
Pro Tip
- The size of your finished Charmander Amigurumi will depend on your hook size and yarn weight. For a larger plushie, use a bigger hook and bulkier yarn.
Progress tracker
0 of the 69 rounds on this page are ticked.
The pattern, round by round
Kept in the order and the wording the source used. Tick a round as you finish it; the ticks stay on this device.
Head & Body Instructions
Start with Orange yarn
Round 1
) 7 sc in a MR (7)
Round 2
) inc around (14)
Round 3
) ( sc, inc ) x 7 (21)
Round 4
) ( 2 sc, inc ) x 7 (28)
Round 5
) ( 3 sc, inc ) x 7 (35)
Rounds 6–10
) sc around (35) [ 5 rounds ]
Round 11
) 8 sc, 6 inc, 2 sc, 4 inc, 2 sc, 6 inc, 7 sc (51)
Round 12
) sc around (51)
Round 13
) 8 sc, 6 dec, 2 sc, 4 dec, 2 sc, 6 dec, 7 sc (35)
Round 14
) ( 3 sc, dec ) x 7 (28)
Round 15
) ( 2 sc, dec ) x 7 (21)
Round 16
) ( sc, dec ) x7 (14)Place eyes between the cheeks and nose in-between rounds 9-10 with 6 stitches between them. Continually stuff the head and body as we continue.
Round 17
) inc around (28)
Round 18
) ( sc, inc ) x 14 (42)
Rounds 19–22
) sc around (42) [ 4 rounds ]
Round 23
) ( 5 sc, inc ) x 7 (49)
Round 24
) sc around (49)
Round 25
) ( 5 sc, dec ) x 7 (42)
Round 26
) ( 4 sc, dec ) x 7 (35)
Round 27
) ( 3 sc, dec ) x 7 (28)
Round 28
) sc around (28)
Round 29
) ( 2 sc, dec ) x 7 (21)
Round 30
) ( sc, dec ) x 7 (14)
Continually stuff the body.
Round 31
) dec around (7)dec around and in the final stitch, slip stitch to fasten off and sew the hole closed.
Arms Instructions
Start with Orange yarn
Round 1
) 4 sc in a MR (4)
Round 2
) inc around (8)
Round 3
) ( sc, inc ) x 4 (12)
Round 4
) sc around (12)
Round 5
) ( sc, dec ) x 4 (8)
Rounds 6–7
) sc around (8)You need to stuff your arm and then fold it flat and sc through both sides. Fasten off and leave a tail for sewing to the body later. Make two.
Legs Instructions
Start with Orange yarn
Round 1
) Chain 5 (5)
Round 2
) Going back along the chain, skip the first stitch. 3 sc, inc in the last stitch, turn to the other side then 3 sc, inc (10)
Round 3
) inc around (20)
Round 4
) sc around (20)
Round 5
) dec around (10)Fasten off, leave a long tail for sewing to the body later and stuff each leg. Make two. For the toe details use white yarn and embroider them on (Do this after you have attached to the body for the best placement).
Tail Instructions
Start with Orange yarn
Round 1
) 4 sc in a MR (4)
Round 2
) sc around (4)
Round 3
) ( sc, inc ) x 2 (6)
Round 4
) sc around (6)
Round 5
) ( 2 sc, inc ) x 2 (8)
Round 6
) sc around (8)
Round 7
) ( 3 sc, inc ) x 2 (10)
Round 8
) sc around (10)
Round 9
) ( 4 sc, inc ) x 2 (12)
Round 10
) sc around (12)
Round 11
) ( 5 sc, inc ) x 2 (14)
Round 12
) sc around (14)
Round 13
) ( 6 sc, inc ) x 2 (16)
Round 14
) sc around (16)Fasten off, leave a long tail for sewing to the body later and stuff.
Yellow Feet Instructions
Start with Yellow yarn
Round 1
) 5 sc in a MR (5)Slst and fasten off, leave a long tail for sewing to the body later. Make two.
Belly Instructions
Start with Yellow yarn
Round 1
) chain 11, going back along the chain and skipping the first stitch, 9 sc, inc turn to the other side inc, 9 sc (22)
Round 2
) chain 1 then turn to the backside, 10 sc, 2 inc, 10 sc (24)
Round 3
) chain 1 then turn work back to the front side, 11 sc, 2 inc, 11 sc (26)Fasten off, leave a long tail for sewing to the body later.
Flames – Yellow Instructions
Start with Yellow yarn
Round 1
) chain 7, skipping the first stitch back along, sc, sc, chain 2, sc into the second stitch of that chain, sc back into the base chain stitch. You should have 4 stitches left on the original chain. In the next stitch sc, sc, chain 3, 2 sc back along that chain and skipping the first stitch, sc back into the base chain stitch. On the original chain there should be 2 stitches left. Then sc and in the last stitch sc, chain 2, sc back along skipping the first stitch, and then slip stitch back into the base chain.Fasten off, leave a long tail for sewing to the body later. Make two.
Flames – Red Instructions
Start with Red yarn
Round 1
) Chain 8, skipping the first stitch, sc, sc then chain 2, in the second stitch sc and a final sc back into the base stitch in the original chain. Then sc and chain 3 in the same stitch, do 2 sc back along and a final sc back into the base stitch. Next we will sc and chain 4, sc back along the 3 and place a sc in the base stitch. We have made 3 little flame tails now and need to make two more. In the next stitch sc and chain 3, doing 2 sc back along and a sc in the base stitch. In the second to last stitch of the original chain we will sc and chain 2, doing one sc back along and place a sc going into the base stitch.For the final stitch you need to sc then slip stitch and fasten off leaving a longer tail for sewing.
Optional Pikachu Hat Instructions
Start with Yellow yarn
Round 1
) 7 sc in a MR (7)
Round 2
) inc around (14)
Round 3
) ( sc, inc ) x 7 (21)
Round 4
) ( 2 sc, inc ) x 7 (28)
Round 5
) ( 3 sc, inc ) x 7 (35)
Rounds 6–9
) sc around (35) [ 4 rounds ]
Round 10
) In the BLO, slip stitch in the first stitch, in the next stitch (sc, HDC, sc) and repeat that the entire way around.Fasten off, weave any tail into the front loops to hide it. Alternatively you could leave two strings either side to tie and help secure it onto the head of the Charmander.
Ears for Pikachu Hat
Start with Brown yarn
Round 1
) 6 sc in a MR (6)
Round 2
) inc around (12)
Round 3
) sc around in last stitch change to yellow (12)
Rounds 4–5
) sc around in BLO (12) [ 2 rounds ]
Round 6
) sc around (12)
Round 7
) ( 4 sc, dec ) x 2 (10)
Round 8
) sc around (10)Fasten off leaving a tail for sewing and stuff each ear. Make two.
Join
Step 1Now comes the fun part—bringing your Charmander to life! Here’s how to assemble all the pieces:
Step 2Facial Features:
Step 3Use felt to create pink cheeks positioned just below the eyes
Step 4With black yarn, sew two straight lines as nose holes from the top of round 11 downward (rounds 10-12 area)
Step 5Consider making felt eyes if you prefer a more cartoon-accurate look
Step 6Attaching Limbs:
Step 7Position arms just below the head between rounds 17-21
Step 8Place legs at the base of the body, spacing them the same width apart as the arms
Step 9Use pins to test placement before permanently sewing
Step 10Tail Attachment:
Step 11Attach the tail to the back of the body between rounds 19-26
Step 12Make sure it’s securely fastened as it’s a prominent feature
Step 13Flame Details:
Step 14Layer the flames with one red flame between the two yellow flames
Step 15Stitch them together first, then attach to the tail
Step 16For a quicker method, hot glue can work, but sewing provides better durability, especially if you plan to sell your finished plushie
Step 17Yellow Belly:
Step 18Center the belly piece on the front of Charmander’s body
Step 19Sew securely around all edges
Step 20Pikachu Hat (Optional):
Step 21Sew or position the Pikachu ears to the hat
Step 22You can choose to permanently attach the hat or leave it removable for versatility
Step 23Pro Assembly Tips:
Step 24Always use pins to temporarily position pieces before final attachment
Step 25Take photos from different angles to ensure symmetrical placement
Step 26Use a yarn needle and matching yarn color for invisible seams
Step 27Weave in all loose ends securely for a professional finish
Check your count
- Head & Body Instructions · Round 12: 51 sts
- Head & Body Instructions · Round 23: 49 sts
- Head & Body Instructions · Round 31: 7 sts
- Arms Instructions · Round 2: 8 sts
- Arms Instructions · Round 4: 12 sts
- Arms Instructions · Rounds 6–7: 8 sts
Finish
- Weave in ends on each of the nine pieces individually before any sewing begins, so nothing unravels once parts are joined.
- Stuff the head, body, arms, legs, and tail firmly, easing stuffing in gradually so the shaping from the increase and decrease rounds stays visible.
- Sew the limbs, tail, flame tip, yellow feet, and belly panel onto the body, then finish with felt cheeks and the toy safety eyes for the face.
Bigger or smaller
- Larger
- Move up to a bigger hook and a bulkier yarn than the one used. The same round counts produce a noticeably taller, rounder finished toy.
- Smaller
- Drop to a smaller hook with a lighter-weight yarn than recommended. Stitches tighten up and the same rounds yield a more compact Charmander without changing any stitch counts.
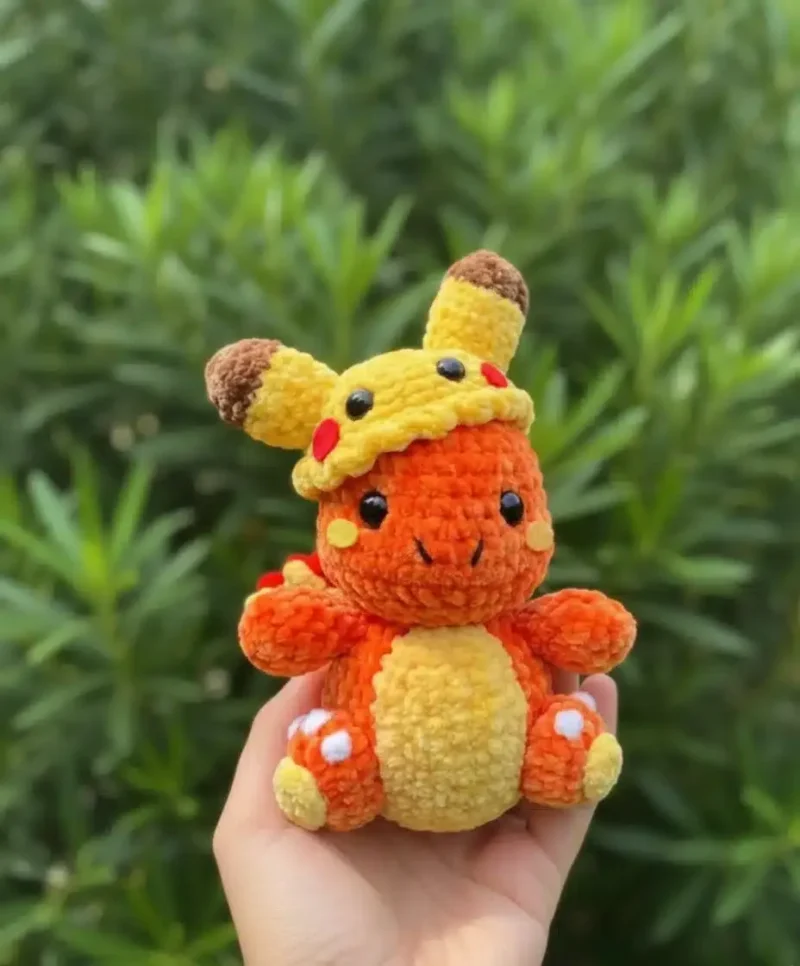
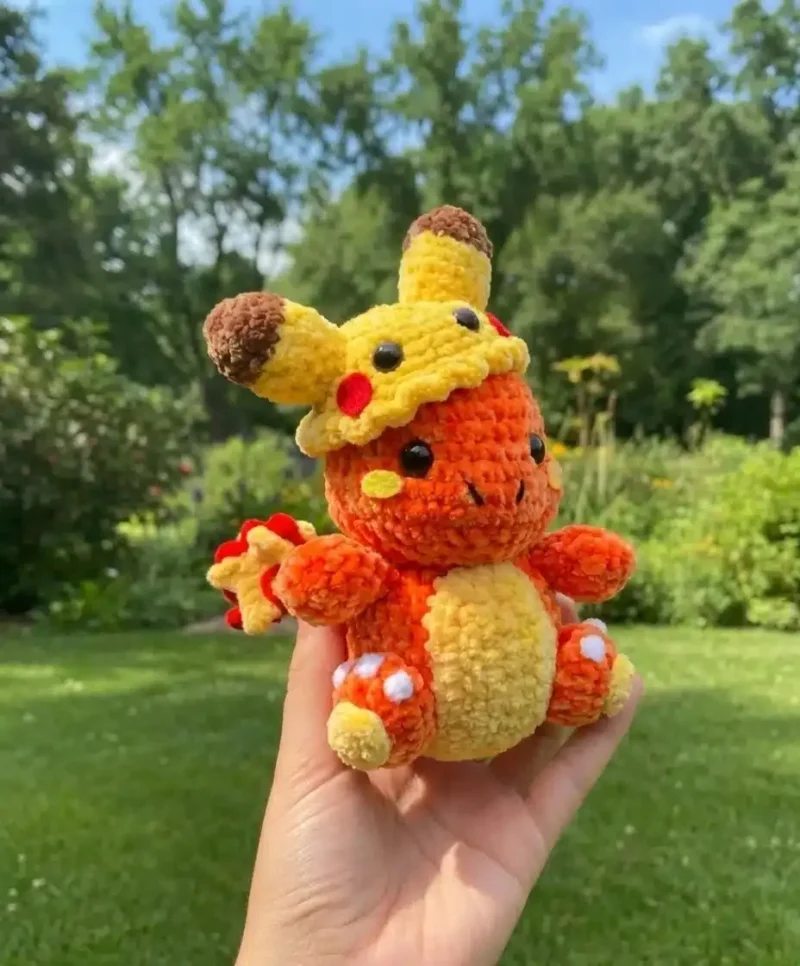
Photographs of this one
Every photograph on this page was taken by whoever published the pattern, and they are printed in the order the source listed them.
FAQs
Asked and answered
These answers came from whoever first published the pattern, kept word for word.
Are the toy safety eyes necessary, or can felt work instead?
Safety eyes give the cleanest, most secure finish for a toy that will be handled often. Felt eyes are a fine substitute for a softer, more cartoon-style look, and are worth considering for a toy meant for very young children.
What is the Pikachu hat ears piece for?
It is an optional add-on worked separately from the main Charmander pieces. Leave it out entirely for a classic look, or add it on as a playful extra.
Which hook size should be used?
A 5mm hook is recommended when working with chenille yarn, but any hook size appropriate to the chosen yarn will work. Match the hook to the yarn weight rather than following a fixed size.
How many pieces need to be sewn together at the end?
The finished toy comes from nine separate pieces: the head-and-body, arms, legs, tail, yellow feet, belly, and the two flame sections. Pinning everything in place before sewing makes the final assembly much easier to get right.
What yarn weight works best for this Charmander pattern?
Any yarn weight can work with this pattern. The key is matching your hook size to your yarn weight. For a standard-sized plushie, worsted weight (4) yarn with a 4-5mm hook works wonderfully; for a larger Charmander, try chenille or bulky yarn with a bigger hook.