 STITCH ROUND
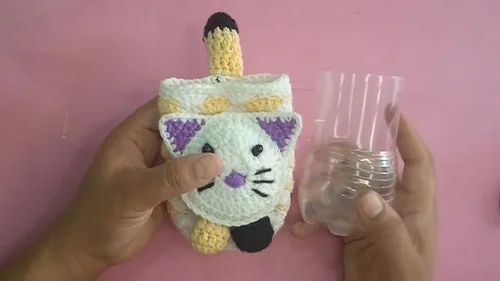
 Crochet cat pencil case pattern that doubles as a plushie
Tick off 4 rounds to build a puffy cat pencil case with tail, paws, and zipper closure.
- Skill
- Intermediate
- Rounds
- 7 rounds
- Yarn weight
- Worsted
- Time
- 4-6 hours

Intermediate
What the original page called it. Nothing here is graded a second time.

7 rounds
Each one gets its own line, with a box beside it to tick as you go.

Worsted
What the sample was made in. Any weight works — the size moves with it.
About this pattern
This cat pencil case starts flat and builds up through the Main Pattern's 4 rounds before the Subsequent Rounds section takes over to grow the body. A magic ring gets the base going, and from there each round adds stitches to widen the circle into a sturdy, huggable shape. Because the finished piece is both a pouch and a plush, every round pulls double duty: form the body and leave room for the fiberfill that gives it that squeezable cat shape.
The shaping hinges on the increase rounds right after the magic ring, where stitch placement decides whether the base sits flat or starts to dome. Slow down through the transition from the Main Pattern into the Subsequent Rounds, since that's where the piece shifts from simple increases to the back-loop-only round that defines the case's side wall. Take care with the Body Pattern's alternating shell rows too, since skipped stitches and dc clusters need to land in the same spots row after row to keep the texture even.
- Build the base with a magic ring and double crochets, then join and start increasing every stitch around.
- Work the next increase round by alternating two double crochets and one double crochet to keep the circle growing evenly.
- Work the Body Pattern rows, alternating single crochet and shell clusters of double crochets to build the textured body.
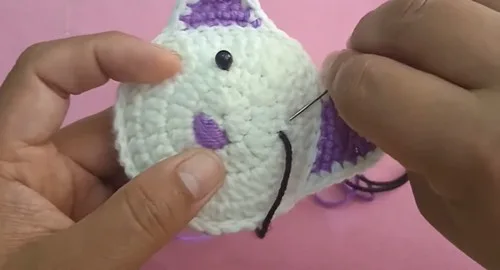
- Shape two circular pieces separately for the face details, crochet the triangular ears in a contrasting color, then join the face pieces, stuff them, and add the embroidered nose, pearl bead eyes, and whiskers.
- Crochet two paws from a magic ring with double crochet rounds, then fill each with fiberfill and close.
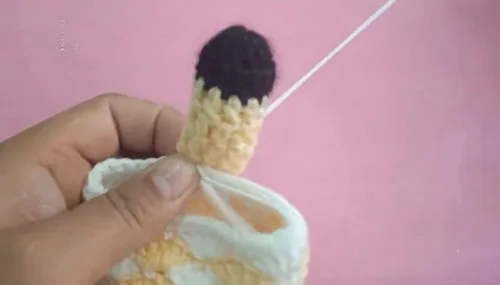
- Crochet the tail in its own color-changing rounds, then fill it with fiberfill before attaching.
- Attach the head, paws, and tail to the body with a needle or glue, then optionally sew in a zipper for closure.
What goes wrong
- Losing count on the increase round Work the 2-dc-in-one-stitch, 1-dc-in-next repeat slowly and mark the start of the round so the pattern doesn't drift out of alignment.
- Crocheting into both loops on the back-loop round Check each stitch before working it, since the back-loop-only round is what creates the ridge that separates the base from the wall.
- Uneven shell stitches in the Body Pattern Count the skipped stitches on both Row 1 and Row 2 so the 5-dc shells stack over the single crochets rather than shifting sideways.
- Underfilling the tail before closing Pack fiberfill in before the final single crochet round closes, since it's much harder to add stuffing once the opening tightens.
Yarn, hook and the rest
Copied from the source pattern's own materials list.
- Multiple yarn colors of your choice
- Crochet hook
- Polyester fiberfill
- Pearl beads (for eyes)
- Needle
Progress tracker
0 of the 7 rounds on this page are ticked.
The pattern, round by round
Kept in the order and the wording the source used. Tick a round as you finish it; the ticks stay on this device.
Main Pattern
Round 1
Start with a magic ring Chain 2, make 11 double crochets into the ring Tighten and join with a slip stitch
Round 2
Chain 3 (counts as first dc), dc again in same stitch 2 dc in each stitch around Join with slip stitch
Round 3
Chain 3, dc again in same stitch 1 dc in next stitch Repeat 2 dc in one stitch, 1 dc in next around Join with slip stitch
Round 4
Dc in each stitch around Join with slip stitch
Subsequent Rounds
Subsequent Rounds
Chain 3, dc in back loop of each stitch around Join with slip stitch
Row 1
Sc in same stitch Skip 2, 5 dc in next stitch Skip 2, sc in next Repeat around
Row 2
Chain 3, 2 dc at the previous row's sc Skip 2, sc in third stitch Skip 2, 5 dc in next Repeat around, join with slip stitchRepeat Rows 1 and 2 to desired length
Face Details
Create two circular shapes by repeating the base pattern
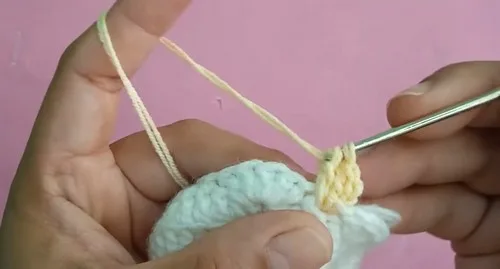
Ears Attach a contrasting yarn Sc in same stitch, then 5 sc in next 5 stitches Decrease one stitch each row to shape a triangle Outline ears with white yarn using sc stitches
Assembly of Face Join two face pieces with sc around Leave a hole, fill with fiberfill, then close Embroider nose, attach pearl bead eyes Add whiskers with black yarn
Paws (Make 2)
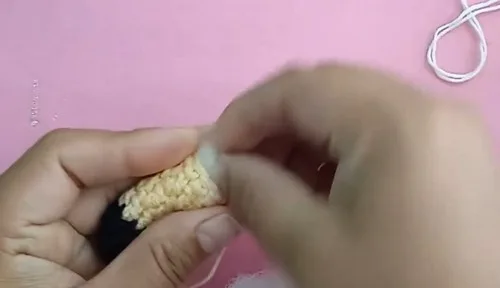
Magic ring, chain 2, 1 dc into ring Tighten and slip stitch to join ends Chain 2, dc in each stitch Repeat dc round Fill with fiberfill, close with slip stitch
Tail
Magic ring, chain 2, 10 dc into ring Join with slip stitch Chain 2, dc in each stitch After 2 rounds, change color Repeat for 2 more rounds
Finish with 1 sc in each stitch Fill with fiberfill and close
Join
Step 1Attach head, paws, and tail using needle or glue
Step 2Optional : sew in a zipper using yellow and black yarn
Finish
- Weave in every color-change end from the body, face circles, ears, paws, and tail before assembly.
- Stuff the head, paws, tail, and body firmly with fiberfill through the final round before closing each piece.
- Attach the head, paws, and tail to the body with a needle or glue, then sew in the zipper for closure.
Bigger or smaller
- Smaller
- Drop to a finer yarn weight with a smaller hook throughout, which shrinks the case and tightens the stitch definition without changing the round sequence.
Photographs of this one
Every photograph on this page was taken by whoever published the pattern, and they are printed in the order the source listed them.
FAQs
Asked and answered
These answers came from whoever first published the pattern, kept word for word.
Can the pencil case be made in one color?
Yes, the pattern calls for multiple yarn colors of choice, but a single color works fine throughout the Main Pattern and Subsequent Rounds. Save color changes for the face details and tail if some contrast is still wanted.
Is the zipper closure required?
No, sewing in the zipper is listed as optional in the final assembly steps. The case still holds its shape as a plushie without one, though the zipper adds secure storage for pencils.
What are the eyes made from?
Pearl beads form the eyes and get sewn on with a needle during finishing. Whiskers and other embroidered features are added the same way once the body is assembled.
How does the tail attach to the body?
The tail is crocheted separately with its own color-changing rounds, then stuffed with fiberfill and closed. It attaches to the main body afterward using a needle or glue, alongside the head and paws.
How are the paws made?
Each paw starts with a magic ring, chain 2, and 1 dc into the ring, then joins with a slip stitch. A dc round is worked and repeated before the paw is filled with fiberfill and closed with a slip stitch. Two paws are made this way.