 STITCH ROUND
 Crochet amigurumi duckling pattern for beginners
48 rounds to tick off make this beginner amigurumi duckling, from beak to legs.
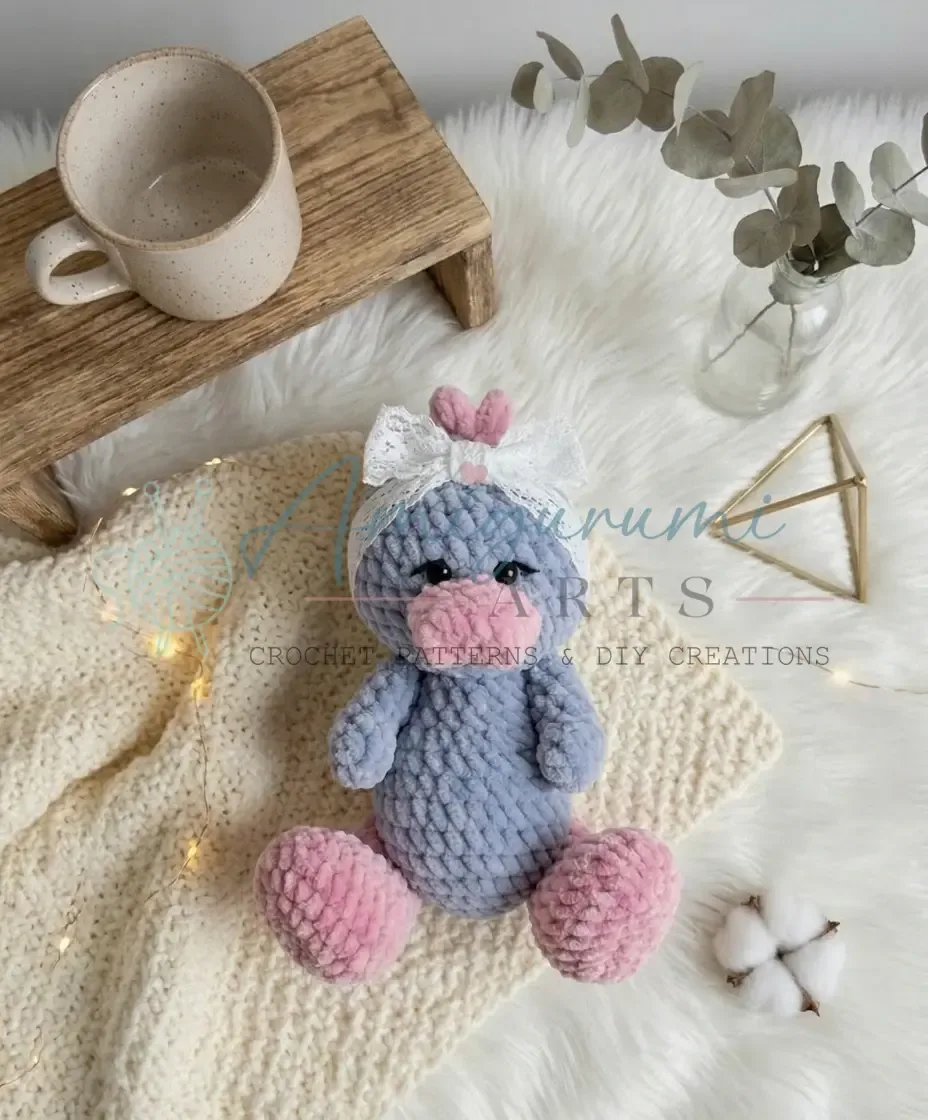
- Skill
- Beginner
- Rounds
- 48 rounds
- Yarn weight
- Bulky
- Hook
- 3.5 mm
- Time
- 4-6 hours

Beginner
What the original page called it. Nothing here is graded a second time.

48 rounds
Each one gets its own line, with a box beside it to tick as you go.

Bulky
What the sample was made in. Any weight works — the size moves with it.
About this pattern
This duckling plush breaks down into five small, checkable pieces: wings worked over 8 rounds, legs over 12, a beak over 6, and a body and head that run together over 13 and 9 rounds. Each part is a magic-ring or foundation-chain start, so nothing on the project runs long before there is a finished piece in hand to set aside. Working in plush yarn keeps every round quick to whip up, which makes this a tidy project to pick up in short sessions rather than one long sitting.
The shaping sits in the increase rounds — wings widen fast near the start, legs flare out from a foundation chain before settling into straight rounds, and the body and head build height and then narrow again as one continuous spiral. Slow down at the points where increases are packed close together, since miscounting there throws off the curve of the piece. Watch the round where color or yarn changes, since that is also where stitch counts shift and a marker earns its keep.
This pattern is written in US crochet terminology, and every piece is worked in a continuous spiral — rounds are not joined unless a step says so, so a stitch marker is essential for tracking where each round begins. Stitch counts appear in parentheses at the end of every round to check your work as you go.
Gauge is not critical for this project, but the fabric should stay tight enough that stuffing never shows through — go down a hook size if gaps appear. Safety eyes go in between Rounds 21 and 22 of the head, spaced 3 stitches apart between the posts, and should be secured firmly before the head closes. A lighter can be used to carefully singe plush yarn ends and safety eye posts to keep finishes tidy, though this step is optional.
- Work the wings and legs first as small standalone pieces, since they are quick to finish and set aside.
- Chain and shape the beak separately, building it into a small rounded piece before moving on.
- Crochet the body and head as one continuous spiral, shaping the increases and decreases as the rounds progress.
- Insert the safety eyes into the head while the piece is still open enough to check placement.
- Stuff the head and body firmly before the final rounds close the opening for good.
- Pin the wings, legs, and beak in place, then sew each one onto the finished body and head.
What goes wrong
- Losing the start of the round Move the stitch marker up into the first stitch of every new round as soon as it is worked, since the piece is joined as a continuous spiral with no slip stitch to mark it.
- Fabric too loose to hide stuffing Go down a hook size if stuffing peeks through the stitches, since gauge is not critical here but the fabric still needs to stay tight.
- Adding safety eyes after stuffing Push the eye posts through the head while it is still flat and unstuffed, then check placement from the outside before locking the backs on.
- Skipping the leg thread-join step Use the white sport-weight yarn to thread-join the last round of each leg rather than pulling it closed, so the legs sit flat and even when attached.
Yarn, hook and the rest
Copied from the source pattern's own materials list.
Main yarn
- Plush yarn in your chosen main color — approximately half a skein
Accent yarn
- A small amount of plush yarn in a contrasting color (for the belly or details)
Detail yarn
- YarnArt Jeans (or similar sport-weight cotton-blend), black — for finishing details
Attachment yarn
- YarnArt Jeans (or similar sport-weight cotton-blend), white — for thread-joining the legs
Hook
- E-4 / 3.5 mm (Note: a 4 mm hook works well with plush yarn — adjust to achieve a firm, stuffing-hiding fabric)
Safety eyes
- Black, 7–8 mm — 2 pieces
Stuffing
- Polyfill fiberfill
- Stitch marker — to mark the beginning of each round
- Yarn needle / tapestry needle
- Sewing pins — for positioning parts before attaching
- Scissors
- Lighter (optional — for singeing plush yarn ends and safety eye posts)
Progress tracker
0 of the 48 rounds on this page are ticked.
The pattern, round by round
Kept in the order and the wording the source used. Tick a round as you finish it; the ticks stay on this device.
Wings (make 2)
Round 1
6 sc in MR. (6)
Rounds 2–3
sc in each st around. (6)
Round 4
sc, inc repeat 3 times. (9)
Round 5
2 sc, inc repeat 3 times. (12)
Round 6
sc, inc repeat 6 times. (18)
Round 7
sc, dec repeat 6 times. (12)
Round 8
2 sc, dec repeat 3 times. (9)
Round 9
sc, dec repeat 3 times. (6)Pull the opening closed, fasten off, and weave the yarn tail inside the wing.
Legs (make 2)
Round 1
Start with a foundation chain of 7 ch.
Round 2
Beginning in the 2nd ch from hook: inc, 4 sc, 3 sc in the last ch; working along the second side of the foundation chain: 5 sc. (14)
Round 3
2 inc, 4 sc, 3 inc, 4 sc, inc. (20)
Round 4
8 sc, sc, inc repeat 3 times, 6 sc. (23)
Round 5
sc in each st around. (23)
Round 6
7 sc, 5 dec, 6 sc. (18)
Round 7
7 sc, 3 dec, 5 sc. (15)
Round 8
3 sc, dec repeat 3 times. (12)
Rounds 9–10
sc in each st around. (12)
Round 11
dec, 4 sc repeat 2 times. (10)
Round 12
sc in each st around. (10)
Round 13
5 dec. (5)Pull the opening closed, fasten off, and weave the yarn tail inside the leg.
Beak
Round 1
Start with a foundation chain of 5 ch.
Round 2
Beginning in the 2nd ch from hook: inc, 2 sc, 3 sc in the last ch, 3 sc. (10)
Round 3
sc in each st around. (10)
Round 4
inc, 4 sc repeat 2 times. (12)
Round 5
sc, inc, 5 sc, inc, 4 sc. (14)
Round 6
sc in each st around. (14)Fasten off and leave a yarn tail for sewing.
Body
Round 1
6 sc in MR. (6)
Round 2
inc in each st around. (12)
Round 3
sc, inc repeat 6 times. (18)
Round 4
sc, 2 sc, inc repeat 5 times, sc. (24)
Round 5
3 sc, inc repeat 6 times. (30)
Round 6
2 sc, inc, 4 sc, inc repeat 5 times, 2 sc. (36)
Rounds 7–9
sc in each st around. (36)
Round 10
9 sc, sc, dec repeat 6 times, 9 sc. (30)
Round 11
sc in each st around. (30)
Round 12
9 sc, 6 dec, 9 sc. (24)
Round 13
sc in each st around. (24)
Round 14
2 sc, dec repeat 6 times. (18)
Round 15
sc, dec repeat 6 times. (12)
Head
Do not fasten off — continue directly into the Head.
Round 16
inc in each st around. (24) — Head begins here.
Round 17
3 sc, inc repeat 6 times. (30)
Round 18
2 sc, inc, 4 sc, inc repeat 5 times, 2 sc. (36)
Rounds 19–24
sc in each st around. (36)Insert safety eyes between Rounds 21 and 22, placing them 3 stitches apart (between posts). Lock the backings firmly in place now.
Round 25
2 sc, dec, 4 sc, dec repeat 5 times, 2 sc. (30)
Round 26
3 sc, dec repeat 6 times. (24)
Round 27
sc, dec, 2 sc, dec repeat 5 times, sc. (18)
Round 28
sc, dec repeat 6 times. (12)
Round 29
6 dec. (6)Stuff the head and body firmly before the opening closes completely. Pull the opening closed, fasten off, and weave in the end.
Join
Step 1Position the beak on the front of the head, centered, approximately 2–3 rounds down from where the head begins. Pin in place before sewing.
Step 2Sew the beak on using a yarn needle and matching yarn, working through all layers for a secure attachment. Weave in the end inside the head.
Step 3Embroider eyebrows above the safety eyes using black sport-weight yarn and a tapestry needle. Two or three straight stitches at a slight angle give the duckling its characteristic expression.
Step 4Position the legs on the underside of the body, roughly at Rounds 6–7, and attach them using the thread-joining method: thread white sport-weight yarn through a needle, pass it through the leg at Rounds 2–3 of the leg, through the body, and back again, pulling snugly and knotting securely inside.
Step 5Position the wings on each side of the body at Round 3 of the wing aligning to the body. Attach using the same thread-joining method, or whipstitch securely with a yarn needle and matching yarn.
Step 6Crochet or form a small crest on top of the head using short lengths of yarn, securing each strand and trimming to the desired length.
Step 7Weave in all remaining ends.
Check your count
- Wings (make 2) · Rounds 2–3: 6 sts
- Wings (make 2) · Round 5: 12 sts
- Wings (make 2) · Round 7: 12 sts
- Wings (make 2) · Round 9: 6 sts
- Legs (make 2) · Round 4: 23 sts
- Legs (make 2) · Round 7: 15 sts
Finish
- Weave in ends from each piece as it is finished, rather than leaving them all for the end, since plush yarn tails are easier to hide while the fabric is still open.
- Stuff the head and body firmly with polyfill before the last rounds close, checking that no gaps let stuffing show through the fabric.
- Close the top of the head and the final body rounds by cinching the last stitches tight, then secure with a few extra stitches before weaving the tail through the piece.
- Add fiberfill gradually through Rounds 24–28 of the head rather than stuffing all at once, so the firmness stays even throughout the piece.
Bigger or smaller
- Larger
- Swap the plush yarn for a heavier weight and go up a hook size, keeping the same rounds for every part; the duckling comes out taller and rounder without changing the shaping.
- Smaller
- Use a lighter sport-weight yarn with a smaller hook and follow the same rounds; the finished duckling shrinks proportionally while keeping its shape.
FAQs
Asked and answered
These answers came from whoever first published the pattern, kept word for word.
What yarn does this pattern actually need?
The body pieces use plush yarn in a main color and a small amount of a contrasting color for the belly or details. A sport-weight cotton-blend yarn in black and white handles the finishing details and the leg thread-join.
Can a different hook size be used with plush yarn?
Yes, a 4 mm hook works well alongside the listed E-4 / 3.5 mm size. Choose whichever gives a firm fabric that fully hides the stuffing.
Is this pattern suitable for a first amigurumi project?
Yes, the piece is built from basic single crochet worked in a continuous spiral with straightforward increases. Each part is small enough to finish in one sitting before moving to the next.
Can I use regular acrylic yarn instead of plush yarn?
Yes, you can substitute any worsted-weight yarn for the plush yarn in this pattern. Keep in mind that the finished duckling will have a different texture — smooth and slightly firmer rather than velvety soft. You may also find it easier to see your stitches and count rounds with a standard acrylic, which can be a real advantage if you are newer to amigurumi.