 STITCH ROUND
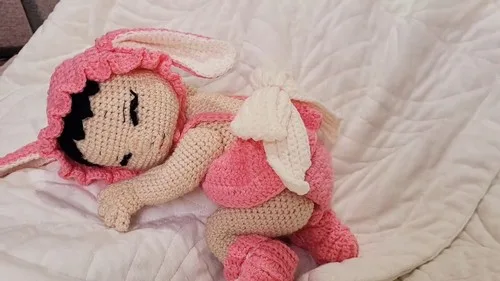
 Crochet bunny hat pattern with floppy ears
Tick off 9 rounds across three pieces to crochet this bunny hat with floppy ears.
- Skill
- Intermediate
- Rounds
- 9 rounds
- Yarn weight
- DK
- Hook
- 3 mm
- Time
- 4-6 hours

Intermediate
What the original page called it. Nothing here is graded a second time.

9 rounds
Each one gets its own line, with a box beside it to tick as you go.

DK
What the sample was made in. Any weight works — the size moves with it.
About this pattern
This bunny hat comes together across three separate pieces: the hat base, the outer ear, and the inner ear. Between them there are nine rounds to tick off, split as four for the base, three for the outer ear, and two for the inner ear. Each piece is small enough to finish in a single sitting, which makes the whole project easy to break into short stretches of work.
The shaping happens mostly through planned increases rather than freehand shaping, so following the stitch counts at the end of each round matters more than usual. Slow down at the ear rounds, where repeated sc and hdc increases build the curve of the outer ear and the shell of dc stitches shapes the inner ear. The back loop only row on the hat base is the other point worth taking carefully, since it sets up the ribbed brim.
- Chain and work the hat base foundation row along both sides of the starting chain to form the brim.
- Turn and continue the hat body in rows, working the back loop only section to build the ribbed edge.
- Chain and work the outer ear rounds, following the increase sequence to curve the shape.
- Chain and work the inner ear rounds in cream yarn using double crochet throughout.
- Fold the outer ear, seam the sides, then layer and stitch the inner ear on top.
- Pin both ears in place on the hat body and sew them down using the ear tails.
What goes wrong
- Losing track of sc and hdc order The repeat sequences alternate sc and hdc in a set order, so count out loud or mark the start of each repeat. A single swapped stitch throws off the rhythm for every repeat after it.
- Skipping the back loop only step The hat base row calls for back loop only to create the ribbed section, and working into both loops instead flattens that texture. Check each stitch goes into the back loop before moving on.
- Uneven ear increases The outer ear increases happen in grouped repeats that build the curve, so an increase placed early or late skews the shape. Keep the stitch markers or counts at the end of each round before starting the next.
- Misaligned inner and outer ear layers Line up the inner ear centered on the outer ear before stitching through the back loop of one and the first loop of the other. A shifted inner piece makes the ear look twisted once seamed.
Yarn, hook and the rest
Copied from the source pattern's own materials list.
- 20g of yarn in your chosen color
- 5g of cream-colored yarn (for inner ears)
- 3mm crochet hook
- Yarn needle
- Scissors
Progress tracker
0 of the 9 rounds on this page are ticked.
The pattern, round by round
Kept in the order and the wording the source used. Tick a round as you finish it; the ticks stay on this device.
Part 2
Round 1
Ch 22 Skip first chain, 1 sc Repeat 10x: 1 hdc 3 sc in last stitch Repeat 10x: 1 sc, 1 hdc
Total: 43 stitches
Round 2
Ch 1, turn Repeat 10x: 1 sc, 1 hdc 3 increases (sc) Repeat 10x: 1 sc, 1 hdc Total: 46 stitchesFor Round 3 Ch 1, turn Repeat 10x: 1 sc, 1 hdc Repeat 3x: 1 sc, 1 increase Repeat 10x: 1 sc, 1 hdc Total: 49 stitches
Round 4
Ch 1, turn Repeat 10x: 1 sc, 1 hdc Repeat 3x: 2 sc, 1 increase Repeat 10x: 1 sc, 1 hdcFasten off with long tail for sewing Bunny Ears (Inner – Cream Color)
Part 3
Round 1
Ch 21 Skip first 2 chains Make 18 dc 6 dc in last chain 18 dc on the other side Total: 42 stitches
Round 2
Ch 2, turn 18 dc 6 dc increases 18 dc Fasten off Assembling the Ears Place inner ear on top of outer earFold ear in half and sew sides of outer ear together Attach inner ear to outer ear using back loop of outer and first loop of innerSeam edges closed Leave tail long to attach to hat Repeat for second ear Attaching Ears to the Hat Position ears between the 5th and 8th rowsPin them in place Sew ears to hat using yarn tail Finishing Touches Weave in all remaining yarn ends neatly into the fabric for a clean finish
Chain (ch)
Single Crochet (sc)
Half Double Crochet (hdc)
Double Crochet (dc)
Slip Stitch (sl st)
Hat Base Foundation Row Chain 16 Starting in the second chain from the hook, make 4 sc Sequence (Repeat 5x): 1 sc, 1 hdc
Make 3 sc in the last chain Crochet along the opposite side of the chain Repeat Sequence (5x): 1 sc, 1 hdc End with 4 sc
Total: 31 stitches
Round 2
Ch 1, turn 4 sc (back loop only) Repeat 5x: 1 sc (both loops), 1 hdc 3 sc increasesRepeat 5x: 1 sc, 1 hdc 4 sc (back loop only)Total: 34 stitches For Round 3 Ch 1, turn 4 sc (back loop only)Repeat 5x: 1 sc, 1 hdc Repeat 3x: 1 sc, 1 increase Repeat 5x: 1 sc, 1 hdc 4 sc (back loop only)
Total: 37 stitches
Round 4
Ch 1, turn 4 sc (back loop only) Repeat 5x: 1 sc (both loops), 1 hdc Repeat 9x: 1 sc, 1 hdc in same stitchRepeat 5x: 1 sc, 1 hdc 4 sc (back loop only)
Total: 46 stitches
Rounds 5–18
Ch 1, turn Repeat entire round (23x): 1 sc, 1 hdc Repeat this round 13 more times for total of 14 rounds
Round 19
Ear Straps & Trim Ch 25 Work 25 sl st back into the chains Sl st onto main bodyCh 2 In next stitch, make 3 dc in same stitch Repeat 44x: 3 dc in same stitch Ch 2, sl st Ch 25 25 sl st into chains (back loop only)Sl st onto last stitch of Round 18 Ch 1 and fasten off Bunny Ears (Outer – Main Color)
Join
Step 1Weave in all remaining yarn ends neatly into the fabric for a clean finish
Finish
- Seam the folded outer ear closed along its sides before adding the inner ear piece.
- Attach the inner ear to the outer ear through the back loop of one and the first loop of the other, then close the edge.
- Pin the finished ears between the hat rows, sew them on with the leftover tail, then weave in every remaining yarn end.
Bigger or smaller
- Smaller
- Drop to a finer yarn with a smaller hook so each stitch sits tighter, shrinking the finished hat and ear size while keeping every round as written.
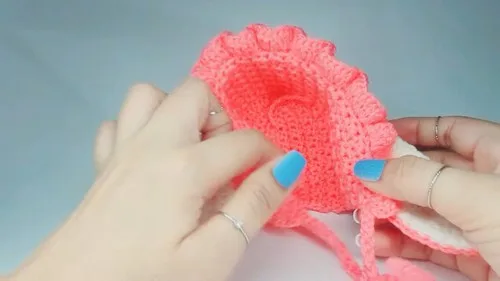
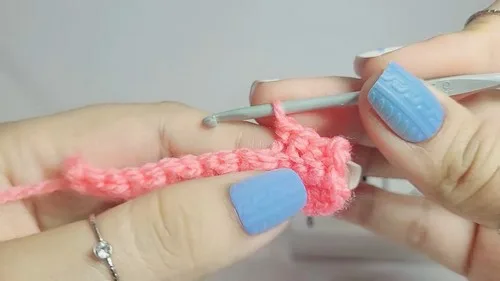
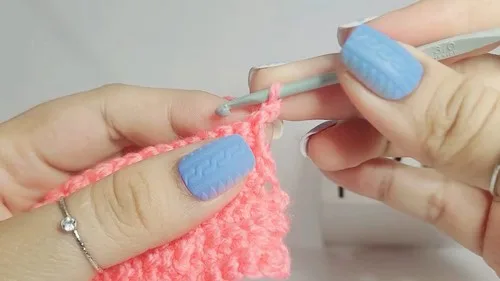
Photographs of this one
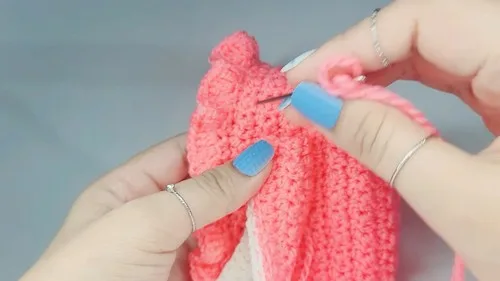
Every photograph on this page was taken by whoever published the pattern, and they are printed in the order the source listed them.
FAQs
Asked and answered
These answers came from whoever first published the pattern, kept word for word.
Why does the inner ear use a different color yarn?
The cream-colored yarn is there to contrast with the main color once the inner ear is layered onto the outer ear. It is a small amount, so leftover yarn in a light shade works well.
Can both ear pieces be made with the same hook?
Yes, the pattern uses a single 3mm hook throughout, for the hat base, the outer ear, and the inner ear. No hook changes are needed between pieces.
Where exactly should the ears sit on the hat?
The ears are pinned and sewn on using the rows of the hat body as a placement guide. Pin both ears first and check they sit evenly before sewing them down.
What is the back loop only row for?
Working into the back loop only on that row creates a ribbed line in the fabric rather than a flat row. It is a texture detail on the hat base rather than a shaping step.