 STITCH ROUND
 Crochet a jointed teddy bear amigurumi
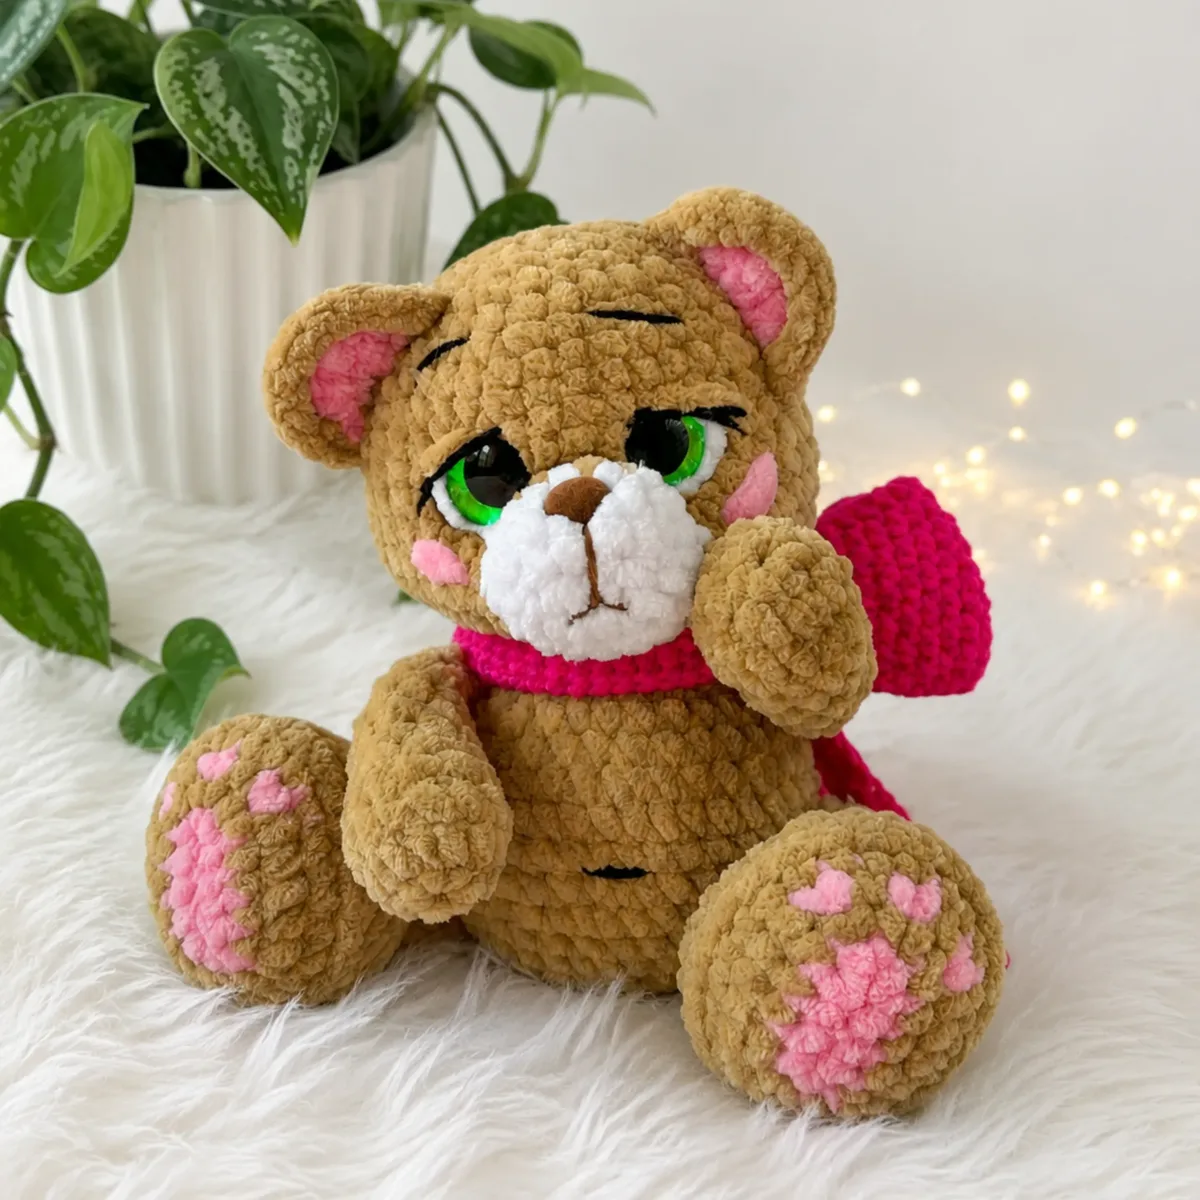
8 pieces, up to 17 rounds each: crochet this jointed teddy bear amigurumi.
- Skill
- Intermediate
- Rounds
- 55 rounds
- Yarn weight
- Worsted
- Hook
- 3.5 mm
- Time
- 4-6 hours

Intermediate
What the original page called it. Nothing here is graded a second time.

55 rounds
Each one gets its own line, with a box beside it to tick as you go.

Worsted
What the sample was made in. Any weight works — the size moves with it.
About this pattern
This bear comes together from eight separate pieces, so progress is easy to track one part at a time. The body runs to Round 16, the arms to Round 11, the legs to Round 17, the head to Round 17, the ears to Round 4, the tail to Round 4, and the muzzle is worked in 3 flat rows. Working through each piece in turn keeps the project manageable even though the finished bear has a lot of parts to join.
Most of the shaping happens fast in the early increase rounds, but the pace changes where safety hardware and two-tone pieces come in. Slow down when placing the safety eyes between Rounds 8 and 9 of the head, when joining the pink and brown ear layers, and when inserting the safety joints into the arms and legs before final stuffing. These are the points where careful placement matters more than speed.
Bobby stands about 9 inches tall when finished, making him a good size for a nursery shelf, a baby shower gift, or a keepsake that gets hugged for years. Gauge is not critical for this project — focus on a tight, even tension that prevents stuffing from showing through. Body, head, arms, legs, tail, and bow pieces are worked in continuous spiral rounds, while the muzzle and some leg sections are worked in flat turned rows; the pattern is written in US crochet terminology.
- Crochet the body and head first in continuous spiral rounds, since everything else attaches to these two pieces.
- Work the muzzle separately in flat turned rows, then whipstitch it onto the head front for a clean seam.
- Build each ear from a pink layer and a brown layer worked together into a single joined piece.
- Crochet the arms and legs on their own, inserting safety joints into each limb before the final stuffing.
- Attach the stuffed limbs, ears, eyes, and nose to the body and head to complete the bear's shape.
- Finish with the bow and neck band in DK yarn, closed with a button for the finishing detail.
What goes wrong
- Ear layers pieced unevenly Line up the pink and brown ear layers stitch for stitch before working the final joining row so the edges sit flush.
- Joints inserted after stuffing Insert the safety joints into each arm and leg before final stuffing, not after, so the joint sits securely at the center of the limb.
- Eyes spaced unevenly on the head Mark the eye placement with stitch markers before inserting the safety eyes between Rounds 8 and 9 so both sides match.
- Muzzle seam shows on the face Use a whipstitch rather than a running stitch to attach the muzzle so the seam stays nearly invisible against the head.
Yarn, hook and the rest
Copied from the source pattern's own materials list.
Yarn
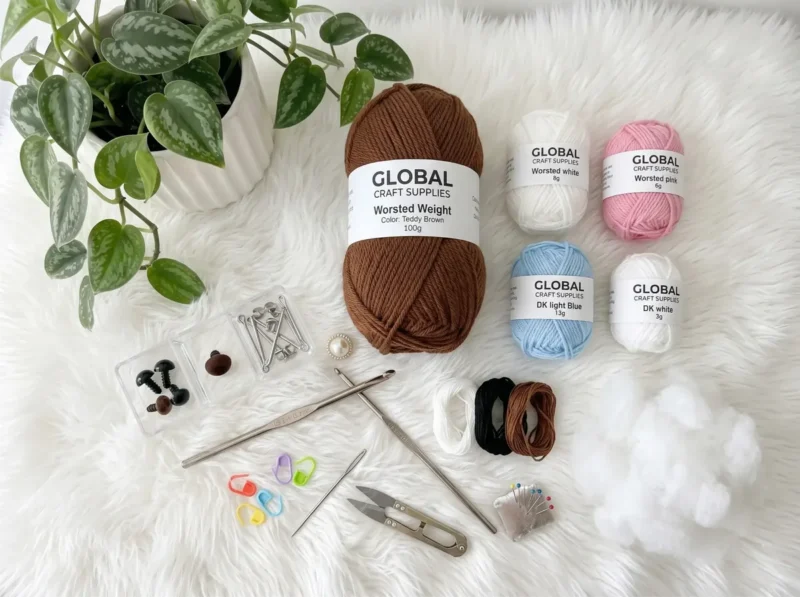
- Worsted weight yarn in brown (approx. 100g) for the main body
Yarn
- Worsted weight yarn in white (approx. 8g) and pink (approx. 6g) for contrast details
Yarn
- DK weight yarn in light blue (approx. 13g) and white (approx. 3g) for the bow
- Small amounts of yarn in white, black, and brown for embroidery details
- Hook size E-4 (3.5 mm)
- Hook size B-1 (2 mm)
- Safety eyes, 18 mm (2)
- Safety nose, 15 mm (1)
- One button for the bow closure
- Polyester fiberfill stuffing
- Stitch markers
- Yarn needle
- Scissors
- Sewing pins
- Safety joints or cotter pin discs, 35 mm (5 sets, for arms, legs, and head)
Progress tracker
0 of the 55 rounds on this page are ticked.
The pattern, round by round
Kept in the order and the wording the source used. Tick a round as you finish it; the ticks stay on this device.
Arms (make 2)
Worked in brown.
Round 1
7 sc in MR. (7)
Round 2
inc in each st around. (14)
Round 3
sc around. (14)
Round 4
5 sc, dec repeat around. (12)
Round 5
4 sc, dec twice, 4 sc. (10)
Round 6
sc around. (10)
Round 7
3 sc, dec twice, 3 sc. (8)
Round 8
sc around. (8)
Round 9
3 sc, dec, 3 sc. (7)
Rounds 10–11
sc around. (7) (2 rounds total) Fold the top flat and sc through both layers together across 3 sts to close the paw. Repeat the entire arm for the second piece.
Tail
Worked in brown, stuffed firmly.
Round 1
6 sc in MR. (6)
Round 2
inc in each st around. (12)
Round 3
sc around. (12)
Round 4
dec around. (6)Fasten off, leaving a long tail for sewing.
Ears (make 2)
Each ear is built from two layers — a pink piece and a brown piece — joined together.
Round 1
Pink layer 5 sc in MR. Fasten off and weave in the end.
Round 1
Brown layer 5 sc in MR. Do not fasten off.
Round 2
Brown layer ch 1, turn, inc in each st around. (10)
Round 3
ch 1, hold pink and brown layers together, sc through both layers across all 10 sts.
Round 4
turn, sl st across all 10 sts. Leave a tail for sewing.
Body
Worked in brown, stuffed firmly.
Round 1
8 sc in MR. (8)
Round 2
inc in each st around. (16)
Round 3
(1 sc, inc) repeat 8 times . (24)
Round 4
sc around. (24)
Round 5
(2 sc, inc) repeat 8 times . (32)
Round 6
sc around. (32) Mark the leg placement points here.
Rounds 7–10
(3 sc, inc) repeat 8 times , then 3 rounds of sc around. (40) Attach the legs at the marked points.
Rounds 11–14
(3 sc, dec) repeat 8 times , then 2 rounds of sc around, then (2 sc, dec) repeat 8 times . (24 after final round)
Round 15
join the arms: 5 sc, sc 3 sts together with one arm, 8 sc, sc 3 sts together with the other arm, 5 sc. (24)
Round 16
(2 sc, dec) repeat 6 times , then continue directly into the head. (18)
Head
Worked in brown, stuffed firmly.
Rounds 1–3
inc in each st around, then (5 sc, inc) repeat 6 times , then (6 sc, inc) repeat 6 times . (48 after final round)
Round 4
19 sc, sc 10 sts together with the lower edge of the muzzle, 19 sc. (48)
Round 5
20 sc, sc 8 sts through the free top loops of the muzzle, 20 sc. (48)
Rounds 6–13
(4 sc, dec) repeat 8 times , then 3 rounds of sc around, then (6 sc, dec) repeat 5 times , then 1 round of sc around, then (5 sc, dec) repeat 5 times , then 1 round of sc around. (30 after final round) Place the safety eyes between Rounds 8 and 9, spaced 8 sts apart.
Rounds 14–17
(3 sc, dec) repeat 6 times , then (2 sc, dec) repeat 6 times , then (1 sc, dec) repeat 6 times , then dec 6 times. (6 after final round)Cinch the opening closed and weave in the end.
Muzzle
Worked in white, in flat turned rows.
Row 1: ch 4.
Round 2
starting in 2nd ch from hook: inc, 1 sc, 4 sc in same st, 1 sc working into the back bumps of the chain, inc. (10)
Round 3
2 inc, 1 sc, 4 inc, 1 sc, 2 inc. (18)
Round 4
sc around. (18)Fasten off. The muzzle will be joined to the head later. Position the safety nose centered between Rows 3 and 4.
Legs (make 2)
Begin in pink, switching to brown partway through. Stuff as you go.
Row 1: ch 6.
Round 2
starting in 2nd ch from hook: 4 sc, 3 sc in same st, working into the back bumps: 3 sc, inc. (12) Switch to brown; do not cut the pink yarn.
Round 3
inc, 3 sc, 3 inc, 3 sc, 2 inc. (18)
Round 4
1 sc, inc, 3 sc, then continue increases in pink: (1 sc, inc in pink) repeat 3 times , 3 sc, (1 sc, inc) repeat twice . (24) Cut the pink yarn.
Round 5
6 sc, (2 sc, inc) repeat 3 times , 9 sc. (27)
Round 6
sc around, working into the cupped sole sts. (27)
Round 7
6 sc, dec, (2 sc, dec) repeat twice , 11 sc. (24) Shift the foot placement toward the center of the sole; Round 8 marks the centerpoint.
Round 8
sc around. (24)
Round 9
3 sc, (1 sc, dec) repeat 6 times , 3 sc. (18)
Round 10
3 sc, dec 6 times, 3 sc. (12)
Round 11
(1 sc, inc) repeat 6 times . (18)
Rounds 12–15
sc around. (18) (4 rounds total)
Round 16
(1 sc, dec) repeat 6 times . (12) Insert the safety joint or cotter pin disc here.
Round 17
dec 6 times. (6) Weave the tail inside the piece to secure.
Bow and Neck Band
Round 1
Neck band — Row 1: 8 sc in MR. (8)
Round 2
Neck band — Rows 2–37: sc around. (8) (36 rows total) Fold in half, sc 4 sts together to close, then ch 5 to form a button loop.Bow main piece — Row 1: ch 50, join into a ring.
Round 3
Bow main piece — Rnds 2–9: hdc in each st around. (50) (8 rounds total)Bow ribbon tails — Row 1: ch 5.
Round 4
Bow ribbon tails — Rows 2–21: starting in 3rd ch from hook, work 3 hdc per row. (20 turning rows total) Finish with an edging round, working decreases as needed.Bow center wrap — Row 1: ch 5.
Round 5
Bow center wrap — Rows 2–11: work 3 hdc per row. (10 turning rows total)
Join
Step 1Insert the safety joints into each arm and leg before final stuffing, then join them to the marked points on the body as described in Round 15 (arms) and Rounds 7–10 (legs).
Step 2Sew the muzzle to the head front following the placement in Rounds 4–5, using a whipstitch for a clean, nearly invisible seam.
Step 3Insert the safety eyes between Rounds 8 and 9 of the head, spaced 8 sts apart, before closing the final rounds.
Step 4Sew the ears to the head at the level of Rounds 10–15, spacing them 7 sts apart, using the yarn tail left from the ear construction.
Step 5Sew the tail to the center back of the body at the level of Rounds 6–8.
Step 6Embroider the mouth, eye whites, eyelids, eyelashes, eyebrows, and belly button using black, white, and brown yarn. Position the belly button at Rounds 7–8 of the tummy.
Step 7Add blush to the cheeks with a small amount of pink yarn or fiber blusher.
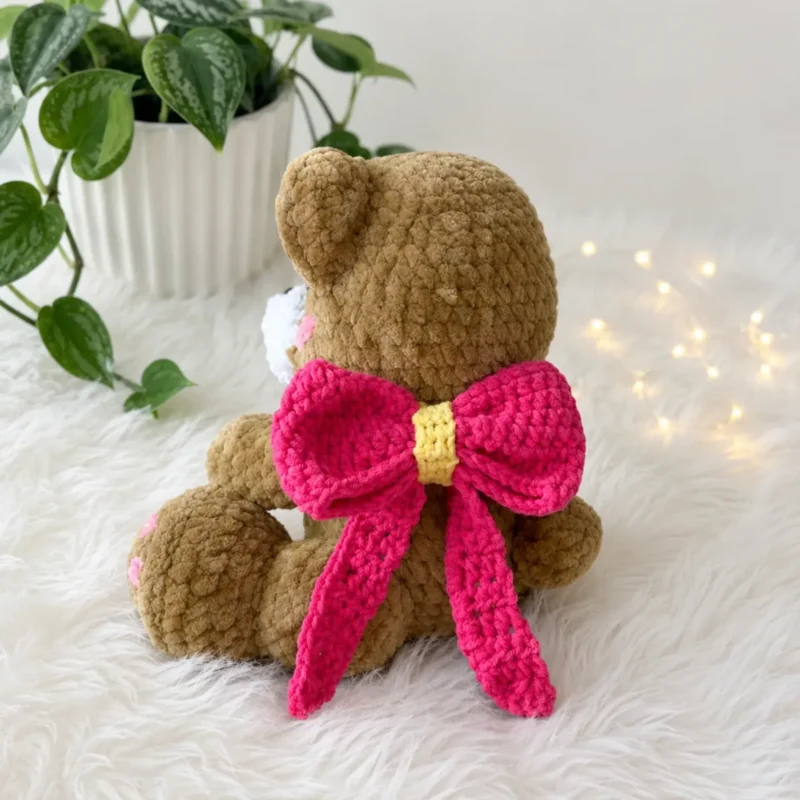
Step 8Assemble the bow: shape the main piece into a bow form, sew the ribbon tails to the bottom, then wrap the center piece around the middle along with the neck band. Sew the button on top to secure everything.
Step 9Fasten the neck band around Bobby’s neck using the button loop.
Step 10Weave in all remaining yarn ends throughout the piece.
Check your count
- Arms (make 2) · Round 3: 14 sts
- Arms (make 2) · Round 6: 10 sts
- Arms (make 2) · Round 9: 7 sts
- Tail · Round 1: 6 sts
- Tail · Round 2: 12 sts
- Tail · Round 3: 12 sts
Finish
- Weave in loose ends from every piece as it comes off the hook, paying extra attention to the two-layer ears where pink and brown yarn ends meet.
- Stuff the body, head, arms, legs, and tail firmly with fiberfill before closing the final rounds, keeping tension even so the fill does not peek through.
- Attach the ears, muzzle, limbs, and bow with a whipstitch once the safety eyes and nose are set, checking placement against the head and body before sewing.
Bigger or smaller
- Smaller
- Repeat one of the straight rounds on the body or legs to add length without changing the stitch count, or drop to a finer hook and lighter yarn to shrink the whole bear.
Photographs of this one
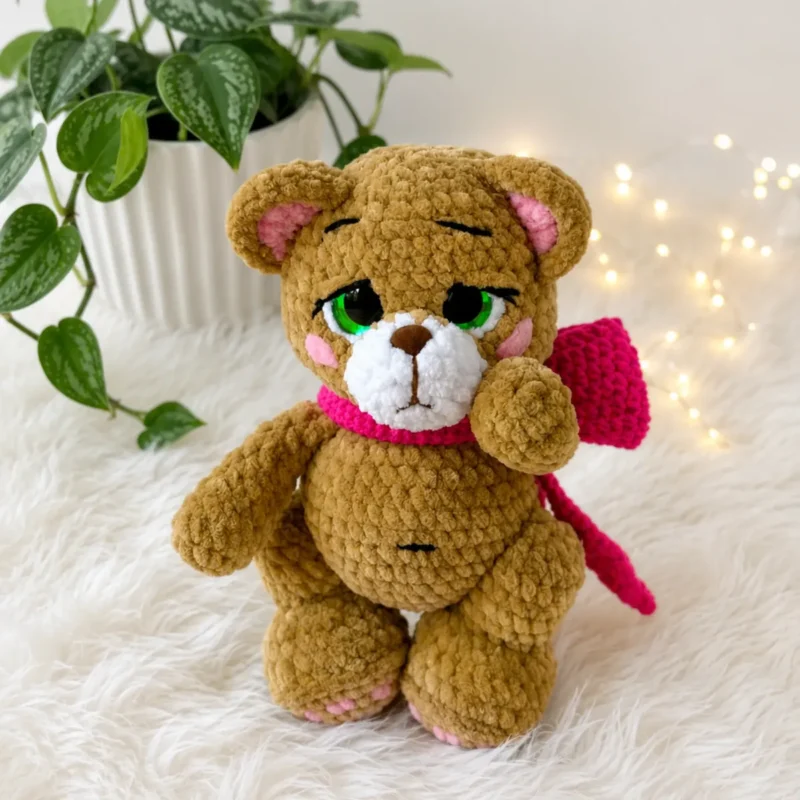
Every photograph on this page was taken by whoever published the pattern, and they are printed in the order the source listed them.
FAQs
Asked and answered
These answers came from whoever first published the pattern, kept word for word.
Can this bear be made without safety eyes and nose?
Yes, since the pattern already lists white, black, and brown yarn for embroidery details. Embroider the features in the same placement described for the safety hardware.
Why does the bow use a different yarn weight?
The bow and neck band are worked in DK weight yarn while the rest of the bear uses worsted weight. This gives the bow a finer, drapier finish against the bulkier body.
Is the two-layer ear construction hard to manage?
It looks fussy but it is simple: the pink layer is fastened off and set aside, then the brown layer is worked over it before the two are joined with a shared row of single crochet.
Can the limbs be sewn on instead of using safety joints?
Yes, the arms and legs can be stitched directly to the body if movable joints are not needed. Skip the joint insertion step and whipstitch the stuffed limbs in place at the marked points instead.