 STITCH ROUND
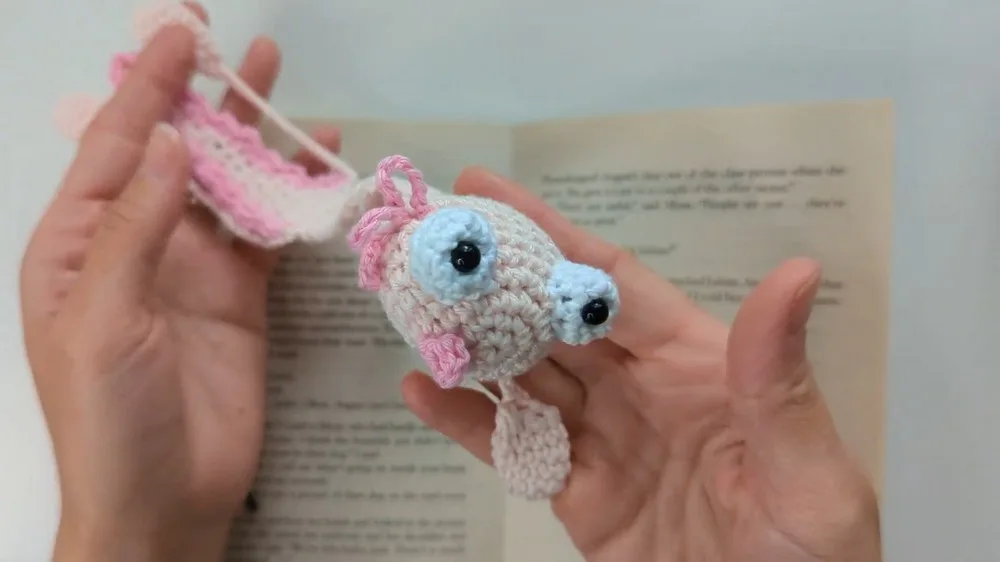
 Crochet axolotl bookmark pattern with simple amigurumi shaping
22 rounds across five parts build this amigurumi axolotl bookmark.
- Skill
- Beginner
- Rounds
- 23 rounds
- Yarn weight
- Worsted
- Hook
- 2.5 mm
- Time
- 2-4 hours

Beginner
What the original page called it. Nothing here is graded a second time.

23 rounds
Each one gets its own line, with a box beside it to tick as you go.

Worsted
What the sample was made in. Any weight works — the size moves with it.
About this pattern
This axolotl bookmark comes together from five separate pieces, so the round count stays short on each one. The head takes 7 rounds, the tail matches it at 7, the legs use just 4 rounds apiece (made four times), the eyes work up in 3, and the body closes in a single round. Fins and gills get added without any rounds of their own, which keeps the total pile of parts manageable for one sitting.
Shaping is front-loaded into the head and tail, where steady increase rounds build the rounded face and tapering tail shape. Slow down through those early increase rounds so stitch placement stays even before the piece grows too large to easily recount. The legs ask for more care at the finishing end, where a decrease round and a sewn-closed opening need a tidy hand, and the chained leg frills call for consistent tension so all four legs match.
- Work the head first, building up with increase rounds until the rounded face shape is complete.
- Crochet the tail separately, shaping it with the same kind of steady increases as the head.
- Make four identical legs, closing each one and adding a chained frill before setting them aside.
- Stitch up the small white eye pieces and fit the safety eyes into their centers.
- Crochet the single-round body piece that links the head and tail together.
- Assemble everything, add the gills, and finish the face with stitched mouth details.
What goes wrong
- Loose magic ring start Pull the magic ring tail tight before working the first round so no gap opens at the center of the head, eyes, or legs.
- Miscounted increase rounds Count stitches at the end of each increase round on the head and tail before moving on, since an early miscount throws off the whole shape.
- Safety eyes placed too late Fit the 6 mm safety eyes into the white eye pieces before attaching them to the head, since they are much harder to insert once the head is stuffed and closed.
- Uneven leg frills Chain each leg frill with the same tension and length so all four legs hang evenly once attached to the body.
Yarn, hook and the rest
Copied from the source pattern's own materials list.
- White yarn for the eyes
- Light pink yarn for the main body and features
- Bright pink or darker pink yarn (optional for different color variations)
- 2.5 mm hook
- Scissors
- 6 mm safety eyes
- Toy stuffing
Progress tracker
0 of the 23 rounds on this page are ticked.
The pattern, round by round
Kept in the order and the wording the source used. Tick a round as you finish it; the ticks stay on this device.
Head
Start with light pink yarn. Make a magic ring.
Round 1
6 single crochet (sc) into the magic ring.
Round 2
Increase (2 sc) in each stitch around (12 sc).
Round 3
1 sc, increase repeat around (18 sc).
Round 4
2 sc, increase repeat around (24 sc).
Rounds 5–10
Sc in each stitch around (24 sc for 6 rounds).
Round 11
2 sc, decrease repeat around (18 sc).
Round 12
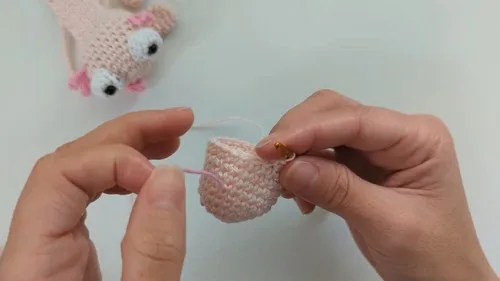
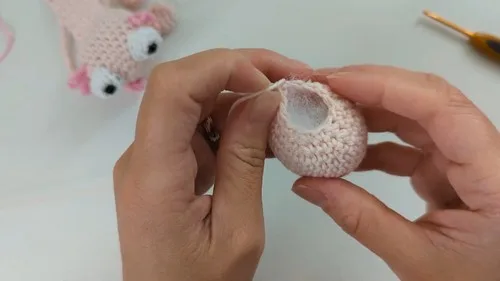
1 sc, decrease repeat around (12 sc). Stuff the head with toy stuffing. Close the hole by squeezing it shut and sc across both layers, making 6 stitches in total. This completes the head.
Legs (Make 4)
Start with a magic ring using light pink yarn.
Round 1
6 sc into magic ring.
Round 2
1 sc, increase repeat three times (9 sc).
Rounds 3–5
Sc in each stitch around (9 sc).
Round 6
1 sc, decrease repeat three times (6 sc). Close by sewing the opening. Chain 20 for each leg frill, then attach them to the body at desired positions.
Eyes
Using white yarn, make a magic ring.
Round 1
6 sc into the magic ring.
Round 2
1 sc, increase three times (9 sc).
Rounds 3–4
1 sc in each stitch around (9 sc). Finish off. Attach 6 mm safety eyes in the center before fitting them onto the head.
Body
Continue with light pink yarn. Chain 1 and turn to start the body.
Rounds 13–40
Sc in each stitch across (6 sc). Repeat this step for 25 rounds or until the body reaches your desired length.
Tail
Start decreasing for the tail, making a tail fin.
Round 41
2 sc, decrease repeat twice (4 sc).
Rounds 42–44
Sc in each stitch around (4 sc).
Round 45
1 sc, decrease and end with 1 sc (3 sc).
Rounds 46–48
3 sc in each round.
Round 49
1 sc, then decrease (2 sc).
Round 50
2 sc.
Rounds 51–52
Repeat step 18.
Round 54
Decrease to 1 stitch left and finish the tail.
Fins
Using bright or dark pink yarn, start from one side of the tail. Make slip stitches, single crochet, and half double crochet to create fin-like structures. Repeat this along the edge of the tail fins. Ensure to repeat on both sides of the tail.
Adding Gills
With bright or dark pink yarn, chain and attach along each side of the head for gills.
Join
Step 1Attach all parts as described. Place the eyes on the head and use the darker yarn to stitch the mouth details.
Step 2Optionally, use PVA glue to stiffen the gills for a permanent shape.
Check your count
- Head · Round 2: 12 sts
- Head · Round 3: 18 sts
- Head · Round 4: 24 sts
- Head · Round 11: 18 sts
- Legs (Make 4) · Round 2: 9 sts
- Legs (Make 4) · Rounds 3–5: 9 sts
Finish
- Weave in every yarn tail from the head, tail, legs, eyes, and body before joining anything together.
- Stuff the head and tail lightly as the rounds close in, keeping the fill even so the amphibian shape stays smooth.
- Attach the head, body, tail, legs, and eyes in position, then stitch the mouth with the darker yarn to finish the face.
Bigger or smaller
- Smaller
- Work the pattern in a finer yarn with a smaller hook than 2.5 mm, which pulls the rounds in tighter and shrinks the head, tail, and legs together.
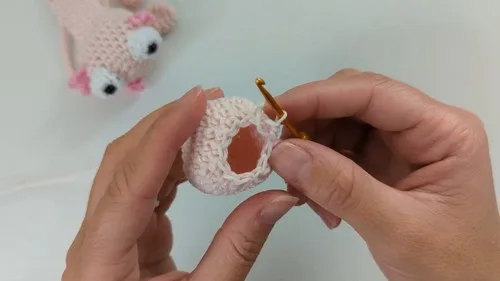
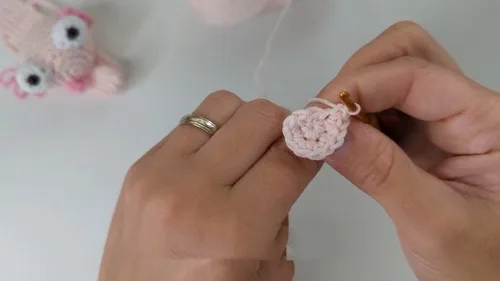
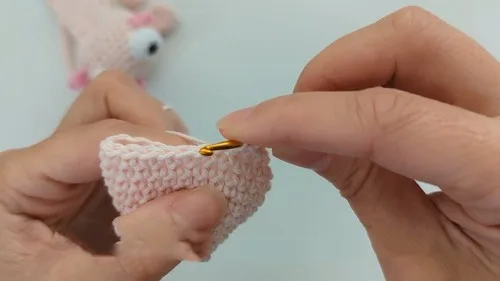
Photographs of this one
Every photograph on this page was taken by whoever published the pattern, and they are printed in the order the source listed them.
FAQs
Asked and answered
These answers came from whoever first published the pattern, kept word for word.
Can the bookmark be made in a different color?
Yes, the pattern already calls for optional bright pink or darker pink yarn as an alternative to the light pink main color. Any similar-weight yarn works as long as the hook size stays suited to it.
How much should the head and tail be stuffed?
Add stuffing gradually while closing the final rounds so the shape stays smooth without bulging. A light, even fill keeps the bookmark flexible enough to sit inside a book.
Do the gills need to be glued?
No, gluing is optional. The assembly notes mention PVA glue only as a way to stiffen the gills permanently, so they can be left soft and flexible if preferred.
What are the leg frills for?
The chained leg frills mimic the feathery gill-like fronds real axolotls have on their legs. They are chained separately after each leg is closed, then attached at the desired position.