 STITCH ROUND
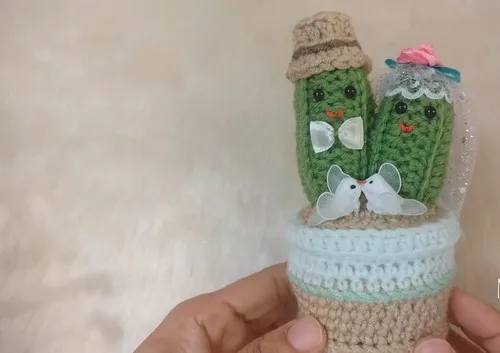
 Crochet wedding cactus pot with tulle bow detail
12 rounds tick off a crochet cactus in a pot, finished with a tulle and ribbon bow.
- Skill
- Intermediate
- Rounds
- 16 rounds
- Yarn weight
- Worsted
- Hook
- 4 mm
- Time
- 4-6 hours

Intermediate
What the original page called it. Nothing here is graded a second time.

16 rounds
Each one gets its own line, with a box beside it to tick as you go.

Worsted
What the sample was made in. Any weight works — the size moves with it.
About this pattern
This piece pairs a potted look with a wedding-ready finish, and the base, pot, and cactus body between them cover 12 rounds plus the cactus body rows. Three separate circles build the base and soil layer, the pot body works up in straightforward rounds, and the cactus itself grows from a starting chain rather than a ring. Tick off each part in turn and the pieces stack into one tidy centerpiece.
Two cactus bodies are made from the same rows — one from a shorter starting chain, one from a taller one — so the finished pair can be dressed differently: a mini hat and bow tie for the male cactus, and a tulle veil for the female cactus.
- Work three flat circles first, since two build the base and one becomes the soil layer on top.
- Add a dark green slip stitch accent around the pot's fourth round, then fold the top edge down, stuff the pot, and sew the soil circle over the top.
- Chain and turn two cactus bodies — one shorter, one taller — then join each one's ends into a tube instead of working it in the round.
- Stuff each cactus, sew the lower sides partway up for shape, then work the mini hat separately for the taller cactus.
- Sew the cactus pair onto the soil circle, add safety eyes and an embroidered mouth, then dress the male cactus in its hat and bow tie and the female cactus in its tulle veil.
- Finish with any optional trims like small plastic birds or gold rings, and trim away excess tulle for a neat edge.
What goes wrong
- Losing the back-loop-only rounds Check each round on the base and pot body for the back-loop instruction before working into it. Working through both loops flattens the ridge that gives the piece its structure.
- Uneven circle count Keep the three circles for base and soil sorted as they are made, since two are meant for the base and one for the soil. Mixing them up before assembly makes the layering look off.
- Sloppy tube seam on the cactus Line up the two edges of the cactus body carefully before slip stitching them together to close the tube. A twisted seam pulls the whole cactus off-center once stuffed.
- Ribbon edges fraying Seal the cut ribbon edges with a lighter before tying it around the green yarn for the bow. Unsealed edges unravel quickly once handled during assembly.
Yarn, hook and the rest
Copied from the source pattern's own materials list.
- Yarn in light brown, light green, dark green, and brown
- Crochet hook (4 mm)
- Fiberfill
- Scissors
- Darning needle
- Ribbon (for bow tie)
- Decorative flower
- Tulle fabric (approx. 4x5.5 inches)
- Fabric glue
- Galloon bottle cap (optional for base support)
Progress tracker
0 of the 16 rounds on this page are ticked.
The pattern, round by round
Kept in the order and the wording the source used. Tick a round as you finish it; the ticks stay on this device.
Base and Soil (Light Brown Yarn)
Make 3 circles: 2 for the base and 1 for the soil Circle Pattern (make 3):
Round 1
6 sc in a magic ring, join. (6 sts)
Round 2
Ch 1, 2 sc in each st around, join. (12 sts)
Round 3
Ch 1, sc, 2 sc repeat around, join. (18 sts)
Round 4
Ch 1, sc in next 2 sts, 2 sc repeat around, join. (24 sts)
Round 5
Ch 1, sc in next 3 sts, 2 sc repeat around, join. (30 sts)
Round 6
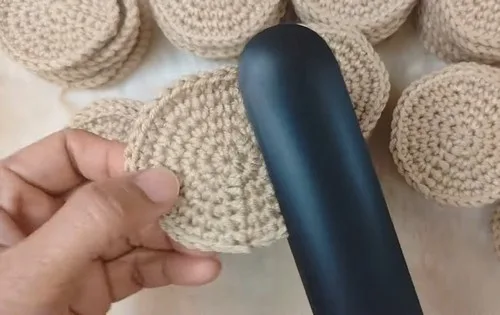
Ch 1, sc in next 2 sts, 2 sc, sc in next 2 sts repeat around, join. (36 sts) Fasten off and leave a long tail on the soil circle for sewing(Optional: Flatten circles with a hair straightener)Step by step: Place 2 base circles wrong sides facing; join them together by slip stitching through both circles all around; fasten off and weave in ends.
Pot Body (Light Brown Yarn)
Round 1
Work into back loops only, sc around. Join. (36 sts)
Rounds 2–4
Ch 1, sc around. Join. (36 sts) Change to light green yarn
Round 5
Ch 1, sc around. Join. (36 sts) Set the pot aside
Pot Decoration (Dark Green Yarn)
Step by step: Sl st around any stitch on the 4th round to add detail; cut yarn and tie off.
Finishing the Pot
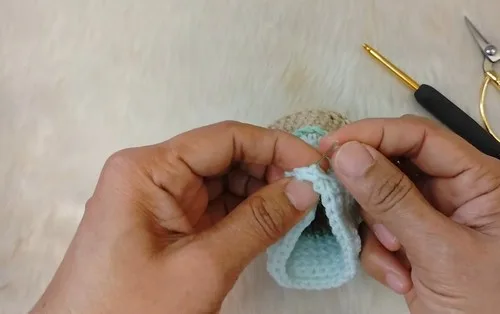
Step by step: Fold the top round downward on the back loop round; (optional) glue the galloon bottle cap inside the pot base for support; stuff the pot with fiberfill; place the soil circle on top and sew it securely to Round 8 of the pot.
Body (Green Yarn)
For shorter cactus: chain 12 For taller cactus: chain 15 Body Rows:
Round 1
Hdc in 2nd chain from hook and across
Rounds 2–8
Ch 1, turn, work sc in back loops only
Round 9
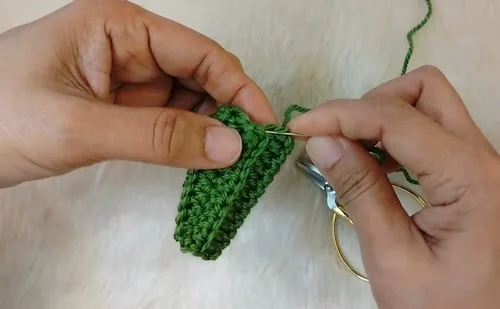
Ch 1, turn, sl st both ends together to form a tube Fasten off and leave a long tailStep by step: Sew and close one end of the cactus; insert the yarn needle through to the open end; stuff the cactus with fiberfill; sew the lower sides halfway up to give the cactus shape.
Mini Hat (Brown Yarn)
Hat Pattern
Round 1
6 sc in a magic ring, join. (6 sts)
Round 2
Ch 1, 2 sc in each st around, join. (12 sts)
Round 3
Ch 2, work dc in back loops only around, join. (12 sts)
Round 4
Ch 1, hdc, 2 hdc in back loops only, repeat around, join. (18 sts) Fasten off and weave in ends
Veil (Tulle Fabric)
Lightly sew one end of tulle to shape and set aside.
Bow Tie (Ribbon)
Step by step: Cut 1 inch of ribbon; seal ribbon edges with a lighter; tie a green yarn around the center of the ribbon; secure the knot with fabric glue.
Final Construction
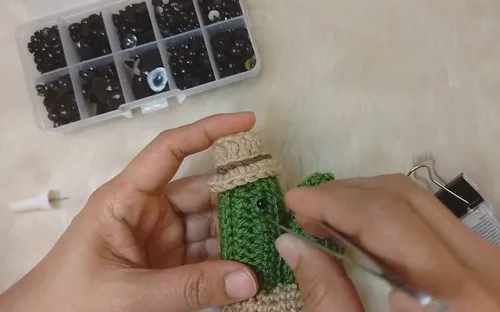
Step by step: Sew the cactus onto the soil circle; attach safety eyes to the cactus; embroider the mouth using red yarn; attach the bow tie to the male cactus; place the mini hat on the male cactus's head; add the lace and veil to the female cactus; secure the veil with fabric glue and let dry; optionally decorate with small plastic birds, gold rings, or other details; trim any excess tulle fabric for neatness.
Check your count
- Base and Soil (Light Brown Yarn) · Round 1: 6 sts
- Base and Soil (Light Brown Yarn) · Round 2: 12 sts
- Base and Soil (Light Brown Yarn) · Round 3: 18 sts
- Base and Soil (Light Brown Yarn) · Round 5: 30 sts
- Pot Body (Light Brown Yarn) · Round 1: 36 sts
- Mini Hat (Brown Yarn) · Round 1: 6 sts
Finish
- Weave in ends from each circle and the pot body separately before assembling, so no tails get trapped inside the stuffing.
- Stuff each cactus body firmly before sealing the tube seam, keeping fiberfill even so the shape stands upright in the pot.
- Sew each finished cactus onto the soil circle, then attach safety eyes and an embroidered mouth, giving the male cactus its hat and bow tie and the female cactus its tulle veil.
Bigger or smaller
- Smaller or taller
- Use the shorter starting chain for a compact cactus body or the taller starting chain for a longer one, adjusting the tube's finished height directly.
Photographs of this one
Every photograph on this page was taken by whoever published the pattern, and they are printed in the order the source listed them.
FAQs
Asked and answered
These answers came from whoever first published the pattern, kept word for word.
Can this cactus pot be made without the wedding trims?
Yes, the base, pot, and cactus body stand on their own as a plain amigurumi cactus. Skip the tulle, ribbon bow, and decorative flower and finish with just the safety eyes and embroidered mouth.
Why does the pattern call for three separate circles?
Two circles form the base for extra structure and stability, while the third becomes the soil layer sewn on top. Working them separately keeps the base sturdy enough to support the pot and cactus once assembled.
What does the galloon bottle cap do in this pattern?
It is an optional support tucked into the base to help the finished piece stand upright. Leave it out if the fiberfill alone holds the shape well enough.
Why are two cactus bodies made instead of one?
The pattern makes a shorter and a taller cactus body so the finished piece can show a couple: the taller male cactus wears the mini hat and bow tie, while the shorter female cactus wears the tulle veil.