 STITCH ROUND
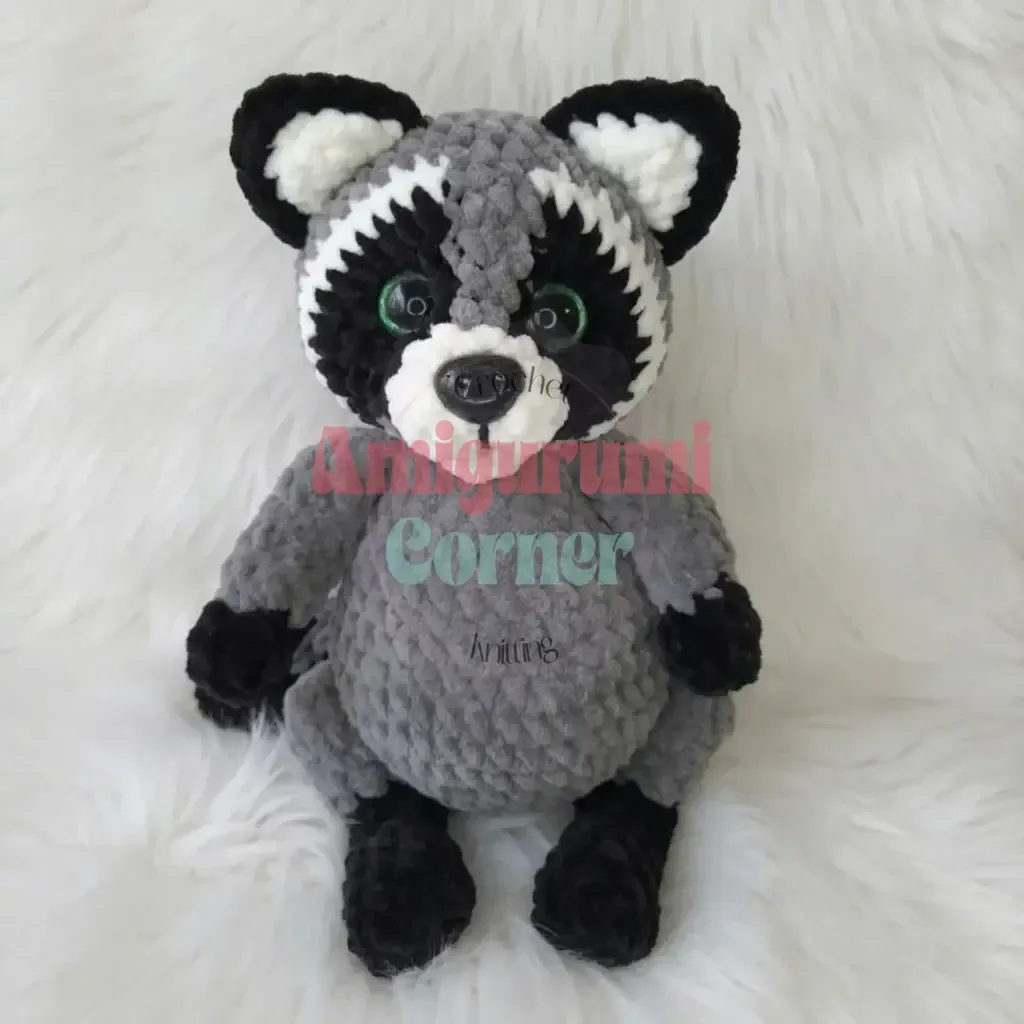
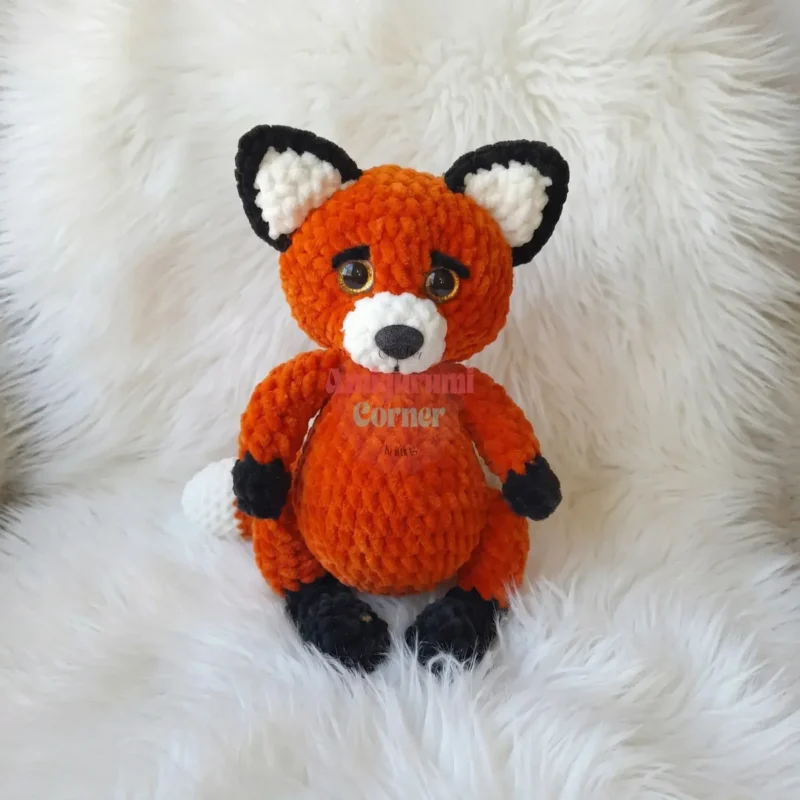
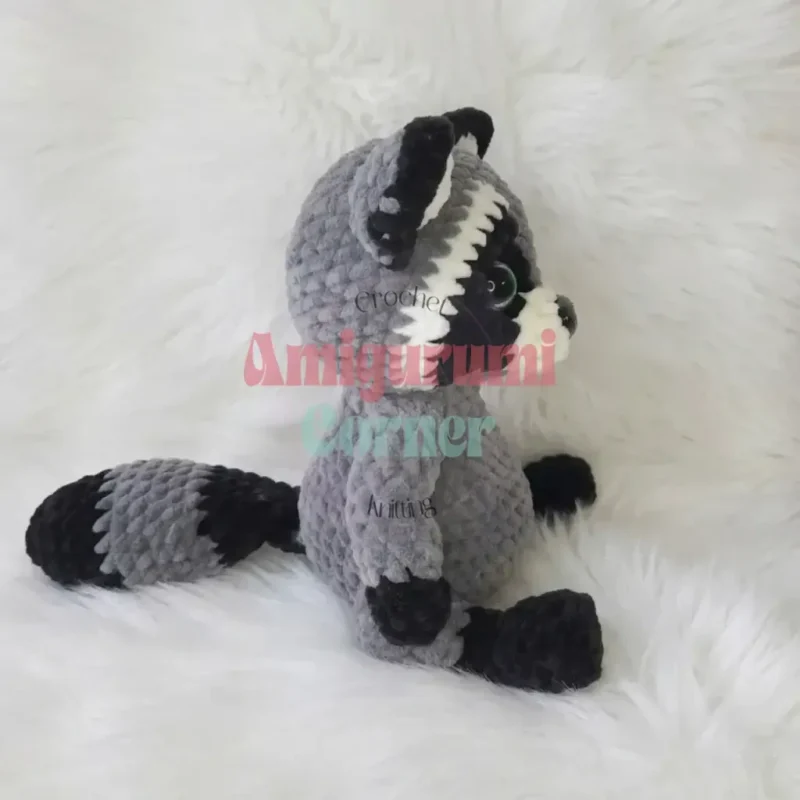
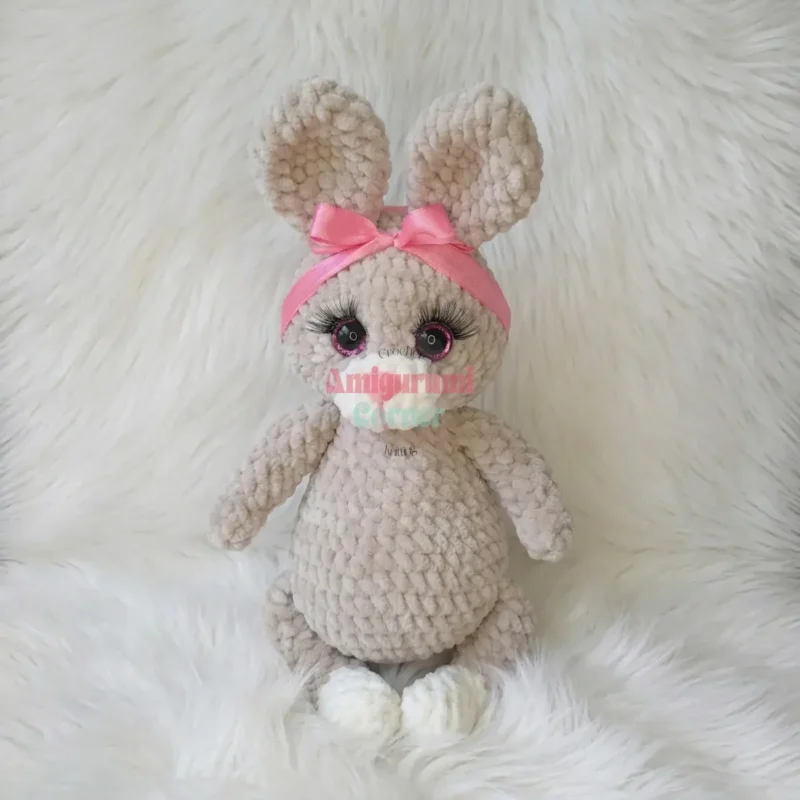
 Fox, raccoon, and bunny amigurumi plushy pattern
19 rounds shape the body for this fox, raccoon, and bunny amigurumi plushy.
- Skill
- Intermediate
- Rounds
- 96 rounds
- Yarn weight
- Bulky
- Hook
- 4 mm
- Time
- 6-9 hours

Intermediate
What the original page called it. Nothing here is graded a second time.

96 rounds
Each one gets its own line, with a box beside it to tick as you go.

Bulky
What the sample was made in. Any weight works — the size moves with it.
About this pattern
This plush build turns into a fox, raccoon, or bunny from one shared set of parts. The body takes 19 rounds, the head 15, and each upper arm 13. Lower legs run 17 rounds apiece, and the tail matches the body at 19. Ears differ by animal: fox and raccoon ears are flat two-piece pairs worked over 5 rows each, while bunny ears are worked in the round over 8 rounds.
- Start each limb, ear, and tail piece on its own before any assembly begins.
- Build the body first, working it in a continuous spiral from base to neck.
- Work the head separately, inserting the safety eyes before closing it up.
- Pick fox, raccoon, or bunny ears and a matching tail, since these parts vary by animal.
- Stuff every piece firmly before sewing it to the body in the order given.
- Shape the face and markings last, giving each animal its own muzzle and coloring.
What goes wrong
- Mismatched ear pieces Pin the two flat fox or raccoon ear pieces together before sewing so the black-to-white color block lines up on both sides.
- Losing the spiral round Keep a stitch marker in the first stitch of every round on the body, head, arms, legs, and tail, since none of these rounds are joined.
- Closing the head too soon Insert the safety eyes while the head opening is still wide and the piece is unstuffed. Fit cannot be adjusted once the back seam is closed.
Yarn, hook and the rest
Copied from the source pattern's own materials list.
- Plush yarn (bulky weight) in main color — Himalaya Dolphin Baby or YarnArt Dolce recommended
- Black plush yarn (for paw pads, raccoon markings, fox tail tip)
- White plush yarn (for muzzle area on all three animals)
- Gray plush yarn (for raccoon markings, if applicable)
- Size G (4 mm) crochet hook
- 16 mm safety eyes (1 pair)
- Polyester fiberfill stuffing
- Sewing needle and scissors
- Stitch marker
- Long tapestry needle for assembly and facial sculpting thread
Progress tracker
0 of the 96 rounds on this page are ticked.
The pattern, round by round
Kept in the order and the wording the source used. Tick a round as you finish it; the ticks stay on this device.
Ears — Fox / Raccoon (Make 2 ears, 2 pieces each)
Work in flat turning rows. Crochet two identical pieces per ear, then join them.
Step by step: Begin with black yarn.
Round 1
Ch 2, work 3 sc into the first ch from hook, ch 1, turn.
Round 2
1 sc, 1 inc, 1 sc, ch 1, turn. (4)
Round 3
1 inc, 2 sc, 1 inc, ch 1, turn. (6)Step by step: Switch to color-work section: Black (B), Gray (G), White (W).B: 2 inc, inc working (1B+1G), inc working (1G+1B), B: 2 inc, 1 sc, G: 5 sc, B: 1 shift st. (18)Step by step: B: 2 sc, 2 inc, G: 2 sc, B: 1 sc, 2 inc, 3 sc, G: 5 sc, B: 1 sc. (22).B: (1 sc, 1 inc) × 3, G: 1 sc, 1 inc, 1 sc, B: (1 inc, 1 sc) × 3, inc working (1B+1G), G: 6 sc. (30)Step by step: B: 3 inc, 6 sc, G: 4 sc, B: 7 sc, 2 inc, inc working (1B+1G), G: 7 sc. (36).G: 1 sc, W: (1 inc, 1 sc) × 3, 6 sc, G: 6 sc, W: 7 sc, (1 sc, 1 inc) × 2, 1 sc, G: 1 inc, 7 sc. (42)Step by step: 42 sc. Work BLO only in white color sections. (42).42 sc. (3 rounds) Insert 16 mm safety eyes between Rnds 7 and 8, positioned between the two increase groups in Rnd 7.
Round 4
6 sc. (6)
Round 5
Hold both ear pieces together and work around the edges, leaving the base open: 4 sc, 3 sc in tip, 4 sc. (11)
Bunny Ears (Make 2)
Round 1
Ch 2, work 6 sc into the second ch from hook. (6)
Round 2
6 inc. (12)
Round 3
(1 sc, 1 inc) × 6. (18)
Round 4
(2 sc, 1 inc) × 6. (24)
Rounds 5–7
24 sc. (3 rounds)
Round 8
(2 sc, 1 dec) × 6. (18)
Rounds 9–10
18 sc. (2 rounds)
Round 11
Fold flat and seam closed by working through both layers: 9 sc. Fasten off, leave tail for sewing.Step by step: Switch to main color yarn.
Upper Arms (Make 2)
Begin with black yarn (fox and raccoon); use main color yarn for bunny.
Round 1
4 sc in mr. (4)
Round 2
4 inc. (8)
Round 3
(1 sc, 1 dec) × 4. (4)Switch to main color yarn.
Round 4
(1 sc, 1 inc) × 4. (8)
Round 5
8 sc. (8)
Round 6
8 sc. (8)
Round 7
2 sl st, 2 sc, 2 hdc, 2 sc. (8)
Round 8
2 sl st, 2 sc, 2 hdc, 2 sc. (8)
Round 9
3 sc, 2 hdc, 2 sc. (8)
Round 10
8 sc. (8)
Round 11
8 sc. (8)
Round 12
1 dec, 2 sc, 1 dec, 2 sc. (6)Step by step: Switch to black yarn.
Round 13
Fold flat and seam through both layers: 3 sc. Fasten off, leave tail for sewing.
Lower Legs (Make 2)
Begin with black yarn (fox and raccoon); use white yarn for bunny.
Round 1
4 sc in mr. (4)
Round 2
1 inc, 1 sc, 3 sc in 1 st, 2 sc. (9)
Rounds 3–5
9 sc. (3 rounds)
Round 6
1 sc, 2 dec, 4 sc. (7)
Round 7
7 sc, 1 shift st.
Round 8
4 sc, ch 1, turn.
Round 9
1 sc, 1 dec, 1 sc.
Round 10
Working in the round: 1 dec, 2 sc, 2 dec. (4)
Round 11
6 sc. Switch to main color yarn.
Round 12
(1 sc, 1 inc) × 3. (9)
Round 13
9 sc. (9)
Round 14
9 sc. (9)Work 1 sl st. Fasten off, leave a long tail for sewing. Lightly stuff and sew to body, concealing any color transition.
Round 15
(2 sc, 1 inc) × 3. (12)
Round 16
12 sc. (12)
Round 17
6 dec. (For jointed version — insert joint hardware between Rnds 12 and 13.) (6)
For sewn-in (non-jointed) version, continue from Rnd 14:
Round 18
1 dec, 4 sc, 1 dec, 4 sc. (10)
Round 19
1 dec, 3 sc, 1 dec, 3 sc. (8)Rnd 20: Fold flat and seam through both layers. Fasten off.
Fox Tail
Begin with black yarn.
Round 1
6 sc in mr. (6)
Round 2
6 inc. (12)
Round 3
(1 sc, 1 inc) × 6. (18)
Round 4
18 sc. (18)
Round 5
(5 sc, 1 inc) × 3. (21)
Round 6
21 sc. (21)
this … Switch to main color yarn.
Round 7
(6 sc, 1 inc) × 3. (24)
Round 8
24 sc. (24)
Round 9
24 sc. (24)
Round 10
(6 sc, 1 dec) × 3. (21)
Round 11
21 sc. (21)
Round 12
(5 sc, 1 dec) × 3. (18)
Round 13
18 sc. (18)
Round 14
18 sc. (18)
Round 15
(4 sc, 1 dec) × 3. (15)
Round 16
15 sc. (15)
Round 17
(3 sc, 1 dec) × 3. (12)
Round 18
12 sc. (12)
Round 19
Fold flat and seam through both layers: 6 sc. Fasten off, leave tail for sewing.
Body
Round 1
6 sc in mr. (6)
Round 2
6 inc. (12)
Round 3
(1 sc, 1 inc) × 6. (18)
Round 4
(2 sc, 1 inc) × 6. (24)
Round 5
(3 sc, 1 inc) × 6. (30)
Round 6
(4 sc, 1 inc) × 6. (36)
Round 7
(5 sc, 1 inc) × 6. (42)
Round 8
If using jointed legs, insert joint hardware between Rnds 6 and 7 now. 42 sc. (42)
Round 9
6 sc while incorporating tail and legs into this round, 36 sc. (42)
Round 10
42 sc. (42)
Round 11
(5 sc, 1 dec) × 6. (36)
Round 12
36 sc. (36)
Round 13
(4 sc, 1 dec) × 6. (30)
Round 14
30 sc. (30)
Round 15
(3 sc, 1 dec) × 6. (24)
Round 16
24 sc. (24)
Round 17
(2 sc, 1 dec) × 6. (18)
Round 18
18 sc. (18)
Round 19
18 sc. (18)Rnd 20: Incorporate upper arms into this round as you work. Fasten off, leave tail for closing.
Head — Fox / Bunny
Begin with white yarn for the muzzle.
Round 1
Ch 4, begin in second ch from hook: 1 inc, 1 sc, 3 sc in last ch, 2 sc. (8)
Round 2
(1 sc, 1 inc) × 4. (12)
Round 3
12 sc, 1 shift st. (12)Switch to main color yarn.
Round 4
6 inc, 6 sc, 1 shift st. (18)
Round 5
2 sc, 2 inc, 3 sc, 2 inc, 9 sc. (22)
Round 6
(1 sc, 1 inc) × 8, 6 sc. (30)
Round 7
3 inc, 17 sc, 3 inc, 7 sc. (36)
Round 8
(1 sc, 1 inc) × 3, 17 sc, (1 sc, 1 inc) × 3, 7 sc. (42)
Rounds 9–12
42 sc. (4 rounds) Insert 16 mm safety eyes between Rnds 7 and 8, positioning them between the two increase groups in Rnd 7.
Round 13
(5 sc, 1 dec) × 6. (36)
Round 14
(4 sc, 1 dec) × 6. (30)
Round 15
(3 sc, 1 dec) × 6. (24)
Round 16
(2 sc, 1 dec) × 6. (18)
Round 17
(1 sc, 1 dec) × 6. (12)
Round 18
6 dec. (6) Fasten off and close.
Join
Step 1Legs: Attach the lower legs to the bottom of the body at Rnd 6–7, evenly spaced. If using joint hardware, secure discs firmly before continuing.
Step 2Tail: Sew the tail to the center back lower body, aligning the open seamed edge flush with the body fabric.
Step 3Head: Stuff the head firmly and evenly. Sew the head to the top of the body, centering it carefully and matching the muzzle to the front.
Step 4Upper Arms: Flatten each arm and pin to the upper sides of the body at Rnd 17–18. Sew securely all around the flat edge.
Step 5Ears (Fox/Raccoon): Pinch the base of each ear slightly to create a natural curve. Sew to the top of the head, spacing evenly.
Step 6Bunny Ears: Sew the flat seamed base of each ear to the top of the head, angling them slightly outward.
Step 7Facial Details: Use a long needle and matching thread to sculpt the muzzle area by making small hidden stitches through the head. Add an embroidered nose if desired.
Step 8Bunny Tail: Sew the lightly stuffed tail to the lower back center, hiding the color join underneath.
Check your count
- Ears — Fox / Raccoon (Make 2 ears, 2 pieces each) · Round 2: 4 sts
- Ears — Fox / Raccoon (Make 2 ears, 2 pieces each) · Round 3: 6 sts
- Ears — Fox / Raccoon (Make 2 ears, 2 pieces each) · Round 4: 6 sts
- Ears — Fox / Raccoon (Make 2 ears, 2 pieces each) · Round 5: 11 sts
- Bunny Ears (Make 2) · Round 1: 6 sts
- Bunny Ears (Make 2) · Round 2: 12 sts
Finish
- Stuff the head, body, arms, legs, and tail firmly and evenly, checking for soft spots that would show through the plush yarn.
- Close each opening with the tapestry needle, then attach ears, arms, legs, and tail to the body, centering the muzzle to the front.
Bigger or smaller
- Larger
- Repeat one of the straight rounds on the body or lower legs an extra time before moving on. This lengthens that section without touching the shaping rounds.
Photographs of this one
Every photograph on this page was taken by whoever published the pattern, and they are printed in the order the source listed them.
FAQs
Asked and answered
These answers came from whoever first published the pattern, kept word for word.
Can the same pattern make a fox, raccoon, or bunny?
Yes, the body, upper arms, and lower legs are shared across all three animals. Only the ears, tail, and face markings change between versions.
Do the ears get worked flat or in the round?
Fox and raccoon ears are worked in flat turning rows and sewn as two matching pieces per ear. Bunny ears are worked in continuous rounds instead.
When should the safety eyes go in?
Insert the safety eyes into the head before closing it up, while the opening is still wide enough to position them evenly. Stuff the head only after the eyes are locked in place.
Does the pattern use joined rounds or a spiral?
The body, head, arms, legs, and tail are all worked in a continuous spiral unless the instructions state otherwise. A stitch marker keeps track of where each round starts.