 STITCH ROUND
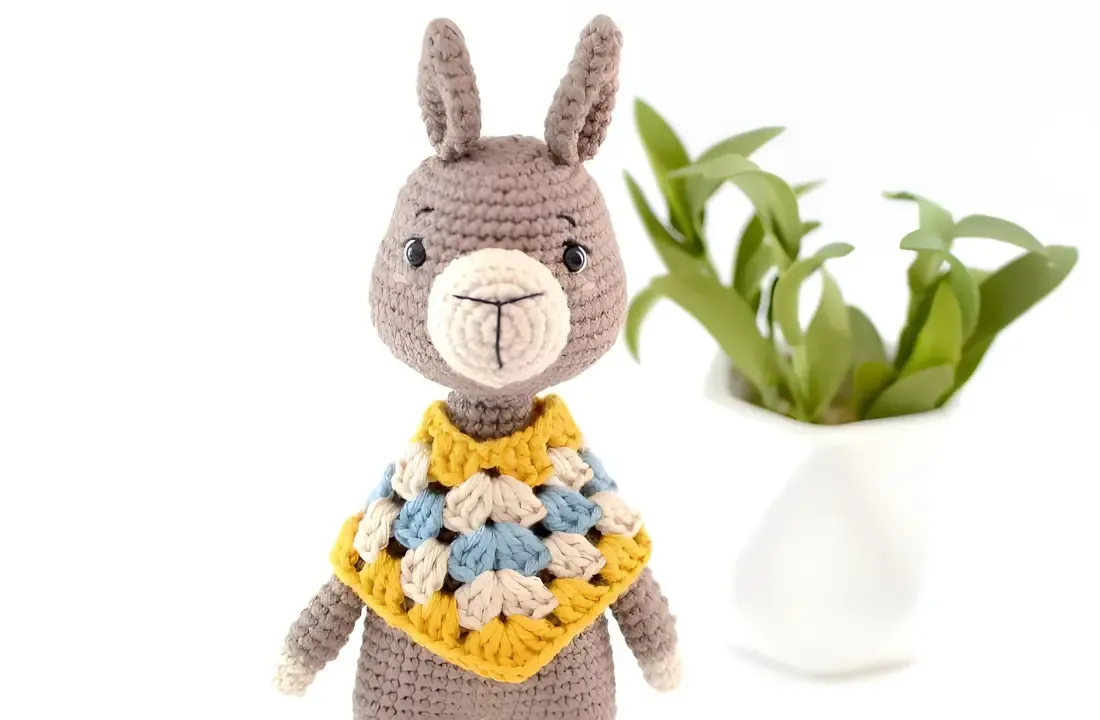
 Crochet llama amigurumi with shaped muzzle and ears
28 rounds to tick off for a small crochet llama with shaped head, muzzle and ears.
- Skill
- Intermediate
- Rounds
- 28 rounds
- Yarn weight
- Worsted
- Hook
- 2.75 mm
- Time
- 4-6 hours

Intermediate
What the original page called it. Nothing here is graded a second time.

28 rounds
Each one gets its own line, with a box beside it to tick as you go.

Worsted
What the sample was made in. Any weight works — the size moves with it.
About this pattern
This llama builds from three separate pieces: a 16-round head, a 5-round muzzle, and a set of 7-round ears. Each piece is a short, self-contained rise from a magic ring, so there is a clear point to stop and check progress after every round. The head carries the bulk of the work, while the muzzle and ears go quickly once the increase pattern is familiar.
All three pieces share the same increase logic: single crochet rounds that add stitches at evenly spaced intervals, building outward from a tight center. The muzzle is the place to slow down, since its stitch count needs to sit correctly against the head before the face reads as a llama rather than a plain ball. Watch the transition from increase rounds into the even rounds on the muzzle, where the shape settles into its final width.
- Start the head with a magic ring and work steady increase rounds to build a rounded dome.
- Continue the head through its full set of rounds before setting it aside.
- Fasten off the muzzle and leave a long strand for sewing it in place later.
- Make the single ear piece, increasing every round to shape a small curved cone.
- Bring the head, muzzle and ear together once all pieces are complete.
What goes wrong
- Losing count during increase rounds Place a stitch marker at the start of each round and count the repeat groups out loud as they're worked. Recount before moving to the next round rather than after.
- Muzzle stuffed too firmly Since the muzzle sits inside a completed head rather than standing alone, pack it just enough to hold shape without straining the seam. Add filler gradually and check the fit against the head before closing.
- Ear shaping worked unevenly Each ear increase round adds stitches at two points only, so an off-count repeat shows up as a lopsided cone. Lay the piece flat after each round to confirm both sides match.
- Long yarn tail cut too short The muzzle is meant to be fastened off with a long strand for sewing, not a standard tail. Leave extra length before cutting so there's enough to attach the piece securely.
Yarn, hook and the rest
Copied from the source pattern's own materials list.
- 2.75 mm crochet hook
- Yarn needle
- Two 6 mm black plastic safety eyes
- Light (3) weight yarn in Brown, Beige, Yellow, Blue and Pink
- Classic Cotton thread in Black and White
- Poly filling (stuffing)
Progress tracker
0 of the 28 rounds on this page are ticked.
The pattern, round by round
Kept in the order and the wording the source used. Tick a round as you finish it; the ticks stay on this device.
HEAD (Brown yarn)
Round 1
8 sc in a mr (8)
Round 2
sc inc around (16)
Round 3
(1 sc, 1 sc inc) rep around (24)
Round 4
(2 sc, 1 sc inc) rep around (32)
Round 5
(3 sc, 1 sc inc) rep around (40)
Rounds 6–10
sc even (40)
Round 11
(4 sc, 1 sc inc) rep around (48)
Round 12
sc even (48)
Round 13
(5 sc, 1 sc inc) rep around (56)
Rounds 14–16
sc even (56)Insert safety eyes between rnds #9/10, 10 sts apart.
Round 17
(5 sc, 1 sc dec) rep around (48)
Round 18
(4 sc, 1 sc dec) rep around (40); start stuffing the head
Round 19
(3 sc, 1 sc dec) rep around (32)
Round 20
(2 sc, 1 sc dec) rep around (24)
Round 21
(2 sc, 1 sc dec) rep around (18)
Round 22
(4 sc, 1 sc dec) rep around (15); F/O, cut the yarn and finish stuffing the head firmly.
MUZZLE (Beige yarn)
Round 1
6 sc in a mr (6)
Round 2
sc inc around (12)
Round 3
(1 sc, 1 sc inc) rep around (18)
Round 4
(2 sc, 1 sc inc) rep around (24)
Rounds 5–7
sc even (24); F/O and leave a long strand of yarn.
EARS (Brown yarn)
Round 1
4 sc in a mr (4)
Round 2
(1 sc, 1 sc inc) rep twice (6)
Round 3
(2 sc, 1 sc inc) rep twice (8)
Round 4
(3 sc, 1 sc inc) rep twice (10)
Round 5
4 sc, 1 sc inc) rep twice (12)
Rounds 6–8
sc even (12)
Round 9
flatten the ear and crochet through both layers now, 6 sc (6)
F/O and leave a long strand of yarn.
Check your count
- HEAD (Brown yarn) · Round 4: 32 sts
- HEAD (Brown yarn) · Round 12: 48 sts
- HEAD (Brown yarn) · Round 19: 32 sts
- HEAD (Brown yarn) · Round 21: 18 sts
- MUZZLE (Beige yarn) · Round 1: 6 sts
- MUZZLE (Beige yarn) · Round 2: 12 sts
Finish
- Weave in the starting tail from each magic ring before stuffing, so nothing works loose later.
- Stuff the head firmly while working the final rounds, adding fiberfill in small amounts to keep the shape even rather than lumpy.
- Use the long strand left on the muzzle to sew it onto the head, then attach the ear at the point that matches the llama's proportions before closing off any remaining opening.
Bigger or smaller
- Smaller
- Drop to a finer yarn with the 2.75 mm hook and keep every round as written; a smaller hook with the same stitch counts pulls the fabric tighter and shrinks the finished llama.
- Finished size
- About 8 in x 4 in (20 x 10 cm) as designed with the materials listed.
FAQs
Asked and answered
These answers came from whoever first published the pattern, kept word for word.
Do the head and muzzle get worked separately or together?
They are worked as two separate pieces, each starting from its own magic ring. The muzzle is fastened off with a long strand specifically so it can be sewn onto the finished head afterward.
How many ears does the pattern make?
The pattern lists a quantity of one for the ear part, so the same 7-round instructions need to be worked twice to get a matching pair.
When should safety eyes go in?
Safety eyes are easiest to place while the head is still open enough to reach inside and secure the backing washer. Position them before the final stuffing and closing rounds are worked.