 STITCH ROUND
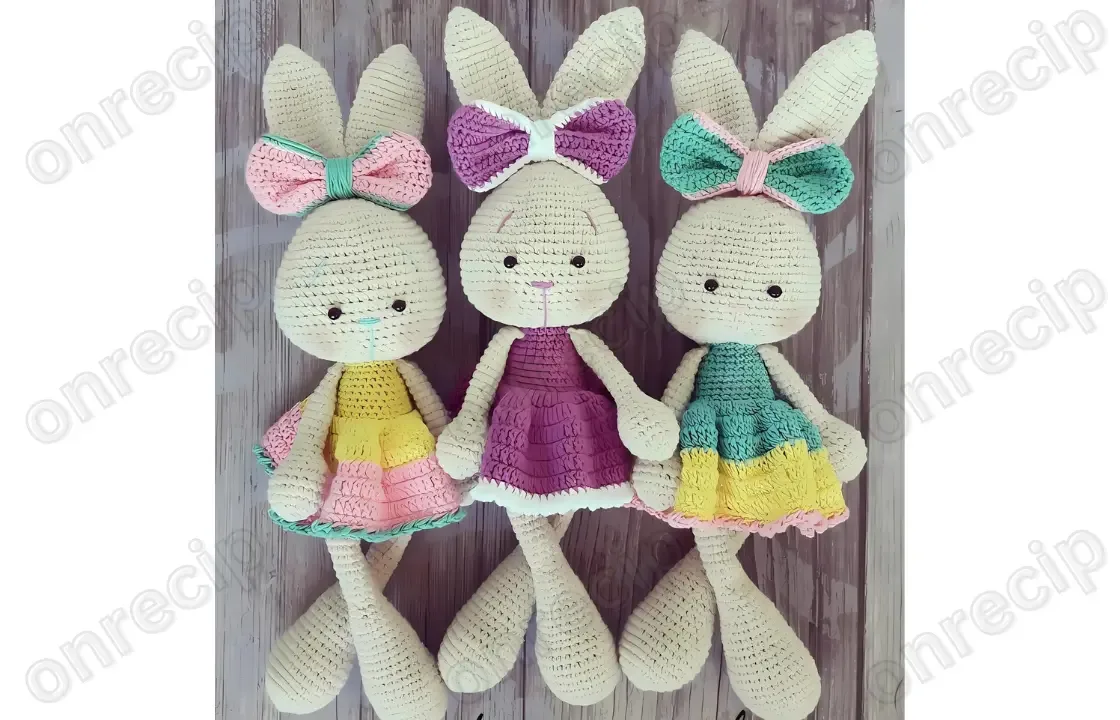
 Amigurumi bunny crochet pattern with shaped ears
100 rounds total to tick off across head, ears and body for this amigurumi bunny.
- Skill
- Intermediate
- Rounds
- 61 rounds
- Yarn weight
- Worsted
- Hook
- 2.0 mm
- Time
- 4-6 hours

Intermediate
What the original page called it. Nothing here is graded a second time.

61 rounds
Each one gets its own line, with a box beside it to tick as you go.

Worsted
What the sample was made in. Any weight works — the size moves with it.
About this pattern
This amigurumi bunny builds from three separate pieces: a head worked over 26 rounds, a body worked over 25 rounds, and a pair of ears worked over 49 rounds each. Every part starts the same way, with a magic ring, before branching into its own shaping sequence. Working the three pieces in one sitting keeps stitch tension consistent across the finished toy.
Shaping happens fast at the start of the head and body, where increase rounds stack up quickly to build the rounded base shape. The ears shift gears partway through, holding a steady stitch count for a stretch of rounds before increasing again to flare out. Slow down at these transition rounds, since that is where the increase pattern changes and a missed one shows in the finished silhouette.
- Start the head with a magic ring and work through a run of increase rounds to build its rounded shape.
- Continue the head pattern through its full set of rounds before setting it aside to stuff and close.
- Work the body starting from another magic ring, following the same early increase sequence as the head.
- Make both ears as matching pairs, each starting small and increasing after a short flat section.
- Stuff the head and body pieces once their rounds are complete, keeping the fill even and firm.
- Join the ears, head and body together to complete the bunny once all three pieces are finished.
What goes wrong
- Losing count during increase rounds Increase rounds on the head and body stack quickly, so count stitches after every round rather than at the end. A stitch marker on the first stitch of each round makes this easier to check.
- Missing the ear's plain rounds The ears hold a steady stitch count for a run of rounds before increasing again, and it is easy to increase too early. Check the pattern for that flat section before moving into the next increase round.
- Uneven stuffing in curved shapes The rounded shaping on the head and body needs fill pushed into the curve, not just the center. Add small amounts at a time and check the outer shape as stuffing builds up.
- Loose magic ring start All three pieces begin with a magic ring, and a loose pull leaves a visible hole at the very center. Pull the ring tail snug before working the first stitches into it.
Yarn, hook and the rest
Copied from the source pattern's own materials list.
- YarnArt Jeans yarn, main color (a little more than one skein needed)
- 2.0 mm crochet hook
- YarnArt Jeans yarn, additional color for the dress (less than one skein needed)
- Stuffing (fiberfill), for filling the head and body
- Safety eyes, placed between rounds 15 and 16 of the head
- Yarn needle, for embroidering the nose and sewing pieces together
Progress tracker
0 of the 61 rounds on this page are ticked.
The pattern, round by round
Kept in the order and the wording the source used. Tick a round as you finish it; the ticks stay on this device.
Head
Work the head using white yarn.
Round 1
6 sc in MR (6)
Round 2
increase in each stitch (12)
Round 3
(1 sc, inc) *6 (18)
Round 4
(2 sc, inc) *6 (24)
Round 5
(3 sc, inc) *6 (30)
Round 6
(4 sc, inc) *6 (36)
Round 7
(5 sc, inc) *6 (42)
Rounds 8–9
42 sc (2 rows)
Round 10
(6 sc, inc) *6 (48)
Rounds 11–12
48 sc (2 rows)
Round 13
(7 sc, inc) *6 (54)
Rounds 14–20
54 sc (6 rows)
Round 21
(7 sc, dec) *6 (48)
Round 22
(6 sc, dec) *6 (42)
Round 23
(5 sc, dec) *6 (36)
Round 24
(4 sc, dec) *6 (30)
Round 25
(3 sc, dec) *6 (24)
Round 26
(2 sc, dec) *6 (18)Fasten off, leaving a long tail for sewing. Stuff the head. Embroider the nose.Place the eyes between rows 15 and 16.
Ears (Make 2)
Work the ears using white yarn; make 2 matching pieces.
Round 1
5 sc in MR (5)
Round 2
5 sc (5)
Round 3
increase in each stitch (10)
Rounds 4–5
10 sc (2 rows)
Round 6
(1 sc, inc) *5 (15)
Rounds 7–8
15 sc (2 rows)
Round 9
(1 sc, inc) *7, 1 sc (22)
Rounds 10–14
22 sc (5 rows)
Round 15
(dec, 9 sc) *2 (20)
Rounds 16–17
20 sc (2 rows)
Round 18
(dec, 8 sc) *2 (18)
Round 19
18 sc
Round 20
(dec, 7 sc) *2 (16)
Rounds 21–23
16 sc (3 rows)
Round 24
(dec, 6 sc) *2 (14)
Rounds 25–27
14 sc (3 rows)
Round 28
(dec, 5 sc) *2 (12)
Rounds 29–31
12 sc (3 rows)
Round 32
(dec, 4 sc) *2 (10)
Rounds 33–42
10 sc (10 rows)
Round 43
(dec, 3 sc) *2 (8)
Rounds 44–49
8 sc (6 rows)Fasten off, leaving a long tail for sewing.
Body
Work the body using purple yarn.
Round 1
6 sc in MR (6)
Round 2
increase in each stitch (12)
Round 3
(1 sc, inc) *6 (18)
Round 4
(2 sc, inc) *6 (24)
Round 5
(3 sc, inc) *6 (30)
Round 6
(4 sc, inc) *6 (36)
Rounds 7–9
36 sc (3 rows)
Round 10
(16 sc, dec) *2 (34)
Round 11
(15 sc, dec) *2 (32)
Round 12
32 sc (working in the back loop only)
Round 13
32 sc
Round 14
(14 sc, dec) *2 (30)
Round 15
(13 sc, dec) *2 (28)
Rounds 16–17
28 sc (2 rows)
Round 18
(12 sc, dec) *2 (26)
Round 19
(11 sc, dec) *2 (24)
Rounds 20–21
24 sc (2 rows)
Round 22
(10 sc, dec) *2 (22)
Round 23
(9 sc, dec) *2 (20)
Round 24
20 sc
Round 25
(8 sc, dec) *2 (18)
Check your count
- Head · Round 5: 30 sts
- Head · Round 21: 48 sts
- Head · Round 26: 18 sts
- Ears (Make 2) · Round 6: 15 sts
- Ears (Make 2) · Round 20: 16 sts
- Ears (Make 2) · Round 43: 8 sts
Finish
- Weave in the starting and ending tails on the head, body and both ears before joining any pieces.
- Stuff the head and body firmly and evenly, working fill into the rounded shaping areas so no dents show.
- Attach both ears to the head at the finished position, then close the head and body openings neatly.
Bigger or smaller
- Smaller
- Use a lighter yarn weight and a smaller hook to tighten the gauge, shrinking the head, body and ears while keeping the same round-by-round shaping.
- Finished Size
- As written, using the 2.0 mm hook and YarnArt Jeans yarn listed in the materials, this bunny measures about 30 cm tall.
FAQs
Asked and answered
These answers came from whoever first published the pattern, kept word for word.
How many pieces does this bunny have?
The pattern makes three parts: one head, one body, and two matching ears. Each piece is worked separately before joining.
Do the ears take longer than the head?
Each ear runs to 49 rounds, well beyond the head's 26 rounds, and there are two ears to make. Budget extra time for the pair.
Where does the shaping change on the ears?
The ears hold a steady round count for a long stretch before increasing again to flare the shape. That transition point is where careful counting matters most.