 STITCH ROUND
 Crochet puppy amigurumi in one continuous piece
14 rounds to tick off for a one-piece plush puppy with sculpted muzzle and safety features.
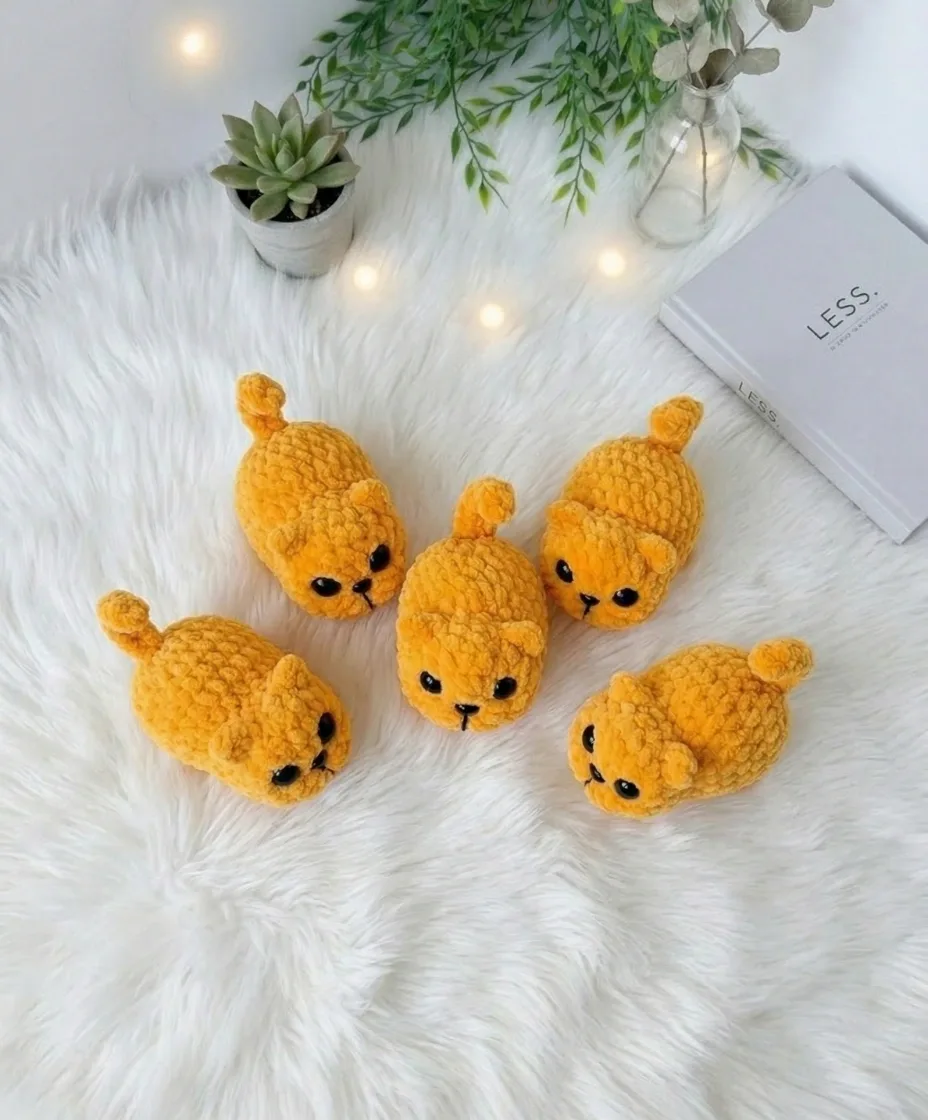
- Skill
- Intermediate
- Rounds
- 14 rounds
- Yarn weight
- Worsted
- Hook
- 4.0 mm
- Time
- 4-6 hours

Intermediate
What the original page called it. Nothing here is graded a second time.

14 rounds
Each one gets its own line, with a box beside it to tick as you go.

Worsted
What the sample was made in. Any weight works — the size moves with it.
About this pattern
This puppy grows from a single magic ring to a finished plush in 14 rounds, with head, body, and tail all worked as one continuous piece. There is no separate assembly of limbs or panels here — every round adds to the same spiral, so progress is easy to track and there is a clear sense of the shape building with each pass of the hook.
The early rounds increase quickly to build out the head, then settle into steadier shaping through the body before tapering toward the tail. The rounds right around where the eyes get placed deserve extra attention, since stitch placement there sets the whole face before the muzzle gets sculpted and the nose goes in.
- Start with a magic ring and build the head through a run of increase rounds.
- Mark the first stitch of every round to keep the spiral honest without joining.
- Place the safety eyes between the early rounds while the head opening is still easy to reach.
- Continue the spiral down through the body, stuffing firmly as the piece closes in.
- Shape the muzzle with thread once the body is complete, then set the safety nose.
- Taper the final rounds to close the tail end and finish the plush.
What goes wrong
- Losing track of the round start Drop a stitch marker into the first stitch of every round before moving on, since the whole body is worked in a continuous spiral with no joins to mark the boundary.
- Stuffing too late Add fiberfill gradually as each section closes rather than trying to pack it all in at the end. Once the head narrows into the body, reaching back to add stuffing gets much harder.
- Setting the eyes off-center Check the eye position against both sides of the head before pushing the safety backs on, since they need to sit snugly between the early head rounds to read as symmetrical.
- Rushing the muzzle sculpting Work the cinching thread slowly and check the shape from the front as it tightens. Pull too fast and the muzzle can pucker unevenly instead of rounding out smoothly.
Yarn, hook and the rest
Copied from the source pattern's own materials list.
Yarn
- Plush yarn, approx. 120 m / 100 g (worsted-weight equivalent) — one color for the body
Hook
- US G-6 / 4.0 mm
Safety eyes
- 10–12 mm, 1 pair
Safety nose
- 7 × 9 mm, 1 piece
- Fiberfill / stuffing
- Thread for face sculpting (for cinching/shaping the muzzle)
- Stitch marker
- Yarn needle / tapestry needle
- Scissors
Progress tracker
0 of the 14 rounds on this page are ticked.
The pattern, round by round
Kept in the order and the wording the source used. Tick a round as you finish it; the ticks stay on this device.
Puppy Body (worked head to tail, one continuous piece)
Round 1
MR, 6 sc into ring. Pull ring closed. Do not join — work in a continuous spiral. (6)Wait — the source specifies 8 sc into the magic ring.
Round 1
MR, 8 sc into ring. Pull ring closed. (8)
Round 2
Inc in each st around. (16)
Round 3
6 sc, inc, 8 sc, inc. (18)
Round 4
18 sc. (18)
Round 5
Ears: 10 sc, [ear: working into the front loop only of the next stitch: sc, dc, sc] , 4 sc, [ear: working into the front loop only of the next stitch: sc, dc, sc] , 2 sc. (18)
The ears are formed by working sc + dc + sc into the front loop of a single stitch. The back loop of that stitch remains for the next round.
Round 6
In this round, work each stitch into both loops as normal — behind each ear, be sure to work into the remaining back loop of the ear stitch so no stitches are skipped. 10 sc, dec, dec, dec, 2 sc. The three decreases should sit centered at the top of the head. (15)
Round 7
2 sc, [front paw: puff st (4 dc into same st, joined at top)] , 2 sc, [front paw: puff st] , 2 sc, (1 sc, inc) × 3, 1 sc. (18)The three increases should fall along the center back. Now is the time to insert the safety eyes: place them between Rounds 2 and 3, with approximately 5 stitches of space between them.
Round 8
7 sc, (1 sc, inc) × 6. Note: the end of this round shifts forward by 1 sc. The increases should again fall along the center back. (24)
Rounds 9–11
Sc in each st around. (24) (3 rounds total) Begin stuffing the head firmly now. Continue adding fiberfill as you close the body.
Round 12
2 sc, [back paw: puff st] , 3 sc, [back paw: puff st] , 17 sc. (24)
Round 13
Tail: (2 sc, dec) × 4, 1 sc, [tail: ch 8, then working back along the chain from the 3rd ch from hook: hdc, sc, sc, sc, sc, sc, sl st into the base of the tail chain] , 1 sc, dec, 2 sc, dec. (18)Work the tail chain loosely so it curls naturally. After the sl st at the base, continue the round as written.
Round 14
(1 sc, dec) × 6. (12)
Round 15
Dec × 6. (6)Fasten off, leaving a yarn tail. Thread the tail through the front loop of each remaining stitch and pull tight to close the opening. Weave in the end.Score: 0 Can you guess this Pattern?
Join
Step 1Muzzle sculpting: Using a length of thread (matching or invisible), sculpt the muzzle by drawing thread through the face in a figure-eight or cinching motion to your preference. Pull gently until the muzzle has a pleasingly rounded, slightly protruding shape.
Step 2Nose: Insert and secure the 7 × 9 mm safety nose at the center front of the muzzle, positioned just below the sculpted indentation.
Step 3Eyes: Confirm both 10–12 mm safety eyes are secured snugly between Rounds 2 and 3 with the washers pressed firmly on the inside.
Step 4Final closing: Weave in all yarn ends thoroughly. Plush yarn can unravel if ends are not secured with at least two anchor passes through surrounding stitches.
Check your count
- Puppy Body (worked head to tail, one continuous piece) · Round 3: 18 sts
- Puppy Body (worked head to tail, one continuous piece) · Round 7: 18 sts
- Puppy Body (worked head to tail, one continuous piece) · Round 14: 12 sts
- Puppy Body (worked head to tail, one continuous piece) · Round 15: 6 sts
Finish
- Stuff firmly and evenly as the rounds progress, packing extra fill into the head and muzzle before the opening narrows too much to reach.
- Weave in the working end through the last few stitches once the final round is closed, pulling it inside the body so it disappears.
- Sculpt the muzzle with thread in a figure-eight or cinching motion, then set the safety nose just below the sculpted line to lock the shape in place.
Bigger or smaller
- Smaller
- Use a finer worsted-weight yarn with a smaller hook to tighten the gauge, keeping the same round count but shrinking the overall plush.
Photographs of this one
Every photograph on this page was taken by whoever published the pattern, and they are printed in the order the source listed them.
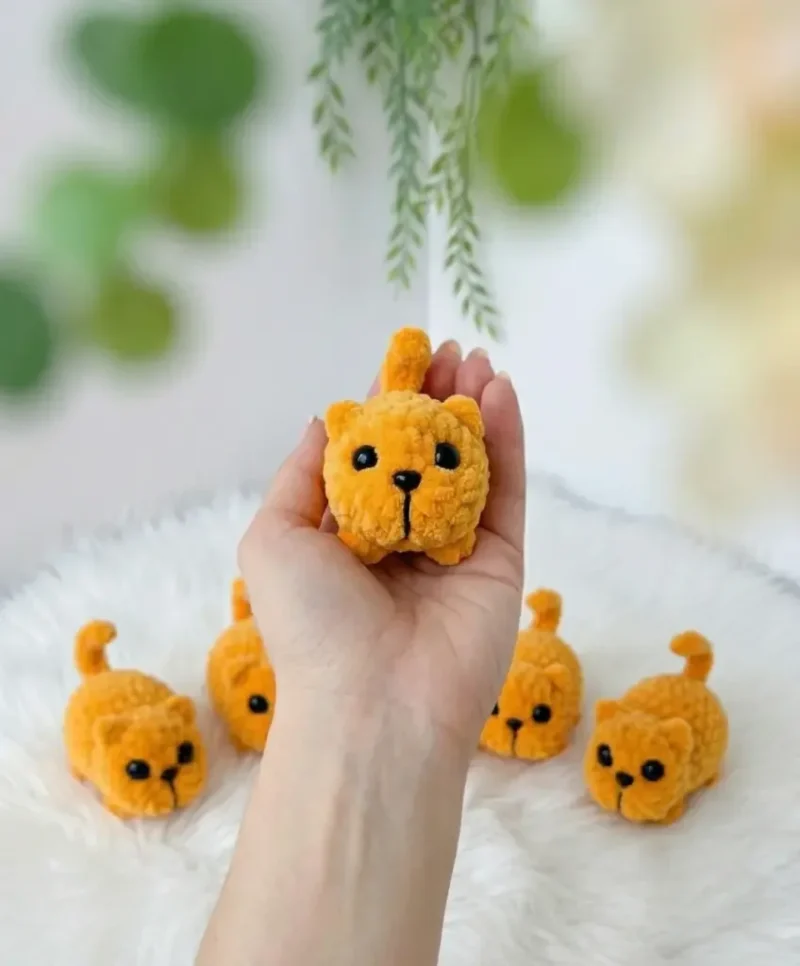
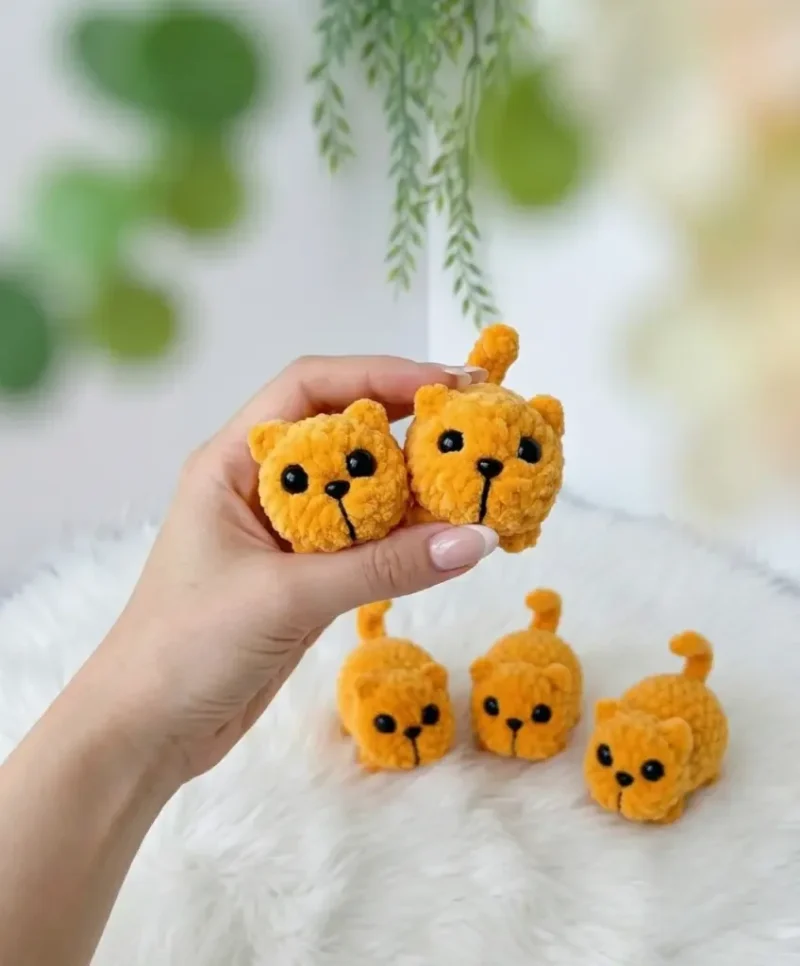
FAQs
Asked and answered
These answers came from whoever first published the pattern, kept word for word.
Does the puppy get joined at the end of each round?
No, the entire body works in a continuous spiral from the first round to the last. A stitch marker in the first stitch of each round is the only way to track where a round begins.
When should the safety eyes go in?
The eyes get secured between the early head rounds while the opening is still wide enough to reach the safety backs from inside. Placing them later makes it much harder to fasten securely.
What does the muzzle sculpting thread actually do?
It draws the flat crocheted face into a rounded, slightly protruding muzzle shape using a cinching or figure-eight motion. This happens after the body is complete, right before the safety nose goes in.
How is tension handled with plush yarn?
Exact gauge is not critical, but the tension should stay tight enough that no fiberfill shows through the stitches. Plush yarn is naturally soft, so a slightly firmer hand than usual keeps the surface clean.