 STITCH ROUND
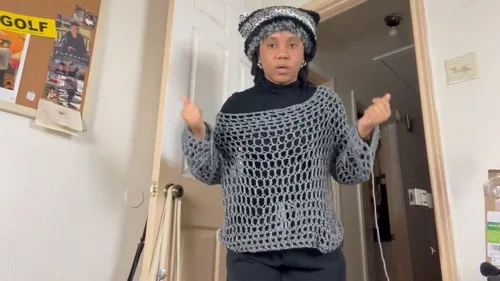
 Mesh shrug top pattern for oversized street layering
12 rounds build the body, 4 more shape each sleeve for an oversized mesh shrug.
- Skill
- Beginner to Intermediate
- Rounds
- 16 rounds
- Yarn weight
- Worsted
- Hook
- 8 mm
- Time
- 4-6 hours

Beginner to Intermediate
What the original page called it. Nothing here is graded a second time.

16 rounds
Each one gets its own line, with a box beside it to tick as you go.

Worsted
What the sample was made in. Any weight works — the size moves with it.
About this pattern
This crochet mesh shrug top works up as one big tube first, with twelve rounds building the open, airy body from the foundation chain to the last mesh round before the armholes get marked. The large double-crochet mesh grows fast thanks to the chunky yarn and oversized hook, so the body section moves quickly from chain to full shoulder width. Once the tube is finished, folding it flat sets up the rest of the construction for marking and sleeves.
Shaping happens in two places: the single increase round that widens the body at four marked points, and the sleeve tapering that works downward from each armhole with decreases at the end of rows. Slow down at the increase round to make sure all four markers get worked evenly, and again at the start and end of each sleeve, where the decrease method controls the taper. Skipping an increase or a decrease throws off the drape, so count rows carefully through those sections.
- Chain a long foundation and join it into a circle to start the mesh body without twisting.
- Build the open mesh pattern upward round by round, turning with a fresh chain after each one.
- Place stitch markers at four points around the folded tube to mark where the body will increase.
- Work the increase round at each marked point so the body widens evenly for front and back.
- Bridge each armhole with a chain and crochet the sleeve downward, tapering with decreases at the row ends.
- Weave in ends and steam block the finished piece to relax the mesh for extra drape.
What goes wrong
- Twisting the foundation chain before joining Check that the long chain lies flat with no twist before slip stitching it closed. A missed twist shows up as a spiral seam running through the whole body.
- Losing the starting ch-4 space each round Watch for the ch-4 at the start of every round and keep it open as you work. The closing slip stitch needs to land in that exact space or the mesh columns drift out of line.
- Missing an increase at a marker Check off all four markers during the increase round before moving on. One skipped marker leaves the body uneven across the front and back.
- Decreasing on the wrong sleeve rounds Only decrease during the designated taper rounds at the start and end of the sleeve. Working a decrease during the even rounds shortens the sleeve more than planned.
Yarn, hook and the rest
Copied from the source pattern's own materials list.
- 8 mm crochet hook
- Size 4 acrylic yarn
- 4 stitch markers
- Scissors
Progress tracker
0 of the 16 rounds on this page are ticked.
The pattern, round by round
Kept in the order and the wording the source used. Tick a round as you finish it; the ticks stay on this device.
Body
Round 1
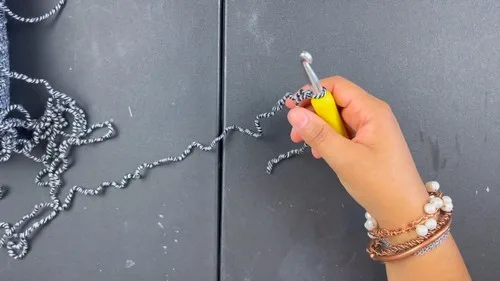
Foundation Chain and Join (Foundation Chain): Make a slip knot and chain 72 (chain the number needed for your measurement if customizing); while chaining, insert hook into the first chain to help prevent twisting; join with a sl st to form a large circle, making sure the chain is not twisted.
Round 2
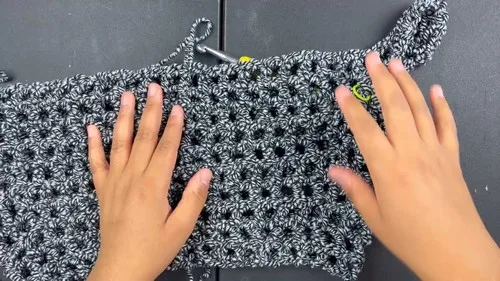
Mesh Round Chain 4 to count as dc and ch 1; skip 1 chain from the foundation; dc into the next chain; ch 1; repeat (skip 1 chain, dc in next chain, ch 1) around; sl st into the center space of the starting ch-4 to close the round; ch 4 and turn.
Round 3
For Mesh Round Work into the chain spaces from the previous row; dc into the next ch-1 space; ch 1; continue (dc in next ch-1 space, ch 1) around; sl st into the center of the starting ch-4 space; ch 4 and turn.
Round 4
Mesh Round Dc into the next ch-1 space; ch 1; repeat (dc in next ch-1 space, ch 1) around; sl st into the center of the starting ch-4 space; ch 4 and turn.Lay the tube flat so it looks like a folded circle before placing markers; place one stitch marker on the left side edge of the fold and one on the right side edge, then place two more markers on the opposite side in the same positions to create the four expansion corners for front and back growth.
Round 5
Increase Round Work the mesh stitch as normal, dc into each ch-1 space with ch 1 after each dc; when you reach a marked point, work an increase (dc, ch 1, dc) into that same chain space; continue mesh stitch until the next marked point; repeat the increase at all four marked points; sl st into the center of the starting ch-4 space; ch 4 and turn.
Round 6
Increase Round Work mesh stitch around; at each of the four marked increase points, work dc, ch 1, dc into the same space, keeping increases stacked above the increases from the previous row; sl st into the starting ch-4 space; ch 4 and turn.
Round 7
For Increase Round Work mesh stitch around; increase at all four marked points; sl st to close the round; ch 4 and turn.
Round 8
Increase Round Work mesh stitch around; increase at all four marked points; sl st to close; ch 4 and turn.
Round 9
Increase Round Work mesh stitch around; increase at all four marked points; sl st to close; ch 4 and turn.
The armhole chain length should match the number of mesh spaces between your markers; in the tutorial example the armhole chain is 19, but use the distance between your own markers as a guide if you adjusted the starting chain or marker positions.
Round 10
Create Armholes Work mesh stitch until reaching the first increase point; work the increase at that marked point; chain 19 loosely (or chain the number needed to span to the next marker on that side); skip the entire side section between those two markers; dc into the next marked increase space to connect the armhole bridge; continue mesh stitch across the back section; when you reach the next increase point, work the increase; chain 19 loosely again for the second armhole bridge; skip the second side section; dc into the next marked space to reconnect; continue mesh stitch until completing the round; sl st into the starting ch-4 space; ch 4 and turn.
Round 11
Work Over Armhole Chains (Work Over Armhole Chains): Work mesh stitch around the body; when you reach an armhole chain bridge, crochet across the chain space working 8 double crochets separated by ch-1 spaces across that armhole chain area, keeping the mesh rhythm consistent; continue mesh stitch around the rest of the body; repeat the same process over the second armhole chain bridge; sl st to close the round; ch 4 and turn.
Round 12
Desired Length Body Only (Desired Length Body Only, repeat for about 10 to 12 rows): Continue working the mesh stitch around with no increases; dc into each ch-1 space; ch 1 after each dc; sl st into the starting ch-4 space at the end of each row; ch 4 and turn after every row; repeat for about 10 to 12 rows or until you reach your preferred shrug length (stop earlier for a cropped shrug, add more rows for a longer shrug).
Sleeve
Sleeves are worked around each armhole opening by attaching yarn at the bottom of the armhole and crocheting mesh rounds downward, with decreases done at the end of rows to taper the sleeve shape.
Repeat the same sleeve steps on the second armhole, matching the number of rows and decreases to keep sleeves symmetrical.
Round 1
Foundation Round Attach yarn to the bottom of the armhole opening; chain 4; work mesh style stitches evenly around the armhole, working 22 double crochets with ch-1 spaces around (adjust the number if your armhole is larger or smaller so the sleeve opening is comfortable); sl st into the center of the starting ch-4 space; ch 4 and turn. (22 dc)
Rounds 2–4
Decrease Rows Work mesh stitch around; at the end of the row, decrease by skipping the last dc post; sl st directly into the starting ch-4 space to close the row and reduce width; ch 4 and turn; repeat this decrease method for three rows total.
Rounds 5–10
Work Even (Work Even): Work mesh stitch around without decreasing; sl st to close each row; ch 4 and turn each row; repeat for six rows or until the sleeve reaches the length you want before tapering again.
Rounds 11–14
Final Taper Work mesh stitch around; decrease at the end of each row using the same method (skip the last post, then sl st to close); ch 4 and turn each row; repeat for the final sleeve rows; fasten off and weave in ends.
Join
Step 1Weave in all ends securely.
Step 2If using acrylic yarn, steam blocking is recommended for maximum drape: hang the shrug on a hanger, steam the fabric evenly letting it relax and lengthen, then allow it to cool and dry fully before wearing.
Finish
- Weave in all loose ends along the mesh spaces so tails stay hidden inside the open stitch pattern.
- Hang the shrug on a hanger and steam the acrylic fabric evenly so the mesh relaxes and lengthens.
- Let the piece cool and dry fully on the hanger before wearing to set the stretched drape in place.
Bigger or smaller
- Larger or smaller overall
- Move up a hook size and the body and sleeves grow wider as the mesh spaces open; move down a hook size and the same yarn pulls the whole piece in tighter.
- Longer sleeves only
- Repeat the sleeve's work-even rounds extra times before the final taper rounds, which adds length to the sleeve without changing the body or the decrease shaping.
Photographs of this one
Every photograph on this page was taken by whoever published the pattern, and they are printed in the order the source listed them.
FAQs
Asked and answered
These answers came from whoever first published the pattern, kept word for word.
What yarn and hook does this mesh shrug use?
The pattern calls for size 4 acrylic yarn worked on an 8 mm hook. That combination keeps the mesh stitches large and open, which is what gives the shrug its drape.
How do the armholes get placed without a fitted pattern piece?
The body tube is laid flat and folded so four stitch markers can mark the fold edges on both sides. Those markers set the four expansion corners and later guide where each armhole chain bridge sits.
Can the sleeve length be adjusted?
Yes, the work-even rounds in the middle of the sleeve can be repeated for more or fewer rounds before the final taper. This changes sleeve length without touching the decrease rounds at either end.
Why block the shrug with steam instead of wet blocking?
The pattern recommends steam blocking because the shrug uses acrylic yarn, which responds to steam heat by relaxing and lengthening. Hanging it while steaming and letting it cool fully locks in that drape.