 STITCH ROUND
 Slip stitch mini scarf pattern with a ribbed finish
Five rounds to tick off for a ribbed, stretchy mini scarf worked entirely in slip stitch.
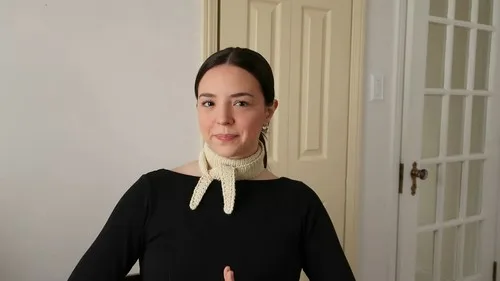
- Skill
- Intermediate
- Rounds
- 4 rounds
- Yarn weight
- DK/Worsted
- Hook
- 4.5 mm
- Time
- 4-6 hours

Intermediate
What the original page called it. Nothing here is graded a second time.

4 rounds
Each one gets its own line, with a box beside it to tick as you go.

DK/Worsted
What the sample was made in. Any weight works — the size moves with it.
About this pattern
This mini scarf ticks off in five rounds, built entirely from slip stitches worked through the front loop for a dense, ribbed fabric. It is a small, portable project that still delivers the stretchy, woven look of Bosnian crochet without a long commitment. A single skein of DK or light worsted weight yarn and a 4.5 mm hook are all it takes to get a finished accessory with real texture.
The shaping happens in three stages: an increasing section that widens the piece, a flat middle section, and a decreasing section that narrows it back down. Slow down at the increase and decrease rows, since each one changes the stitch count and sets the scarf's final shape. The foundation row also deserves care, since working into the back bumps gives the starting edge a clean, finished look.
- Start with a short foundation chain, then work the first row into the back bumps for a tidy starting edge.
- Build width gradually through the increasing section, adding a stitch at set intervals until the piece reaches its working width.
- Settle into the middle section, working flat rows in slip stitch through the front loop only until the body reaches length.
- Mirror the shaping in reverse through the decreasing section, trimming stitches at set intervals back down to just two.
- Finish the raw edges with a round of fancy single crochet, then join and secure the tail.
- Soak and shape the piece so the ribbed texture relaxes into its finished drape.
What goes wrong
- Working into both loops by accident Check each stitch before hooking in — the ribbed texture only forms when every row after the first goes into the front loop only. Working into both loops flattens the rib and throws off the look.
- Losing track of increase and decrease rows Mark the increase and decrease rows as they happen, since they occur at set intervals rather than every row. A stitch marker or a quick tally keeps the shaping on schedule.
- Crocheting too tight for slip stitch Slip stitch fabric naturally runs dense, so a tight tension can make the piece stiff and hard to hook into. Relax the grip or size up the hook if the fabric feels rigid.
- Skipping the back bump start Starting the first row in the regular chain stitches instead of the back bumps leaves a less finished edge. Take the extra moment to find the back bumps so both short ends match.
Yarn, hook and the rest
Copied from the source pattern's own materials list.
- Yarn — DK or light worsted weight
- Crochet hook — 4.5 mm
- Yarn needle
- Measuring tape
Progress tracker
0 of the 4 rounds on this page are ticked.
The pattern, round by round
Kept in the order and the wording the source used. Tick a round as you finish it; the ticks stay on this device.
Main Pattern
The entire scarf is worked in slip stitches in the front loop only (Bosnian crochet), creating a ribbed, stretchy fabric.
Slip stitch runs tight, so keep your tension relaxed — if your fabric feels stiff or hard to hook into, loosen up or go up half a hook size.
The first row goes into the back bumps of the foundation chain, giving the starting edge a clean, finished look that matches the other side.
Count with a marker or row counter — slip-stitch rows are notoriously hard to read, and this pattern increases (and later decreases) on a 5-row rhythm.
Work the fancy single crochet border slowly the first time — it's the detail that makes the scarf look finished rather than homemade.
Don't skip the blocking — slip-stitch fabric comes off the hook compact and opens up dramatically when wet-blocked.
Getting Started: Make a slip knot and insert your hook; chain 3 — the first two chains count as your first two stitches.
Rounds 1–5
Increasing Section For Row 1, slip stitch into the back bumps of the foundation chain; for all following rows, work into the front loops only; at the end of each row, chain 1 and turn; Increase Row (every 5 rows): increase one stitch by working two slip stitches into the same front loop; continue this increase pattern until your piece reaches 18 stitches wide.
Middle Section
Middle Section Work slip stitches in the front loop only, with no increases, until the scarf measures approximately 21–22 cm.
Rounds 1–4
Decreasing Section Work four rows without decreasing.
Round 5
Decrease Row Work two stitches together — insert your hook into the front loops of two stitches, yarn over, and pull through all loops on the hook; repeat this 5-row pattern until only two stitches remain; then work five final rows with just two stitches.
Join
Step 1Work a fancy single crochet around the entire edge of the scarf: insert your hook and pull up a loop; wrap the yarn behind and to the right of your hook, then in front; yarn over and pull through two loops.
Step 2Connect the border with a slip stitch into the beginning stitch; chain 1, leave a tail, cut the yarn, and pull it through to secure.
Step 3Soak the scarf in lukewarm water with a small amount of wool wash for 15 minutes; gently squeeze out the excess water; stretch the scarf to 110–120 cm and pin it on a blocking mat; let it dry overnight.
Check your count
- Main Pattern · Rounds 1–5: 18 sts sts
- Main Pattern · Round 5: 2 sts sts
Finish
- Weave in any loose ends from color changes or the starting tail before adding the border.
- Join the fancy single crochet border with a slip stitch into the first stitch, then chain 1 and cut the yarn, pulling the tail through to secure.
- Block the scarf by soaking it in lukewarm water with wool wash, squeezing out excess water, and stretching it gently to its finished size before it dries flat.
Bigger or smaller
- Smaller or larger width
- Adjust the target stitch count in the increasing section to more or fewer stitches than called for, which makes the scarf daintier or chunkier while the shaping pattern stays the same.
Photographs of this one
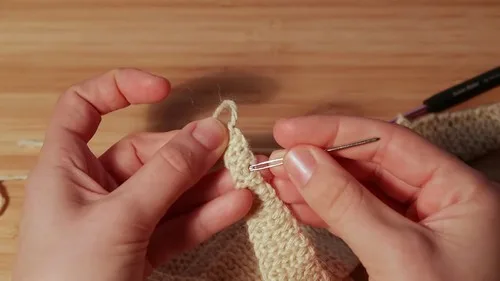
Every photograph on this page was taken by whoever published the pattern, and they are printed in the order the source listed them.
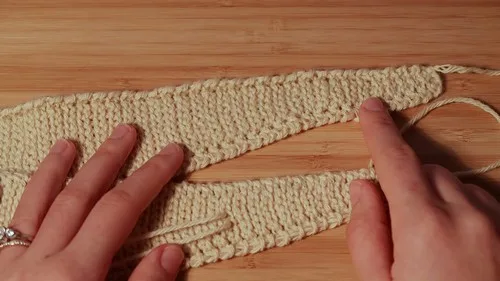
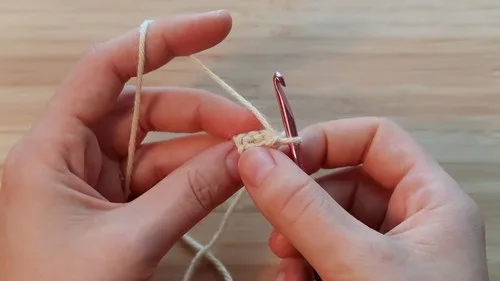
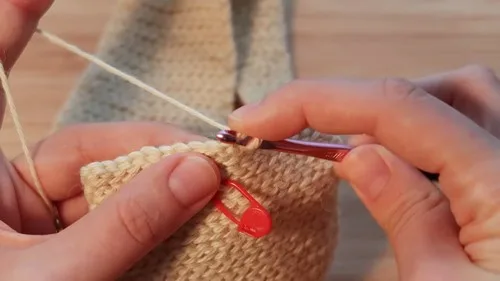
FAQs
Asked and answered
These answers came from whoever first published the pattern, kept word for word.
Why is it called a "mini" scarf if it blocks out to 110–120 cm?
"Mini" here refers to how slim and lightweight it is — a narrow, skinny statement scarf rather than a short one. It uses very little yarn and sits more like an accent than a bulky winter wrap.
Why is the whole thing slip stitches — isn't that slow?
It is a bit slower than working in taller stitches, but that's the point: slip-stitch (Bosnian) crochet makes a dense, stretchy, almost-knitted fabric you can't get any other way. Keeping your tension loose makes it go faster and feel much nicer to work.
Do I really need to block it?
this scarf, yes. Slip-stitch fabric is tight and compact straight off the hook, and blocking is what relaxes it into its full length and soft drape. Skipping it leaves you with a stiff, undersized version of the finished piece.