 STITCH ROUND
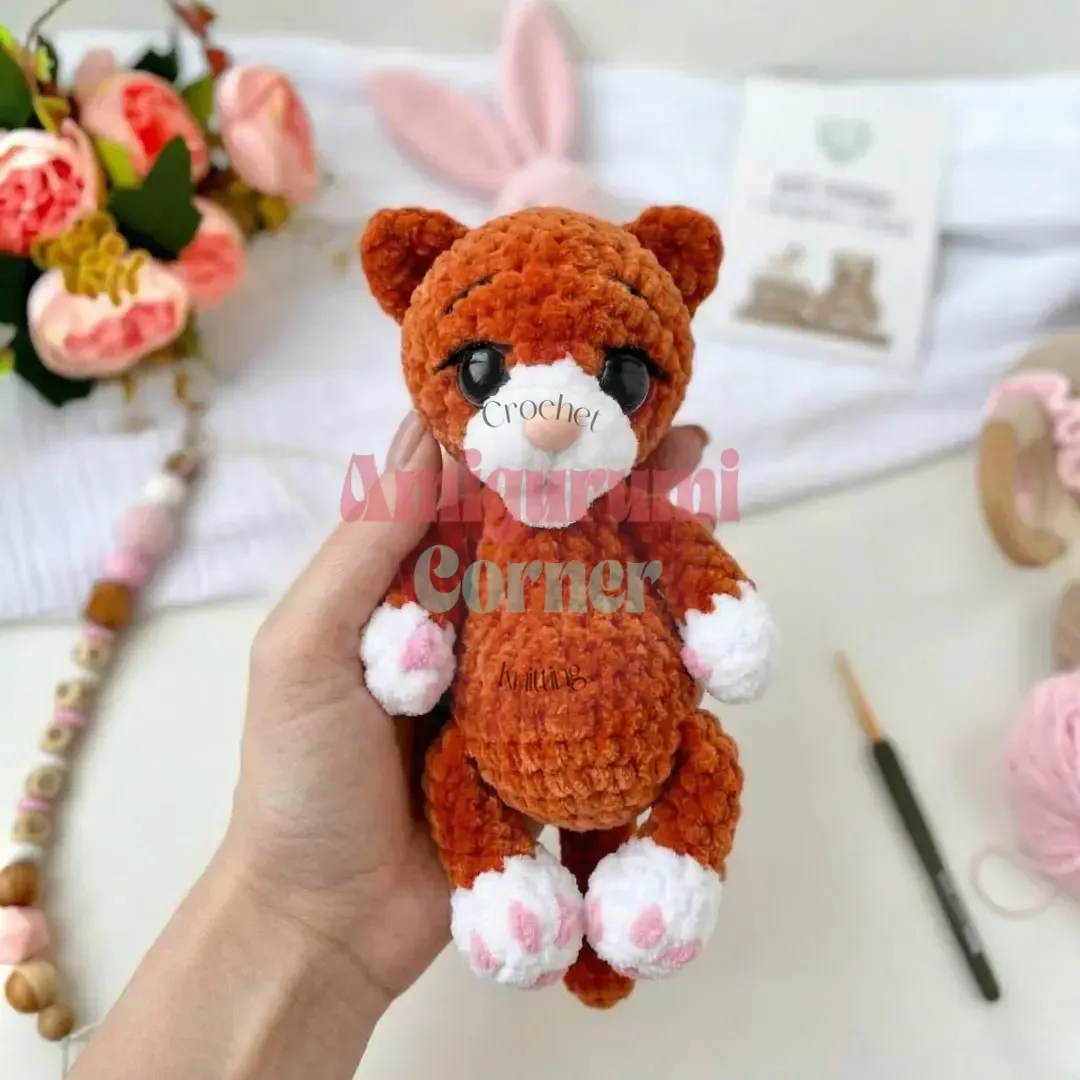
 Amigurumi cat crochet pattern with eye indentation technique
40 rounds build this amigurumi cat, head to tail, finished with the eye indentation technique.
- Skill
- Intermediate
- Rounds
- 40 rounds
- Yarn weight
- DK
- Hook
- 3.25 mm
- Time
- 5-7 hours

Intermediate
What the original page called it. Nothing here is graded a second time.

40 rounds
Each one gets its own line, with a box beside it to tick as you go.

DK
What the sample was made in. Any weight works — the size moves with it.
About this pattern
This amigurumi cat, Kotyatki, comes together from six parts: upper arms worked over four rounds each, lower legs over five rounds each, a twelve-round body, a twelve-round head, a six-round tail, and a single-round mouth. None of these pieces run long, so each one reads like a tick-box session rather than a marathon round count. Working through the list in order gives a clear sense of progress, with the body and head as the only sections that ask for real patience.
Shaping runs through increases and decreases in the arms, legs, body and head, plus a back-loop-only round on the lower legs that creates a visible ridge at the foot. The body carries a stitch marker that shifts to sit at the center back partway through, so re-check its position before continuing past that round. Slow down most during the eye indentation technique, where strong thread pulls the stuffed head into a dimpled muzzle; rushing the tension here flattens the face instead of shaping it.
This pattern uses US crochet terminology and is worked entirely in continuous spiral rounds — do not join rounds or turn unless otherwise instructed. Gauge is not critical for amigurumi, but aim for a tight, even tension so stuffing does not show through the stitches. The finished cat measures roughly 15–18 cm tall when stuffed firmly, and the project takes about four to eight hours to complete depending on experience.
- Build the body in main color, shifting the stitch marker to the center back partway through the rounds.
- Shape the head on its own, leaving it open and ready for the eye indentation technique later.
- Work the tail as a slim tube worked entirely in main color yarn.
- Crochet the mouth in a single round, then stitch it directly onto the finished head.
- Finish by attaching the limbs and tail, then add safety eyes, embroidered features and the eye indentation step.
What goes wrong
- Misplacing the body stitch marker Move the marker to the center back exactly when the body pattern calls for it. Leaving it in its starting position throws off round alignment for the rest of the piece.
- Skipping the back-loop-only round Work the back-loop-only round on the lower legs as written, not as a regular round. Skipping it removes the visible ridge that defines the foot line.
- Rushing the eye indentation step Complete both thread paths before pulling the strong thread firmly to set the indentation. Pulling too soon or too loosely leaves the muzzle flat instead of dimpled.
Yarn, hook and the rest
Copied from the source pattern's own materials list.
Yarn
- Himalaya Dolphin Baby — approx. 0.5 skein in main color, small amount in white (accent color)
- Yarn Art Jeans in black — for embroidering eyes and eyebrows
Hook
- Hook: 3.25 mm
Safety eyes
- 13 mm black, 1 pair
Safety nose
- 10×8 mm, 1 piece
Stuffing
- Polyfill or polyester fiberfill (hollowfibre/fiberfill)
- Strong thread and large tapestry needle — for eye indentation technique
- Stitch markers
- Scissors
Progress tracker
0 of the 40 rounds on this page are ticked.
The pattern, round by round
Kept in the order and the wording the source used. Tick a round as you finish it; the ticks stay on this device.
Upper Arms (make 2)
Begin with white (accent) yarn.
Lightly stuff only the white section before switching colors.
Round 1
8 sc in mr (8)
Round 2
8 sc (8)
Round 3
(dec, 2 sc) × 2 (6)Switch to main color yarn.
Rounds 4–8
6 sc for 5 rounds (6)Fold the piece flat and work 3 sc through both layers to close. Fasten off and cut yarn.
Lower Legs (make 2)
Begin with white (accent) yarn.
Lightly stuff only the white section before switching colors.
Round 1
12 sc in mr (12)
Round 2
12 sc in BLO (12)
Round 3
3 sc, dec × 3, 3 sc (9)
Round 4
3 sc, 3sc-dec, 3 sc (7)Switch to main color yarn.
Rounds 5–9
7 sc for 5 rounds (7)Align the stitch marker to the center back of the leg. Fold the piece flat and work 3 sc through both layers to close. Fasten off and cut yarn.
Body
Work entirely in main color yarn.
Stuff as you go.
Stitch marker sits at center back throughout.
Round 1
6 sc in mr (6)
Round 2
6 inc (12)
Round 3
(1 sc, inc) × 6 (18)
Round 4
(6 sc, inc) × 2, 4 sc (20)
Round 5
20 sc (20)
The start-of-round marker is at the center back.
Round 6
3 sc, [3 sc joining lower leg — work 1 sc through body stitch and corresponding leg stitch simultaneously, repeat for next 2 sts], 8 sc, [3 sc joining lower leg as before], 3 sc (20)
Round 7
dec, 16 sc, dec (18)
Round 8
(3 sc, dec) × 3, 3 sc (15)
Rounds 9–10
15 sc for 2 rounds (15)
Re-align the marker to center back.
Round 11
2 sc, dec, 3 sc, dec, 2 sc, dec, 2 sc (12)
Round 12
1 sc, [3 sc joining upper arm — work 1 sc through body stitch and corresponding arm stitch simultaneously, repeat for next 2 sts], 4 sc, [3 sc joining upper arm as before], 1 sc (12)
Round 13
12 sc (12)Finish stuffing the body firmly. Fasten off and leave a long tail for attaching the head.
Head
Begin with white (accent) yarn.
Stuff as you go.
Round 1
Chain 5; starting in the 2nd ch from hook: inc, 2 sc, 4 sc in last ch; working along opposite side of chain: 2 sc, 2 inc in first ch (12)
Rounds 2–3
12 sc for 2 rounds (12)Switch to main color yarn.
Round 4
1 sc, 6 inc, 5 sc (18)
Round 5
(1 sc, inc) × 6, 6 sc (24)
Round 6
1 sc, 3 inc, 12 sc, 3 inc, 5 sc (30)
Round 7
30 sc (30)Place stitch markers to indicate ear positions before working Rnd 8.
Round 8
8 sc, ch 2, [2 dc worked together into same stitch through FLO — popcorn-style ear point], ch 2, sl st into same stitch, 6 sc, ch 2, [2 dc worked together into same stitch through FLO], ch 2, sl st into same stitch, 12 sc (30)
Round 9
8 sc, 2 sc into the remaining BLO stitches from the previous round (the ear base stitches), 6 sc, 2 sc into the remaining BLO stitches from previous round, 12 sc (30)Insert the 10×8 mm safety nose between Rnds 1 and 2 of the muzzle section.Insert 13 mm safety eyes between Rnds 4 and 5. Space them 7 stitches apart (measuring between the posts of the eyes).
Round 10
(3 sc, dec) × 6 (24)
Round 11
(2 sc, dec) × 6 (18)
Round 12
(1 sc, dec) × 6 (12)
Round 13
6 dec (6)Pull the remaining opening closed, fasten off, and cut yarn. Sew the head to the body.
Tail
Work entirely in main color yarn.
Do not stuff the tail.
Round 1
8 sc in mr (8)
Rounds 2–3
8 sc for 2 rounds (8)
Round 4
dec, 6 sc (7)
Rounds 5–6
7 sc for 2 rounds (7)
Round 7
dec, 5 sc (6)
Rounds 8–14
6 sc for 7 rounds (6)Fold the piece flat and work 3 sc through both layers to close. Fasten off and leave a long tail for sewing. Attach the tail to the center back of the body at Rnd 6.
Mouth (make 1)
Work in white (accent) yarn.
Round 1
5 sc in mr (5)Fasten off and leave a long tail for sewing. Sew the mouth circle below the muzzle.
Join
Step 1Lower Legs are joined directly to the body during Rnd 6 of the body. Ensure both legs are oriented the same way, with white paws facing forward.
Step 2Upper Arms are joined directly to the body during Rnd 12. Position them symmetrically on each side of the body.
Step 3Head is sewn to the top of the body using the long yarn tail left after completing Rnd 13 of the body. Center it carefully and stitch all the way around for a secure join.
Step 4Tail is sewn to the center back of the body, aligned with Rnd 6. Use the long yarn tail and a tapestry needle to stitch it securely.
Step 5Mouth circle is sewn below the muzzle using the yarn tail.
Step 6Eye Indentation Technique: Using a strong thread and a large tapestry needle, mark two points in Rnd 3 below the muzzle, spaced 2 stitches apart. Insert the needle at point 1, exit at point 2, re-enter at point 3, exit at point 4, re-enter at point 5, and exit at point 6 below the muzzle. Repeat the path once more, pull firmly to create indentations, tie a secure knot, and hide ends inside the head. Optionally, use a fine acrylic thread to lightly cinch the muzzle: wrap the thread around the safety nose, tie a knot, thread both ends through the cinch point below the muzzle, bring them out at the top of the head, pull gently, knot, and bury the ends.
Step 7Face Embroidery: Using black Yarn Art Jeans yarn, embroider a lash line above each safety eye and two small eyebrows. If desired, also embroider toe pads on each paw.
Check your count
- Upper Arms (make 2) · Round 1: 8 sts
- Upper Arms (make 2) · Round 2: 8 sts
- Upper Arms (make 2) · Round 3: 6 sts
- Upper Arms (make 2) · Rounds 4–8: 6 sts
- Lower Legs (make 2) · Round 1: 12 sts
- Lower Legs (make 2) · Round 2: 12 sts
Finish
- Weave in the color-change ends left from the white sections of the arms and legs before attaching limbs.
- Finish stuffing the head and body firmly and evenly, so the fill supports the eye indentation technique without lumps.
- Close the final round of each piece with a tapestry needle, then attach limbs, tail and mouth to the body and head.
Bigger or smaller
- Larger or smaller
- Swap in a thicker or finer yarn and match the hook size to it; a thicker yarn with a larger hook scales every piece up, while a finer yarn with a smaller hook scales everything down, with the round count staying the same.
- Larger
- Repeat one extra round in a straight section of the body or tail before the decreases begin. This lengthens that piece without changing its width or affecting the rest of the pattern.
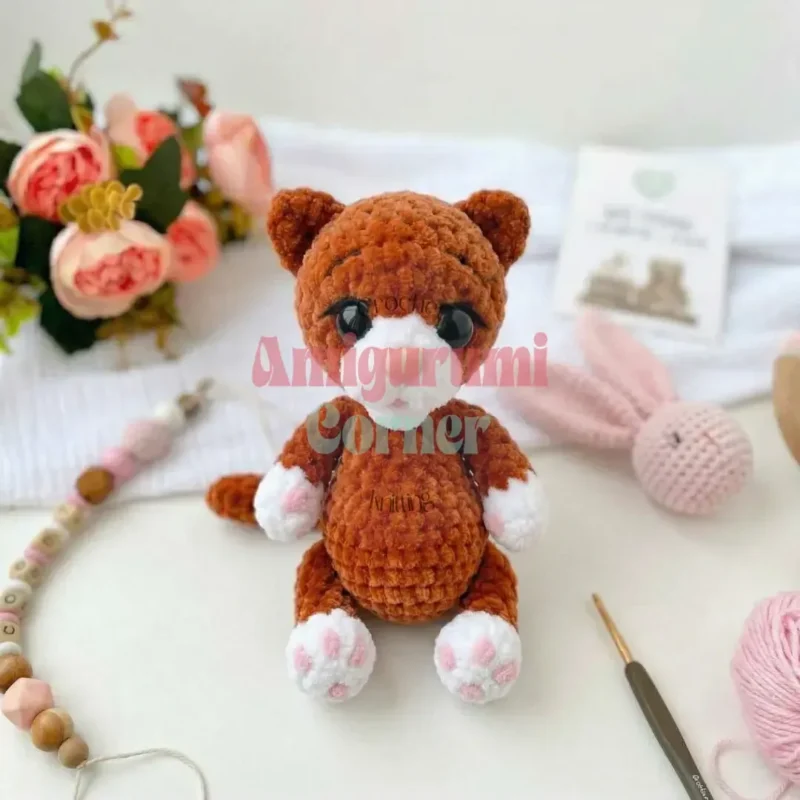
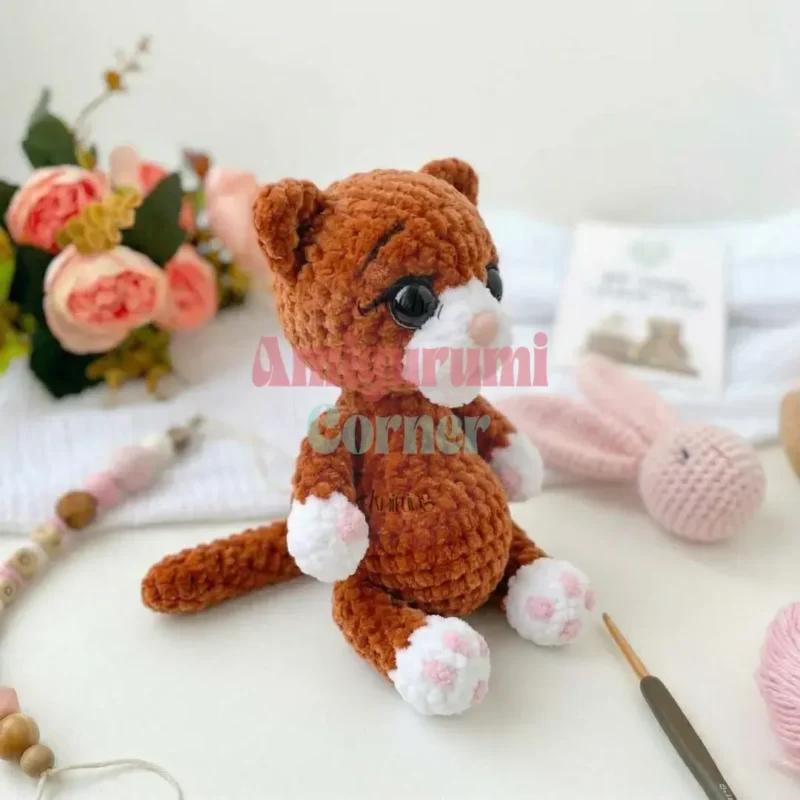
Photographs of this one
Every photograph on this page was taken by whoever published the pattern, and they are printed in the order the source listed them.
FAQs
Asked and answered
These answers came from whoever first published the pattern, kept word for word.
What yarn and hook combination works best for this amigurumi cat?
Himalaya Dolphin Baby yarn paired with a 3.25 mm hook gives a tight enough fabric that fiberfill will not peek through the stitches. Any yarn and hook pairing with a similarly firm gauge will work just as well.
Why does the pattern call for strong thread in the eye indentation technique?
Strong thread can be pulled firmly without snapping, and that tension is what draws the stuffed head into its dimpled muzzle shape. Regular sewing thread tends to break before enough pull is applied.
Should the safety eyes go in before or after stuffing the head?
Insert the safety eyes while the head is still open, since centering them is far easier before the piece closes up. Add the fiberfill afterward, then finish closing the final rounds.