 STITCH ROUND
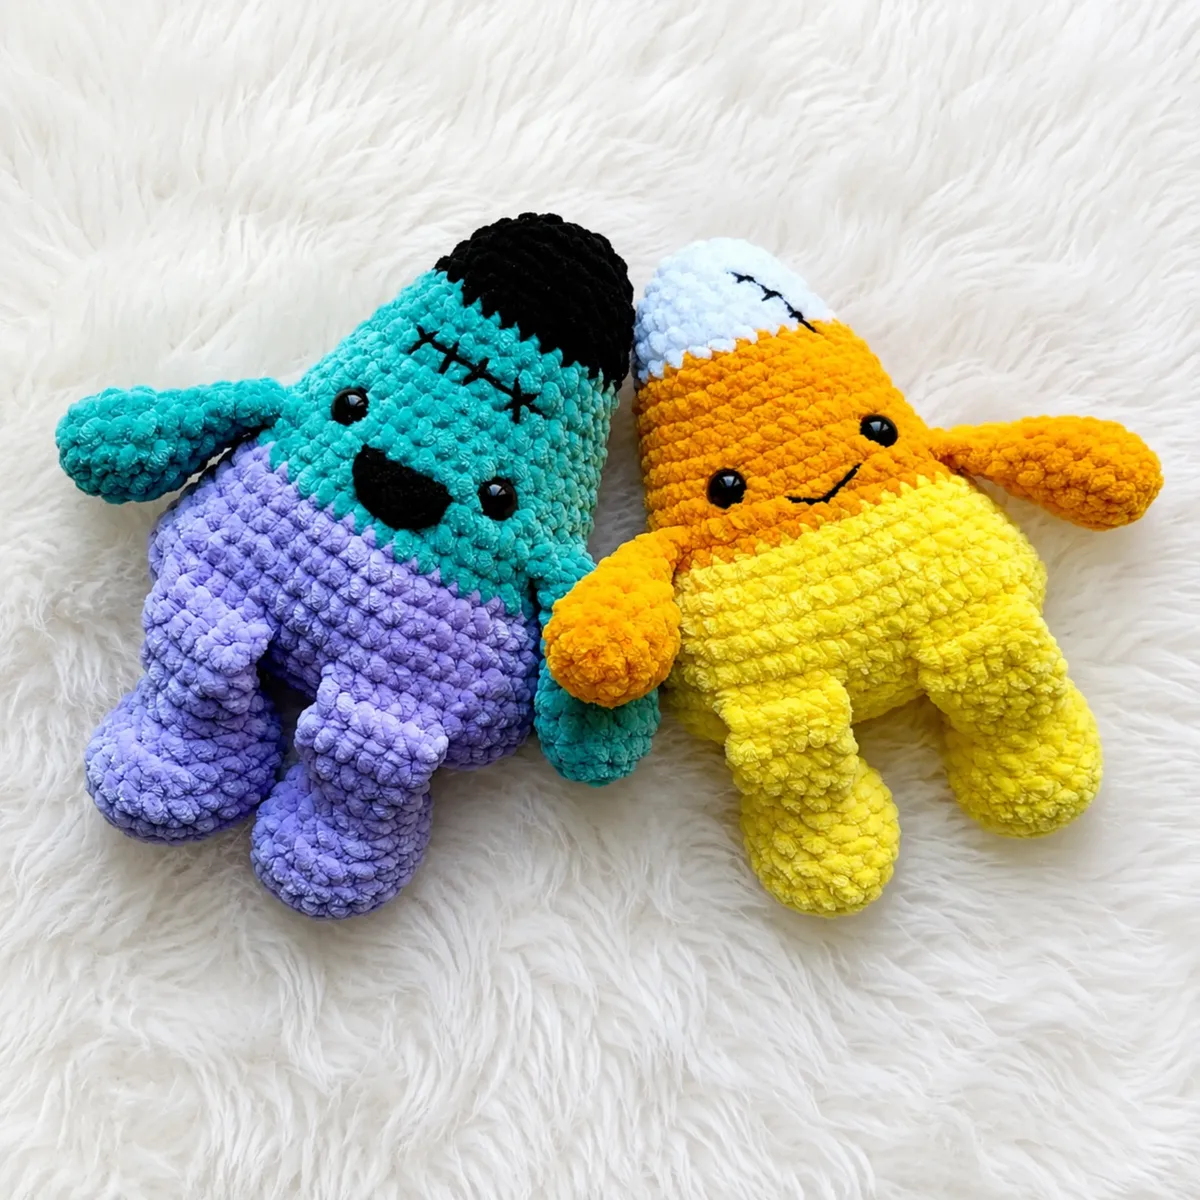
 Crochet a candy corn amigurumi with legs and arms
47 rounds across four pieces build this candy corn amigurumi, from stubby legs to a stitched mouth.
- Skill
- Intermediate
- Rounds
- 45 rounds
- Yarn weight
- Worsted
- Hook
- 3.5 mm
- Time
- 4-6 hours

Intermediate
What the original page called it. Nothing here is graded a second time.

45 rounds
Each one gets its own line, with a box beside it to tick as you go.

Worsted
What the sample was made in. Any weight works — the size moves with it.
About this pattern
This candy corn amigurumi builds from four separate pieces: two Legs worked over 10 rounds each, two Arms over 9 rounds, a Body that runs 25 rounds, and a small Mouth finished in just 3. Each piece works in continuous spiral rounds, so there's no slip stitch join to track and no seam running down the side. Ticking off one part at a time keeps the project manageable, and the Body, the longest single piece, is where most of the shaping and color changes happen.
The shaping is front-loaded: the Legs and Arms both increase fast in their opening rounds before settling into plain single crochet, and the Body's early rounds stack increases in pairs to flare the base wide enough for the Legs to attach. Slow down at the back-loop-only rounds on both the Legs and the Body, since working in BLO changes the stitch look and is easy to miss mid-round. The tiny Mouth, worked in fine cotton-blend yarn on a much smaller hook, also rewards close attention given its scale.
This pattern is written in US crochet terminology, with the stitch count shown at the end of each round in parentheses. Yarn amounts will vary depending on your gauge and hook, so it's worth having a little extra of each color on hand before you start.
- Crochet the two Legs first, shaping the heel with a back-loop-only round before the leg goes straight.
- Work the two Arms next, increasing quickly then decreasing to taper toward the tip.
- Begin the Body with a flat oval base, then join both Legs to the sc rounds as directed.
- Continue the Body upward, attaching the Arms and inserting the safety eyes as the pattern marks their rounds.
- Stitch the small Mouth separately in black cotton-blend yarn on the finer hook.
- Finish by stuffing the Body firmly and sewing on the last few pieces to complete the candy corn shape.
What goes wrong
- Losing track of the spiral round Continuous rounds without a joining slip stitch drift without a stitch marker at the start of each round. Move the marker every round, and again when the pattern shifts it to a new position on the Legs.
- Skipping the back-loop-only rounds The BLO rounds on the Legs and Body create the ridge that shapes the heel bend and marks the base line; working into both loops there flattens that detail. Check the round instructions before crocheting past them.
- Attaching Legs or Arms off-round The Legs join during the Body's early rounds and the Arms join later at the color-change line, so attaching either too early or too late throws off the spacing. Pause to check the round before stitching them on.
Yarn, hook and the rest
Copied from the source pattern's own materials list.
Yarn
- YarnArt Dolce plush yarn (or similar plush worsted-weight yarn) — Purple (43g), Green (23g), Black (5g)
Yarn
- YarnArt Jeans cotton-blend yarn (or similar fingering/sport-weight cotton) — Black, small amount for the mouth
Hook
- 3.5mm (US E-4) for the main pieces
Hook
- 1.75mm (no standard US letter equivalent — closest is a steel hook, similar to US 4 or 5 in lace-weight sizing) for the mouth
Safety eyes
- 12mm, 1 pair
- Fiberfill stuffing
- Stitch marker
- Yarn needle
- Scissors
Progress tracker
0 of the 45 rounds on this page are ticked.
The pattern, round by round
Kept in the order and the wording the source used. Tick a round as you finish it; the ticks stay on this device.
Legs (make 2)
Round 1
With Purple, ch 4. Starting in 2nd ch from hook: inc, sc, 3 sc in last ch; working back along opposite side of chain: 2 sc. (8)
Round 2
2 inc; sc; 3 inc; sc; inc. (14)
Round 3
(sc, inc) x2; sc; (sc, inc) x3; 2 sc; inc. (20)
Round 4
Move marker to heel position, sc 2, working in BLO: sc 20.
Round 5
Sc 20.
Round 6
Sc 6; dec 4 times; sc 6. (16)
Round 7
(dec, sc 4, dec) x2. (12)Stuff only the foot portion with fiberfill before continuing.
Round 8
Sc 4; dec 2 times; sc 4. (10)
Round 9
Sc 10.
Round 10
Work partial row: sc 8–9 (do not complete round). Fold the piece flat and sc 5 through both layers; ch 1, turn; sc 5 back across.
Arms (make 2)
Round 1
With Green, ch 2. In 2nd ch from hook: sc 6.
Round 2
Inc 6 times. (12)
Rounds 3–4
Sc 12. (2 rounds, no shaping)
Round 5
(sc 4, dec) x2. (10)
Round 6
(sc 3, dec) x2. (8)
Round 7
Sc 8. Stuff the arm with fiberfill up through Rnd 7.
Round 8
(sc 2, dec) x2. (6)
Round 9
Sc 6.
Final Row
Fold the piece flat and sc 3 through both layers, closing the top.
Body
Round 1
With Purple, ch 15. Starting in 2nd ch from hook, working along chain: inc; sc 12; 4 sc in last ch; working back along opposite side of chain: sc 12; inc. (32)
Round 2
(2 inc, sc 12, 2 inc) x2. (40)
Round 3
((sc, inc) x2; sc 12; (inc, sc) x2) x2. (48)
Round 4
Working in BLO: shift st; sc 48.
Round 5
Attach Legs: sc 5, sc 5 (joining first Leg), sc 4, sc 5 (joining second Leg), sc 29. (48)
Round 6
Sc 48.
Round 7
Shift st; (sc 3; dec; sc 14; dec; sc 3) x2. (44)
Rounds 8–9
Sc 44. (2 rounds)Switch to Green yarn here.
Round 10
(sc 3; dec; sc 12; dec; sc 3) x2. (40)
Round 11
Sc 40.
Round 12
Attach Arms: sc 3 (joining first Arm), sc 14, sc 3 (joining second Arm), sc 20. (40)
Round 13
Shift st; (sc 3; dec; sc 10; dec; sc 3) x2. (36)
Rounds 14–15
Sc 36. (2 rounds)
Round 16
Shift st; (sc 3; dec; sc 8; dec; sc 3) x2. (32)
Round 17
Sc 32.Insert safety eyes between Rnds 13–14, spaced 8 sc apart and centered above the Legs.
Round 18
Shift st; (sc 3; dec; sc 6; dec; sc 3) x2. (28)
Round 19
Sc 28.Switch to Black yarn here.
Round 20
Shift st; (sc 2; dec; sc 6; dec; sc 2) x2. (24)
Round 21
Sc 24.
Round 22
(sc 2; dec; sc 4; dec; sc 2) x2. (20)
Round 23
Shift st; sc 4; dec; sc 8; dec; sc 4. (18)
Round 24
(sc, dec) x6. (12)
Round 25
(sc, dec) x4. (8)Sl st to close. Cut yarn, leaving a tail for closing the opening. Thread the tail through a yarn needle and cinch the opening closed.
Mouth
Worked with Yarnart Jeans yarn (or similar fine cotton-blend) and a 1.75mm hook, in turned rows.
Row 1
Into mr: sc 4, ch 1, turn.
Row 2
Inc 4 times. (8) Ch 1, turn.
Row 3
(sc, inc) x4. (12)
Fasten off, leaving a tail for sewing the mouth on. Embroider scar-style stitches if you’re making the green/teal variant.
Join
Step 1Weave in the starting tail on each Leg and Arm before attaching, so you’re not juggling loose ends mid-assembly.
Step 2Attach both Legs to the Body during Rnd 5 as directed, making sure they sit evenly spaced and pointing forward.
Step 3Attach both Arms to the Body during Rnd 12, positioning them symmetrically on either side at the green color-change line.
Step 4Insert the 12mm safety eyes between Rnds 13–14 of the Body, spacing them 8 sc apart and centering the pair above the Legs.
Step 5Stuff the Body firmly but evenly as you close the final rounds — add stuffing in small amounts as the opening narrows so you don’t overload it at the end.
Step 6Sew the Mouth piece onto the black portion of the face using the tail left from fastening off, using a whipstitch around the edge for a clean, secure finish.
Step 7If making the green/teal variant, embroider the scar stitches now, using straight stitches across the marked area for a simple, graphic look.
Step 8Weave in all remaining ends, including the cinch tail at the top of the Body and any tails left from color changes.
Check your count
- Legs (make 2) · Round 2: 14 sts
- Legs (make 2) · Round 6: 16 sts
- Legs (make 2) · Round 8: 10 sts
- Arms (make 2) · Round 2: 12 sts
- Arms (make 2) · Round 5: 10 sts
- Arms (make 2) · Round 6: 8 sts
FAQs
Asked and answered
These answers came from whoever first published the pattern, kept word for word.
Can the Mouth be skipped if the finer hook isn't available?
The Mouth is worked in fine cotton-blend yarn on a much smaller hook to keep it neat against the plush Body yarn, so substituting the main hook makes the stitches oversized. A similarly sized steel hook works fine as a stand-in, since no standard US letter matches this size exactly.
Why are the Legs and Arms joined mid-Body instead of sewn on at the end?
Joining the Legs and Arms into the Body's sc rounds while working means fewer ends to weave in later and a stronger attachment than sewing on after stuffing. It also locks their placement to the round count rather than leaving it to guesswork.
What does the back-loop-only round actually change?
Working BLO on the Legs and Body leaves the front loops exposed as a visible ridge, which shapes the heel bend on the Legs and marks the base line on the Body. Working both loops there instead removes that ridge and flattens the shaping.