 STITCH ROUND
 Hello Kitty amigurumi crochet pattern with jumpsuit detail
Two quick rounds shape the arms, three shape the tail, in this Hello Kitty amigurumi crochet pattern.
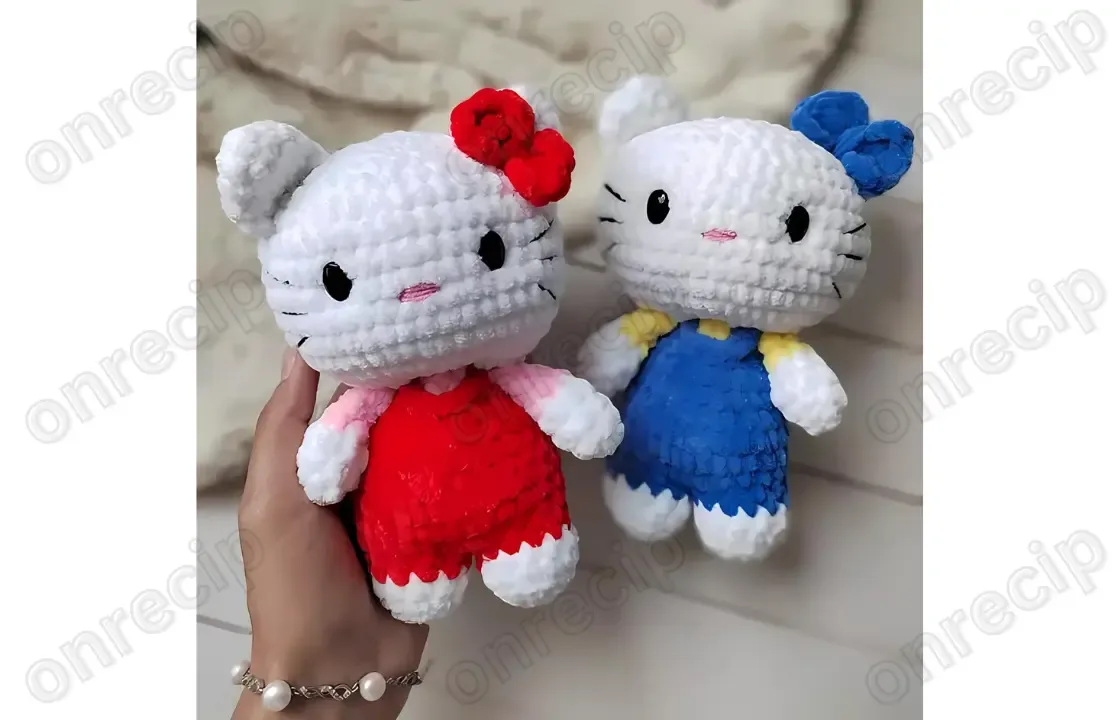
- Skill
- Intermediate
- Rounds
- 5 rounds
- Yarn weight
- Light
- Hook
- 3.5 mm
- Time
- 4-6 hours

Intermediate
What the original page called it. Nothing here is graded a second time.

5 rounds
Each one gets its own line, with a box beside it to tick as you go.

Light
What the sample was made in. Any weight works — the size moves with it.
About this pattern
The arms take two rounds to complete, starting from a small amigurumi ring, building up with an increase row, working even in the sweater color, then decreasing back down before the final stitches close together. The tail needs three rounds, growing with an increase row, holding steady for two rows, then pulling shut. Both small pieces tick off fast, giving a quick sense of progress before the body and head take shape.
Shaping happens through the increase and decrease rows on both arms and tail, where stitch placement determines whether the piece curves smoothly or puckers. Slow down on the color change into sweater tone for the arms and jumpsuit tone for the legs, since a stitch worked in the wrong color pulls the eye straight to the seam. The closing rows, where remaining stitches gather into a single point, also reward a careful, even pull.
- Start each small piece from an amigurumi ring, then build outward with an increase row.
- Work the arms in a steady color before shifting to sweater tone partway through.
- Shape the tail with an increase, a few even rows, then a gathered close.
- Crochet two identical leg pieces, finishing one and continuing straight into the second.
- Carry the working yarn from the joined leg up into the body and head.
What goes wrong
- Cutting yarn on both legs Only cut and fasten the thread on the first leg. Leave the second leg's yarn attached so it flows straight into the body round.
- Losing the color-change line Swap yarn colors at the start of a round rather than mid-stitch. This keeps the sweater and jumpsuit tones sitting in a clean ring around the piece.
- Stuffing the arms or tail Leave both unstuffed as directed. Extra filling stiffens these thin, flat pieces and makes them hard to curve into shape.
- Loose amigurumi ring center Pull the starting tail firmly after the first round on the arms and tail. A loose pull leaves a visible gap at the center.
Yarn, hook and the rest
Copied from the source pattern's own materials list.
- Wolans Bunny Baby (body – 44 g, jumpsuit – 3 g)
- Cotton yarn or embroidery floss for the nose and whiskers
- 3.5 mm crochet hook
- Toy eyes 12×9 mm (or 13×10 mm)
- Stuffing for toys
- Needle for sewing parts
- Scissors
Progress tracker
0 of the 5 rounds on this page are ticked.
The pattern, round by round
Kept in the order and the wording the source used. Tick a round as you finish it; the ticks stay on this device.
Arms (do not stuff)
Round 1
6 sc in KA = 6 2nd row: (2 sc, inc) x 2 = 8 3rd-4th rows: 8 sc (2 rows) Sweater color
Round 5
(2 sc, dec) x 2 = 6 6th row: 6 sc 7th row: 3 sc together
Tail (do not stuff)
Round 1
4 sc in KA = 4 2nd row: 4 inc = 8 3rd-4th rows: 8 sc (2 rows) 5th row: 4 sc together
Legs + Body + Head: Body color.
Round 1
6 sc in KA = 6 2nd row: 6 inc = 12 3rd row: sl st, 12 sc 4th row: 12 sc Jumpsuit color
Round 5
12 sc Make 2 pieces. On the first leg, cut the thread and fasten it. On the second leg, do not cut the thread and continue crocheting.
Ready to Learn More? Open the next page for Further Guidance!
Pages:
Finished Size
Materials and Tools: Plush yarn: Wolans Bunny Baby (body – 44 g, jumpsuit – 3 g)
Cotton yarn or embroidery floss for the nose and whiskers 3.5 mm crochet hook Toy eyes 12×9 mm (or 13×10 mm)
Stuffing for toys Stitch markers Pins Needle for sewing parts Scissors Abbreviations: KА — amigurumi ring ch — chain stitch sl st — slip stitch sc — single crochet dc — double crochet inc — increase dec — decrease
(…) x n — repeat n times Crochet Pattern for Hello Kitty Amigurumi
Finish
- Weave in every yarn end left by the sweater, tail, and jumpsuit color changes before joining any parts.
- Stuff the body and head firmly for a rounded shape, but leave the arms and tail unstuffed as directed.
- Pin the toy eyes for symmetry, sew them and the embroidered nose and whiskers in place, then attach the arms and tail to the body.
Bigger or smaller
- Longer tail or arms
- Repeat one of the even rows on the tail or arms an extra time before decreasing. This lengthens just that piece without touching the rest of the pattern.
FAQs
Asked and answered
These answers came from whoever first published the pattern, kept word for word.
Why does the pattern say not to cut the yarn on the second leg?
Leaving the yarn attached lets the working thread flow directly from the second leg into the body round, avoiding an extra join. Cutting it there would mean weaving in an unnecessary end right where the two legs meet.
Should the arms and tail be stuffed like the body?
No, both are worked flat and left unstuffed so they stay soft and easy to curve into position. Stuffing would make them stiff and harder to attach neatly.
What yarn works if Wolans Bunny Baby isn't available?
Any plush yarn that pairs well with a 3.5 mm hook and holds its shape for amigurumi will substitute fine. Match gauge roughly to the body weight listed in the materials to keep proportions consistent.
How are the nose and whiskers added?
Cotton yarn or embroidery floss, listed in the materials, is used to embroider the nose and whiskers directly onto the head once assembly is done. This is worked after the toy eyes are placed, using a sewing needle.