 STITCH ROUND
 Crochet Cat Phone Bag Pattern With Adjustable Strap
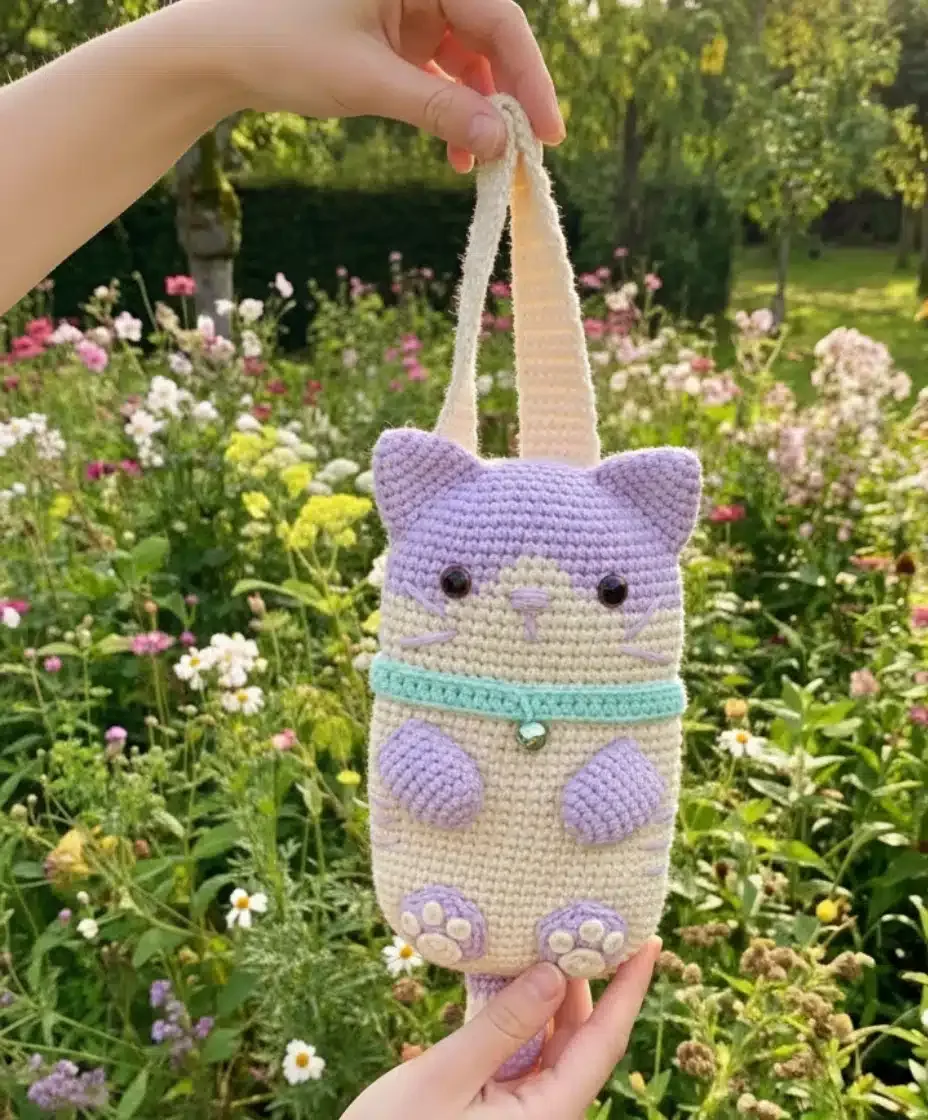
Tick off nine rounds each for body and head to build this crochet cat phone bag with zip closure.
- Skill
- Intermediate
- Rounds
- 49 rounds
- Yarn weight
- Worsted
- Hook
- 3.5 mm
- Time
- 6-8 hours

Intermediate
What the original page called it. Nothing here is graded a second time.

49 rounds
Each one gets its own line, with a box beside it to tick as you go.

Worsted
What the sample was made in. Any weight works — the size moves with it.
About this pattern
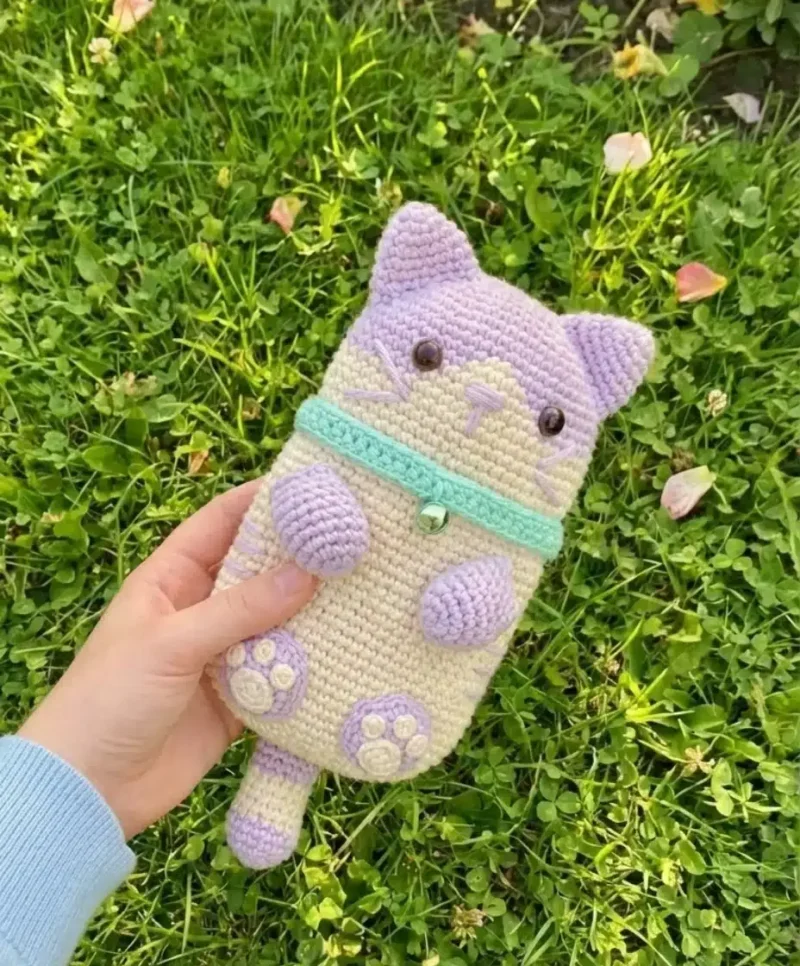
This cat-shaped phone bag comes together from several small pieces rather than one continuous build. The body and head each take nine rounds to tick off, with the front legs, rear legs, ears, tail, heel pads, and finger pads worked as their own shorter pieces alongside a separate adjustable belt strap. Working in off-white for the body and lavender for the head keeps the color changes easy to track as each section is completed and set aside for assembly.
The shaping load sits mostly in the head and the paired limbs, where increases have to land evenly for the face and feet to sit straight once seamed on. Slow down at the safety eye placement between rows ten and eleven of the head, and again when picking out the full edge stitch on both head and body for the mattress-stitch seam. The heel pads, worked with the smaller 2.0mm hook, also reward careful, even tension against the bulkier main-hook pieces.
The finished bag measures about 23cm in height and 13cm in width, with a roomy main compartment that fits phones up to 6.8 inches (21.59cm). Check your own phone against these measurements before sewing the zipper into the body.
- Work the body first in off-white cotton, shaping it flat before the zipper opening takes form.
- Build the lavender head as a separate piece, matching its round count to the body before joining.
- Crochet the front legs, rear legs, ears, and tail individually, each worked as its own small piece.
- Seam the head to the body using mattress stitch, then set the safety eyes and glue or sew the nose.
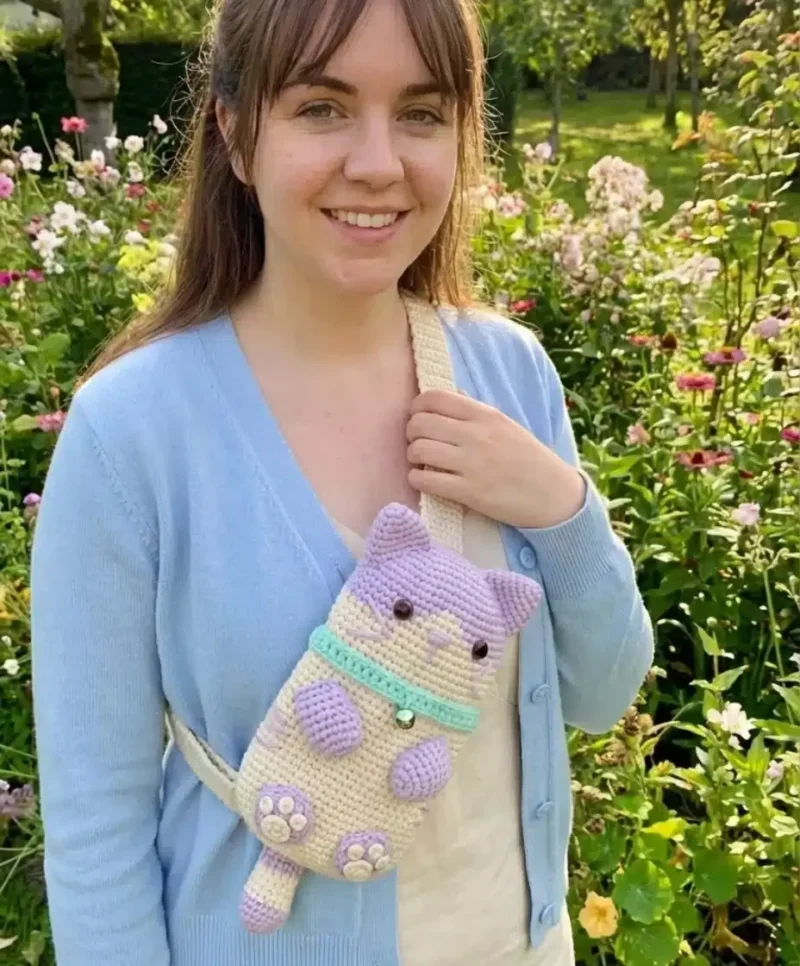
- Finish with the adjustable belt strap and buckle so the bag closes and wears like a small shoulder bag.
What goes wrong
- Using the main hook for heel pads Swap to the 2.0mm hook for the heel pads and finger pads instead of the 3.5mm main hook. The smaller hook keeps the pads dense and correctly scaled against the rest of the piece.
- Placing eyes without counting rows Count carefully to rows ten and eleven on the head before inserting the 15mm safety eyes. Placing them too high or low throws off the cat's expression once the nose and embroidery go on.
- Rushing the head-to-body seam Pick out the full edge stitch on both the head and body pieces before starting the mattress stitch. Skipping this step leaves gaps or a lumpy seam where the two panels meet.
Yarn, hook and the rest
Copied from the source pattern's own materials list.
Yarn
- 125g of 4-strand Milk Cotton (worked with double thread)
- 1 skein of body color (choose from off-white or light gray) – approximately 100g
- 1/2 skein of head color (lavender/light purple) – approximately 50g
- Small amount of contrasting color for collar (mint/turquoise green)
Crochet Hook
- 3.5mm for main work
- 2.0mm for foot pads
Safety Features
- Pair of 15mm safety eyes
- 13x17mm nose (can be glued or sewn)
- 15mm bell
Hardware and Notions
- 12cm zipper
- Japanese-style buckle (inner diameter 3.9cm, inner height 2cm)
- Black embroidery floss
- Scissors
- Tapestry needle
- Pins
- Polyester fiberfill (for stuffing legs, ears, and tail)
Progress tracker
0 of the 49 rounds on this page are ticked.
The pattern, round by round
Kept in the order and the wording the source used. Tick a round as you finish it; the ticks stay on this device.
Body
Important Note: Start all rows with 1 chain and finish with 1 slip stitch. However, these are NOT counted in the total stitch count for each row.
Begin with off-white color yarn from the bottom of the bag:
Round 1
Ch11, starting in the second loop from the hook, 10 sc, turn the work and continue knitting on the other side of the chain, 10 sc = 20 sc
Round 2
inc, 8 sc, 2 inc, 8 sc, inc = 24 sc
Round 3
inc, 10 sc, 2 inc, 10 sc, inc = 28 sc
Round 4
1 sc, inc, 11 sc, 2 inc, 11 sc, inc, 1 sc = 32 sc
Round 5
1 sc, inc, 13 sc, 2 inc, 13 sc, inc, 1 sc = 36 sc
Round 6
(5 sc, inc) x 6 = 42 sc
Round 7
(3 sc, inc, 3 sc) x 6 = 48 sc
Rounds 8–24
48 sc (17 rows) Change color to turquoise green (collar)
Round 24
48 sc
Front Legs (Make 2)
With light purple color yarn:
Round 1
5 sc in MR
Round 2
5 inc = 10 sc
Round 3
(4sc, inc) x 2 = 12 sc
Rounds 4–8
12 sc (5 rows)
Round 9
(4 sc, dec) x 2 = 10 sc
Rear Legs (Make 2)
With light purple color yarn:
Round 1
8 sc in Mr = 8 sc
Round 2
8 inc = 16 sc
Round 3
(sc, inc) x 8 = 24 sc
Ears (Make 2)
With light purple color yarn:
Round 1
6sc in Mr
Round 2
(2 sc, inc) x 2 = 8 sc
Round 3
(3 sc, inc) x 2 = 10 sc
Round 4
(1 sc, inc) x 5 = 15 sc
Round 5
15 sc
Round 6
(2 sc, inc) x 5 = 20 sc
Tail
With light purple color yarn:
Round 1
6 sc in MR
Round 2
6 inc = 12 sc
Round 3
(1sc, inc) x 6 = 18 sc
Round 4
18 sc Change to off-white color yarn:
Round 5
(sc, dec) x 6 = 12 sc
Rounds 6–7
12 sc Change to light purple color yarn:
Rounds 8–9
12 sc
Heel Pads (Make 2)
Note: Use 4-strand single thread and 2.0mm crochet hook.
With off-white color yarn:
Round 1
6 sc in Mr
Round 2
6 inc = 12 sc
Finger Pads (Make 6)
Note: Use 4-strand single thread and 2.0mm crochet hook.
With off-white color yarn:
Round 1
5 sc in Mr
Adjustable Belt Strap
With off-white yarn, crochet in turning rows:
Round 1
Ch13, starting in the second loop from the hook, 12 sc along the chain
Round 2
dec, 8 sc, dec = 10 sc
Round 3
10 sc
Round 4
dec, 6 sc, dec = 8 sc
Round 5
8 sc
Round 6
dec, 4 sc, dec = 6 sc
Rounds 7–24
6 sc (18 rows) Crochet the number of rows at your own discretion, depending on your height and fullness. This completes the first long strap.Make the second part of the strap similar to the first, from rows 1 to 7, creating a short webbing piece.
Head
Switch to light purple color yarn.
Crochet the first 7 rows in the same way as you knitted the body. In this section, alternate between off-white and light purple yarn colors, where light purple yarn is indicated.
Round 8
12 sc, 2 sc, 34 sc = 48
Round 9
11 sc, 4 sc, 33 sc = 48
Round 10
10 sc, 6 sc, 32 sc = 48
Round 11
9 sc, 8 sc, 31 sc = 48
Round 12
8 sc, 10 sc, 30 sc = 48
Round 13
27 sc, 21 sl-st
Round 14
27 sc, 21 ch, skip 21 sts on the head, 1 slst (zipper slot)
Rounds 15–16
48 sc (2 rows) Change color to turquoise green (collar)
Round 16
48 sc Change to light color
Join
Step 1Attaching the Head to Body: After completing the head portion, align the fabric pieces carefully. Pick out the entire stitch on the edge of both the head and body. Sew the crochet pieces together using the mattress stitch technique for a seamless finish. This completes the entire body part of the bag.
Step 2Adding Facial Features: Insert the 15mm safety eyes between rows 10 and 11 of the head
Step 3Attach or sew the 13x17mm nose in position as shown in the pattern image
Step 4Use black embroidery floss to embroider additional facial details
Step 5Installing the Zipper: Carefully insert and sew the 12cm zipper into the slot created at row 13 of the head. Take your time with this step to ensure smooth operation.
Step 6Attaching Body Parts: Sew the front legs to the body
Step 7Attach the rear legs with heel pads and finger pads
Step 8Position and sew the ears to the top of the head
Step 9Attach the tail to the back of the bag
Step 10Add the decorative bell
Step 11Final Strap Assembly: Sew both strap pieces to the bag body
Step 12Adjust the strap length according to your individual height
Step 13Install the Japanese-style buckle on the short end of the strap to facilitate easy length adjustment
Step 14Test the strap to ensure it’s secure and comfortable
Finish
- Lightly stuff the head, legs, ears, and tail with polyester fiberfill before sewing them to the body so the shapes hold volume, taking care not to overstuff.
- Sew in the 12cm zipper along the bag opening, then attach the buckle strap so the bag closes securely.
Bigger or smaller
- Larger
- Move up to a slightly bigger hook than the 3.5mm called for and use a heavier yarn than the 4-strand cotton. The body and head grow proportionally, though the 15mm eyes, nose, and 12cm zipper may then read small against the larger frame.
- Smaller
- Drop to a hook a size or two below 3.5mm while keeping the same double-thread setup. Stitches tighten and the finished bag shrinks, so plan a shorter zipper and smaller buckle to match.
Photographs of this one
Every photograph on this page was taken by whoever published the pattern, and they are printed in the order the source listed them.
FAQs
Asked and answered
These answers came from whoever first published the pattern, kept word for word.
What size phone fits this bag?
This bag is designed to fit phones up to 6.8 inches (21.59cm) in length, with the finished bag measuring about 23cm in height and 13cm in width. Measure your phone against these dimensions before assembling the zipper opening, since the seam is hard to redo afterward.
Can a different yarn be used instead of Milk Cotton?
Yes, any yarn that matches the 3.5mm main hook gauge will work, though the pattern is written for 4-strand cotton worked double. Swapping yarn changes the finished bag size, so make a test swatch and check gauge against the body piece first to ensure your phone will still fit.
Where exactly do the safety eyes go?
Insert the 15mm safety eyes between rows ten and eleven of the head, spacing them evenly before the head is closed up. Add the nose and embroidered mouth afterward, following the pattern image for placement.
Is the shoulder strap actually adjustable?
Yes, a separate seven-round belt strap piece pairs with the Japanese-style buckle (inner diameter 3.9cm, inner height 2cm) to make the strap length adjustable. This lets the finished bag be worn crossbody or shortened once everything is assembled.
Do the cat's legs and ears need to be stuffed?
Yes, light stuffing with polyester fiberfill is recommended for the legs, ears, and tail so they hold their shape and give the cat bag a three-dimensional look. Be careful not to overstuff, as this can distort the proportions.