 STITCH ROUND
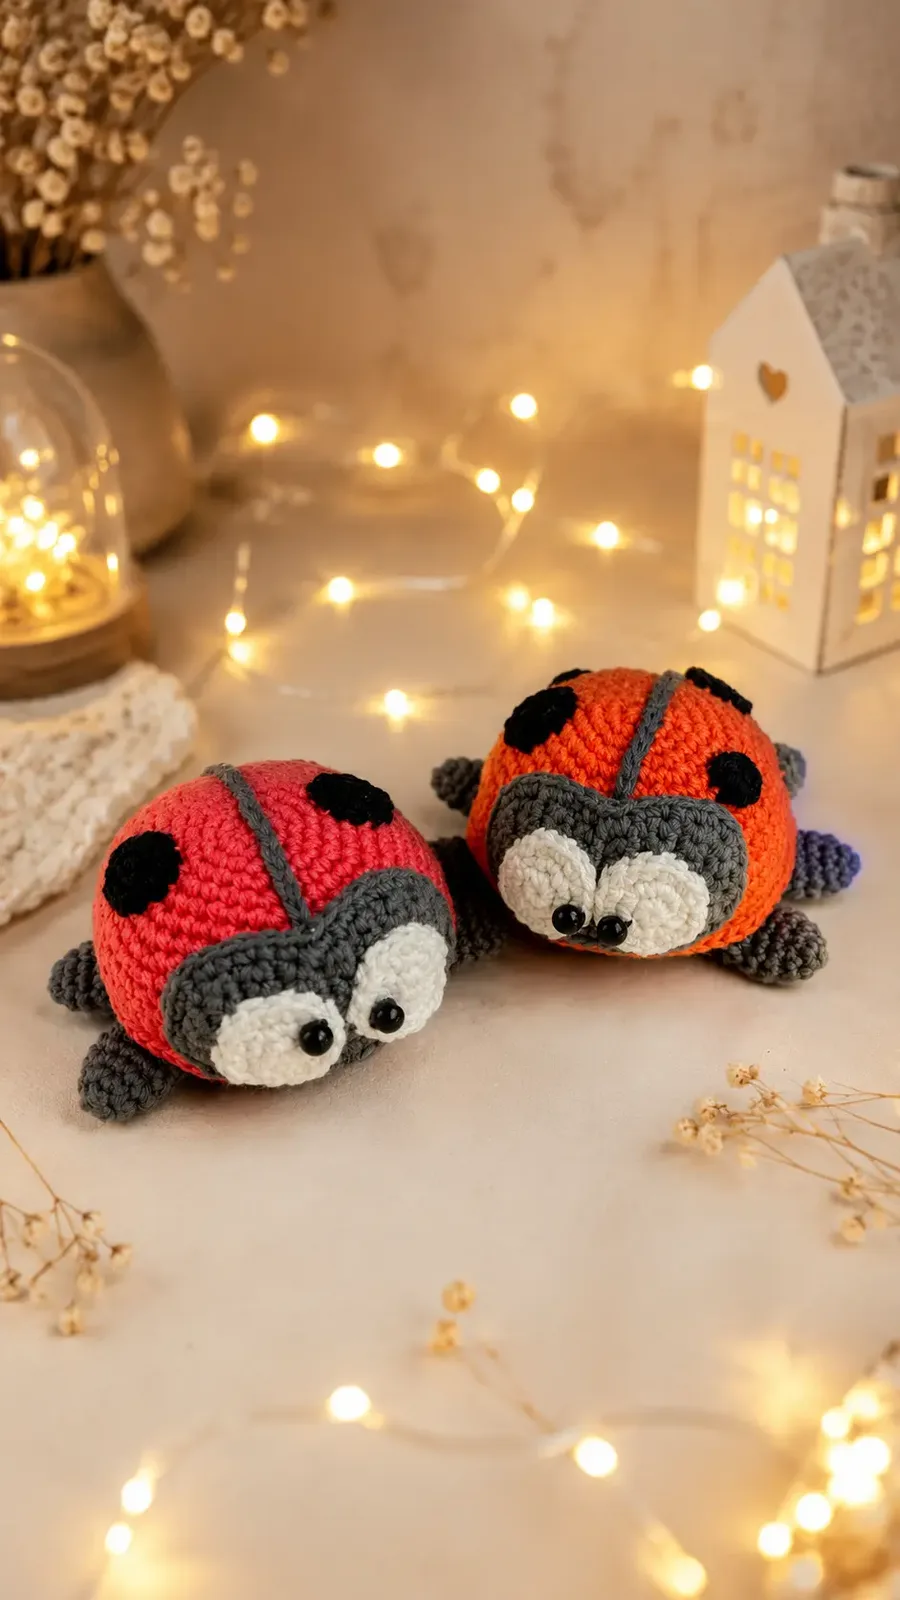
 Crochet a round ladybug amigurumi with paws
49 rounds across six pieces build this plump ladybug amigurumi toy.
- Skill
- Intermediate
- Rounds
- 43 rounds
- Yarn weight
- DK
- Hook
- 2.0 mm
- Time
- 4-6 hours

Intermediate
What the original page called it. Nothing here is graded a second time.

43 rounds
Each one gets its own line, with a box beside it to tick as you go.

DK
What the sample was made in. Any weight works — the size moves with it.
About this pattern
Six pieces make up this ladybug: a belly and a back worked in spiraled rounds, a muzzle built row by row, two white eye bases, six matching paws, and as many spots as you like. The belly takes ten rounds and the back takes fourteen before they are joined together; the muzzle takes sixteen rows; each eye takes just three rounds; each paw wraps up in three rounds before folding; and each spot is only one or two rounds. Tick off the belly and back first since they join into the body, then the muzzle and eyes, then knock out the paws and spots since they repeat short sequences over and over.
The real shaping happens where pieces meet rather than within any single part. Joining the back and belly means single crocheting around the whole edge while stuffing a little at a time, so slow down there to keep the body round instead of lumpy. The same care applies to placing the muzzle and eyes, since both get pinned and checked from a distance before a single stitch of sewing goes in for good.
- Work the back and belly in spiraled rounds, then join them with single crochet while stuffing gradually.
- Build the muzzle in straight rows, shaping it with increases before setting it aside to pin later.
- Make six paws in quick spiral rounds, folding each one flat so it keeps an unstuffed, foot-like shape.
- Crochet a simple chain and sew it down the back to mark the ladybug's center line.
- Pin the muzzle and eyes in place first, checking the look before sewing anything down for good.
- Finish by attaching the spots and paws, choosing as many spots as feels balanced to you.
What goes wrong
- Stitches left too loose Cotton with a small hook should feel snug, so tighten up if tiny gaps appear. Loose stitches on a toy this size let the stuffing show through.
- Stuffing added all at once Pack filling in small amounts while joining the back and belly, pausing often to keep the shape even instead of lumpy.
- Sewing features before pinning Pin the muzzle and eyes first and step back to check the placement. Unpicking stitched pieces later is far harder than repositioning a pin.
- Stuffing the paws by accident Leave the paws unstuffed and simply fold and close them flat so they keep their natural little foot shape.
Yarn, hook and the rest
Copied from the source pattern's own materials list.
- 100% cotton yarn (the pattern used PaintBox Yarns Cotton DK, 125 m / 50 g, in Pillar Red (415), Granite Grey (407), a small amount of Champagne White (403), and Pure Black (402))
- Crochet hook 2.0 mm (the pattern used a Clover hook)
- Stuffing, hollow fiber
- Black beads 6 mm in diameter for eyes (or you can embroider the eyes instead)
- A needle with a large eye
- Sewing pins
Progress tracker
0 of the 43 rounds on this page are ticked.
The pattern, round by round
Kept in the order and the wording the source used. Tick a round as you finish it; the ticks stay on this device.
Belly
With dark gray yarn. Use a 2.0 mm hook. The belly is crocheted in a spiral.
Round 1
6 sc in magic ring (6)
Round 2
2 sc in each sc (12)
Round 3
(1 sc, sc inc)*6 (18)
Round 4
(2 sc, sc inc)*6 (24)
Round 5
(3 sc, sc inc)*6 (30)
Round 6
(4 sc, sc inc)*6 (36)
Round 7
(5 sc, sc inc)*6 (42)
Round 8
(6 sc, sc inc)*6 (48)
Round 9
(7 sc, sc inc)*6 (54)
Round 10
(8 sc, sc inc)*6, sl.st. (60)Tie off the thread and cut it
Back
With red yarn. Use a 2.0 mm hook. The back is crocheted in a spiral.
Round 1
6 sc in magic ring (6)
Round 2
2 sc in each sc (12)
Round 3
(1 sc, sc inc)*6 (18)
Round 4
(2 sc, sc inc)*6 (24)
Round 5
(3 sc, sc inc)*6 (30)
Round 6
(4 sc, sc inc)*6 (36)
Round 7
(5 sc, sc inc)*6 (42)
Round 8
42 sc (42)
Round 9
(6 sc, sc inc)*6 (48)
Round 10
48 sc (48)
Round 11
(7 sc, sc inc)*6 (54)
Round 12
54 sc (54)
Round 13
(8 sc, sc inc)*6 (60)
Round 14
60 sc (60)Do not cut the work threadJoining the belly and the back together: Put the wrong sides of the pieces to each other, insert the crochet hook through the loops of both pieces and crochet sc. Work sc around the edge. Stuff the body as you go around. Finish with sl.st. Tie off the thread and hide it inside.
Muzzle
With dark gray yarn. Use a 2.0 mm hook. The muzzle is crocheted in rows.
Crochet 5 ch
Round 1
Start in the second loop from the hook and crochet 1 sc inc, 2 sc, 1 sc inc, 1 ch, turn (6)
Round 2
1 sc inc, 4 sc, 1 sc inc, 1 ch, turn (8)
Rounds 3–6
to 6: 4 rows of 8 sc, 1 ch, turn (8)
Round 7
6 sc, 1 sc dec, 1 ch, turn (7)
Round 8
1 sc dec, 5 sc, 1 ch, turn (6)
Round 9
5 sc, 1 sc inc, 1 ch, turn (7)
Round 10
1 sc inc, 6 sc, 1 ch, turn (8)
Rounds 11–14
to 14: 4 rows of 8 sc, 1 ch, turn (8)
Round 15
1 sc dec, 4 sc, 1 sc dec, 1 ch, turn (6)
Round 16
1 sc dec, 2 sc, 1 sc dec, 1 ch (4)Do not cut the thread and work sc around the edge of the muzzle. Finish with sl.st.Tie off the thread and leave enough for sewing
Eyes (make 2)
With white yarn. Use a 2.0 mm hook. The eyes are crocheted in a spiral.
Round 1
6 sc in magic ring (6)
Round 2
2 sc in each sc (12)
Round 3
(1 sc, sc inc)*6 (18)Finish with sl.st. Tie off and leave enough thread for sewing.
Paws (make 6)
With dark gray yarn. Use a 2.0 mm hook. The paws are crocheted in a spiral.
Round 1
5 sc in magic ring (5)
Round 2
2 sc in each sc (10)
Rounds 3–5
to 5: 3 rows of 10 sc (10)Fold two edges of the paw to each other and work 4 sc. Finish with 1 ch.Tie off the thread and leave enough for sewing The paws do not need to be stuffed
Spots (make as many as you'd like)
With black yarn. Use a 2.0 mm hook. The spots are crocheted in a spiral.
Big spot Big spot:
Round 1 (Big)
6 sc in magic ring (6)
Round 2 (Big)
2 sc in each sc, sl.st. (12)Tie off and leave enough thread for sewing
Small spot Small spot:
Round 1 (Small)
6 sc in magic ring (6)Finish with sl.st. Tie off and leave enough thread for sewing.
Join
Step 1Crochet 27 ch with dark gray yarn and sew the chain onto the body to create the line down the center of the back
Step 2Sew the muzzle onto the body
Step 3Use two black beads 6 mm in diameter for eyes and sew them onto the whites of the ladybug’s eyes. Note: If you don’t have beads, you can embroider the eyes instead
Step 4Sew the whites of the ladybug’s eyes onto the muzzle
Step 5Sew the paws onto the body
Step 6Sew the spots onto the back
Check your count
- Belly · Round 3: 18 sts
- Belly · Round 6: 36 sts
- Belly · Round 9: 54 sts
- Belly · Round 10: 60 sts
- Back · Round 4: 24 sts
- Back · Round 8: 42 sts
Finish
- Weave in every loose end as each piece finishes, since cotton can work itself loose over time.
- Stuff the body gradually while single crocheting the back and belly together, checking the shape stays round rather than lumpy.
- Pin the muzzle, eyes, spots and paws before sewing, then attach each one and close with the chain line down the back.
Bigger or smaller
- Larger
- Repeat one of the straight rounds in the belly or muzzle an extra time before moving on, which adds a touch more height without changing the stitch pattern.
Photographs of this one
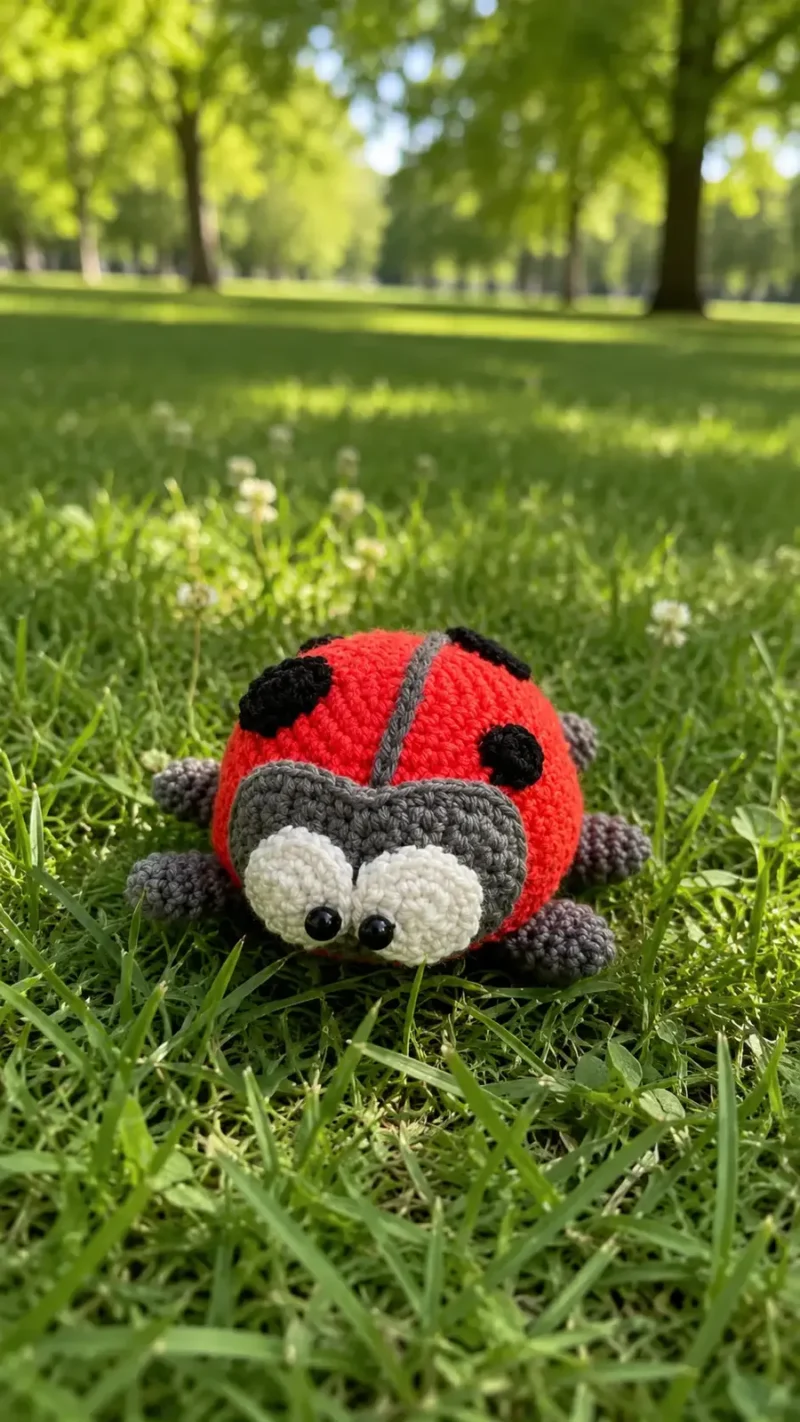
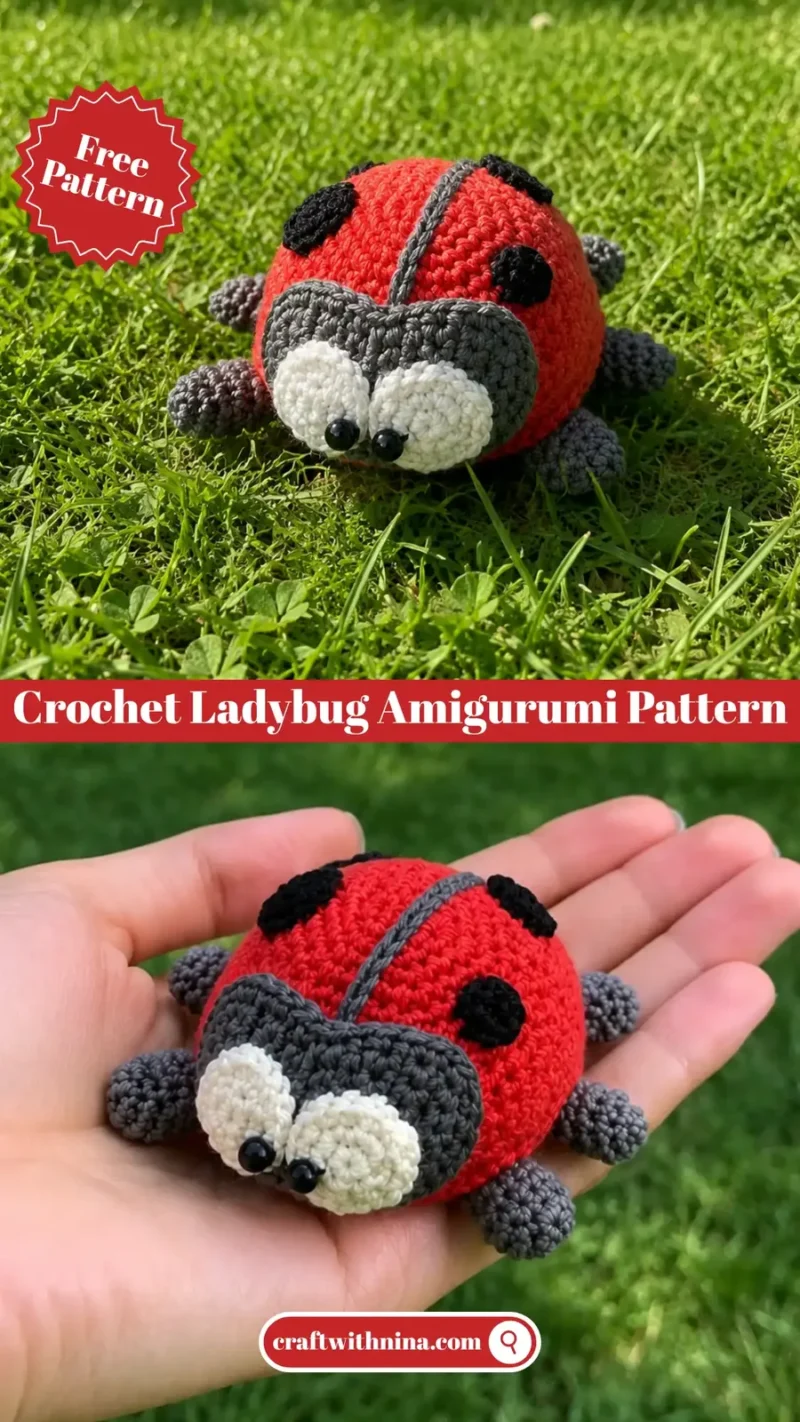
Every photograph on this page was taken by whoever published the pattern, and they are printed in the order the source listed them.
FAQs
Asked and answered
These answers came from whoever first published the pattern, kept word for word.
Is it safe to use beads for a baby's toy?
Skip the 6 mm beads for babies or toddlers and embroider the eyes with black yarn instead, since the pattern allows for that swap. It looks just as cute and removes any choking risk.
How many spots does the ladybug need?
The number of spots is left entirely up to the maker, with three on each side looking balanced and sweet. Fewer spots give a cleaner, simpler look if that is preferred.
Do the paws need stuffing like the body?
No, the paws stay unstuffed. They get folded and closed flat instead, which gives them a natural little foot shape on their own.
What yarn and hook does this ladybug use?
The pattern calls for 100% cotton DK yarn and a 2.0 mm hook throughout. Keeping stitches tight with this combination helps hide the stuffing underneath.