 STITCH ROUND
 Crochet drawstring gift bag pattern with eyelet closure
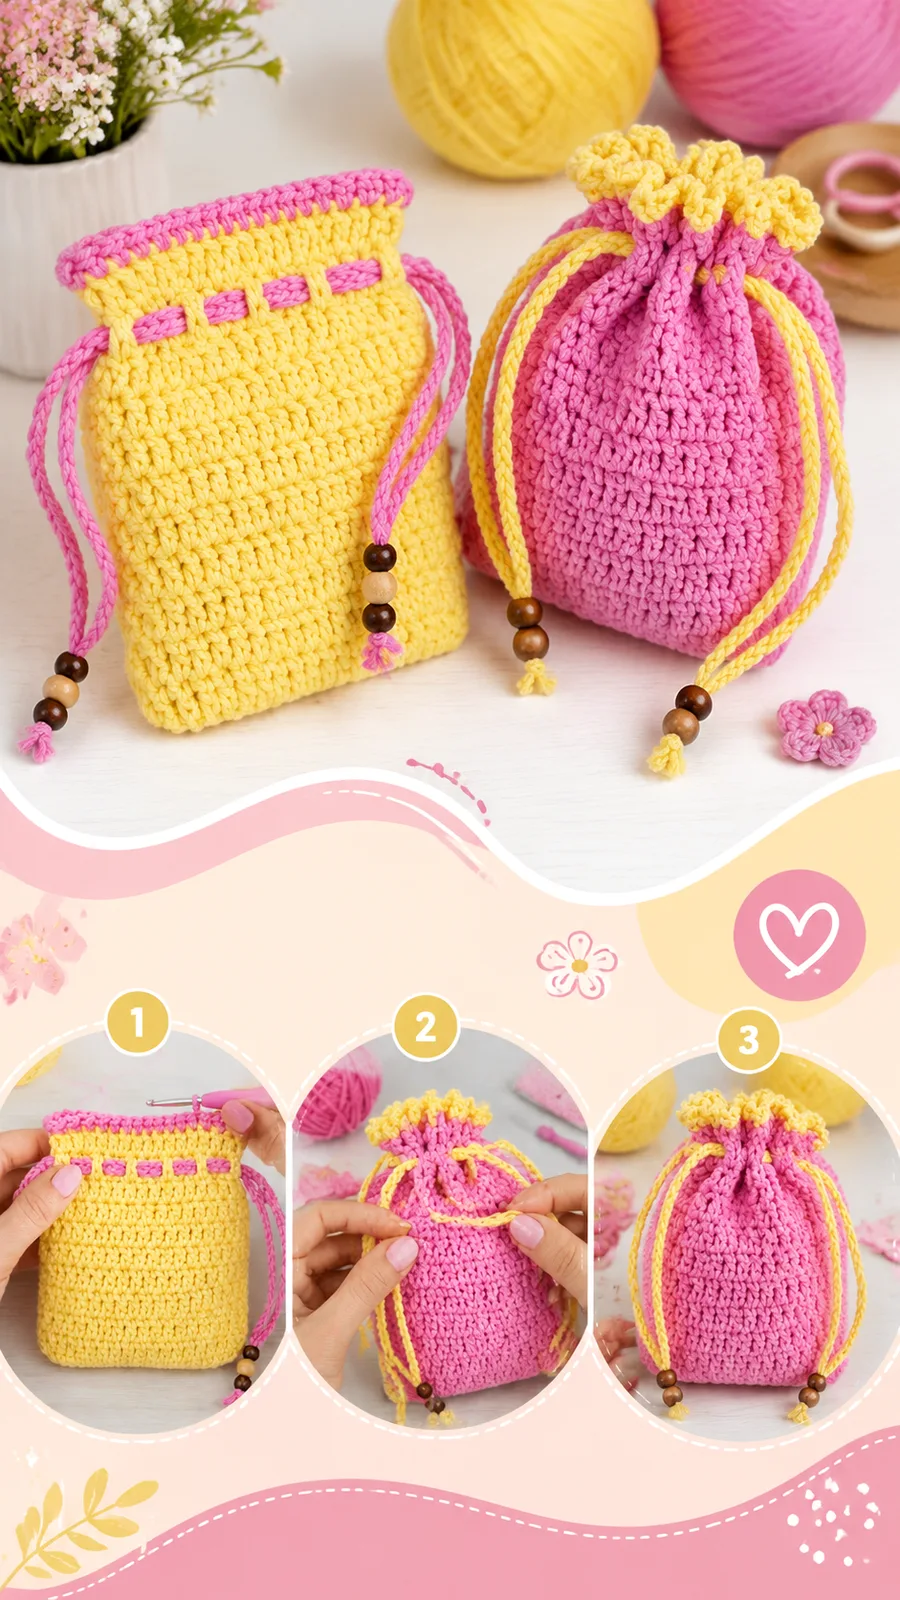
Nine rounds build a pastel cotton drawstring pouch with eyelet closure.
- Skill
- Intermediate
- Rounds
- 9 rounds
- Yarn weight
- Worsted
- Hook
- 4 mm
- Time
- 4-6 hours

Intermediate
What the original page called it. Nothing here is graded a second time.

9 rounds
Each one gets its own line, with a box beside it to tick as you go.

Worsted
What the sample was made in. Any weight works — the size moves with it.
About this pattern
This drawstring pouch comes together over nine tracked rounds: three for the oval base, three to build the straight-sided body, two for the eyelet section, and one for the decorative top edge. Each round is a clear checkpoint, so progress is easy to see from the first flat oval to the finished cord-closed bag. The compact shape makes it a practical stand-in for wrapping paper on small gifts, jewelry, or craft tools.
Skill level: Beginner to intermediate. Finished size: approximately 6 inches (15 cm) wide and 7 inches (18 cm) tall. Gauge: 18 single crochet stitches by 20 rows = 4 x 4 inches (10 x 10 cm), worked using US crochet terms.
Construction notes: The turning chain does not count as a stitch. Join each round with a slip stitch to the first single crochet unless otherwise stated. Keep a relaxed tension so the pouch opening remains flexible.
Pro Tip: A cotton or cotton-blend yarn is recommended for this type of pouch because it provides stitch definition, durability, and a neat shape after blocking.
- Chain and single crochet around to form a flat oval that becomes the pouch base.
- Build the sides upward in joined rounds of single crochet without any shaping changes.
- Work a back-loop-only round near the top to add a subtle ridge of texture.
- Close the chain spaces on the next round so the eyelet trim lies flat.
- Thread a crochet cord through the eyelets and finish the ends with small decorative beads.
What goes wrong
- Pouch sides curling If the sides curl outward, your tension may be too tight. Try using a slightly larger hook or relaxing your stitches.
- Uneven base Count stitches carefully during the oval base rounds. Missing an increase can cause the pouch to twist or become narrow.
- Loose drawstring opening Make sure the eyelet spaces are evenly distributed. A consistent round creates a neat closure.
Yarn, hook and the rest
Copied from the source pattern's own materials list.
- Worsted weight cotton yarn in Color A for the main pouch, approximately 85 yards (78 meters).
- Contrast cotton yarn in Color B for the top edging and cord, approximately 15 yards (14 meters).
- 4 mm US G-6 crochet hook.
- Yarn needle for weaving ends.
- Scissors.
Optional
- small wooden beads or crochet bobbles for cord ends.
Progress tracker
0 of the 9 rounds on this page are ticked.
The pattern, round by round
Kept in the order and the wording the source used. Tick a round as you finish it; the ticks stay on this device.
Pouch Base
Construction: Oval base with joined rounds for the pouch body. The base begins as a flat oval, then the sides are built upward in joined rounds, creating a stable foundation while avoiding bulky seams.
Round 1
Ch 18. Sc in 2nd ch from hook and across 16 sts. Work 3 sc in the last chain. Turn slightly and work along the opposite side of the chain with 16 sc. Work 2 sc in the final chain. Join with sl st. (38 sts)
Round 2
Ch 1. Sc in each st around, placing 2 sc in each of the three curved end stitches. Join. (44 sts)
Round 3
Ch 1. Sc around evenly. Join. (44 sts)
Pouch Body
Main stitch: Single crochet worked through the body for a firm texture. Texture detail: Alternating stitch placement creates subtle vertical definition at the back-loop-only round.
Rounds 4–20
Ch 1. Sc in each stitch around. Join after each round. (44 sts)
Round 21
Ch 1. Work sc in back loop only around. Join. (44 sts)
Round 22
Ch 1. Sc in each stitch around. Join. (44 sts)
Drawstring Eyelet Round
Attach Color B.
Closure: Crochet cord threaded through eyelet openings created in this round and closed on the next, so a drawstring cord can cinch the bag shut.
Round 23
Ch 1, sc in first 3 sts, ch 1, skip 1 st, sc in next 5 sts. Repeat around. Join. (36 sc and 8 chain spaces)
Round 24
Ch 1. Sc in each stitch and work 1 sc into each chain space around. Join. (44 sts)
Decorative Top Edge
Round 25
Ch 2. Work 2 dc in the same stitch, skip 1 stitch, sl st into next stitch. Repeat around. Join and fasten off. (22 shell points)
Special Stitch
Raised texture stitch: Work one round of single crochet by inserting the hook into the back loop only of each stitch. This creates a subtle ribbed texture without making the fabric too stretchy.
Drawstring Cord
Make two cords. For each cord, chain 55 inches (140 cm) long.
Slip stitch back across the chain to create a stronger cord.
Weave one cord through the eyelets from the front and the second cord through the opposite direction.
Tie knots at the ends. Add optional beads or crochet decorations if desired.
Join
Step 1For the best shape, gently block the finished pouch after assembly. Wet the project lightly, reshape it with your hands, and allow it to dry completely. Cotton yarn may soften slightly after washing while maintaining its structure.
Step 2Hand wash gently when needed.
Step 3Lay flat to dry.
Step 4Avoid pulling strongly on decorative cords.
Check your count
- Pouch Base · Round 1: 38 sts
- Pouch Base · Round 2: 44 sts
- Pouch Base · Round 3: 44 sts
- Pouch Body · Rounds 4–20: 44 sts
- Pouch Body · Round 21: 44 sts
- Pouch Body · Round 22: 44 sts
Finish
- Secure all yarn tails with a yarn needle.
- Lightly steam block or damp block the pouch to even the stitches.
- Shape the corners gently while drying.
Bigger or smaller
- Wider pouch
- Increase the starting chain length by adding stitches in multiples of two to create a wider pouch while keeping the same stitch pattern.
- Taller pouch
- a taller bag, add additional body rounds before creating the drawstring section.
- Color and style ideas
- Use pastel shades for a soft handmade look, create holiday versions with seasonal color combinations, or add stripes by changing yarn colors every few rounds. Replace the decorative edge with a simple single crochet border for a minimalist finish.
- Check gauge first
- Checking your gauge before adjusting size helps keep the drawstring opening and pouch proportions balanced.
FAQs
Asked and answered
These answers came from whoever first published the pattern, kept word for word.
Can the pouch be made without the back-loop-only round?
Yes, working that round the same as the others still produces a sturdy pouch. The texture detail is decorative, not structural, so skipping it only changes the surface look.
What happens if the eyelet spacing is uneven?
Uneven spacing usually comes from skipping stitches at inconsistent points in the repeat. Unraveling back to the start of the eyelet round and following the repeat exactly fixes the alignment.
Does the pouch need stuffing or a lining?
No, the single crochet body is firm enough to hold its shape on its own. A lining is optional and not part of this construction.
Why use cotton yarn instead of acrylic for this bag?
Cotton holds its shape well and blocks cleanly, which matters for the rounded base and the eyelet openings staying open. It also wears well as a reusable item that gets handled repeatedly.