 STITCH ROUND
 Crochet headset covers for round ear cushions
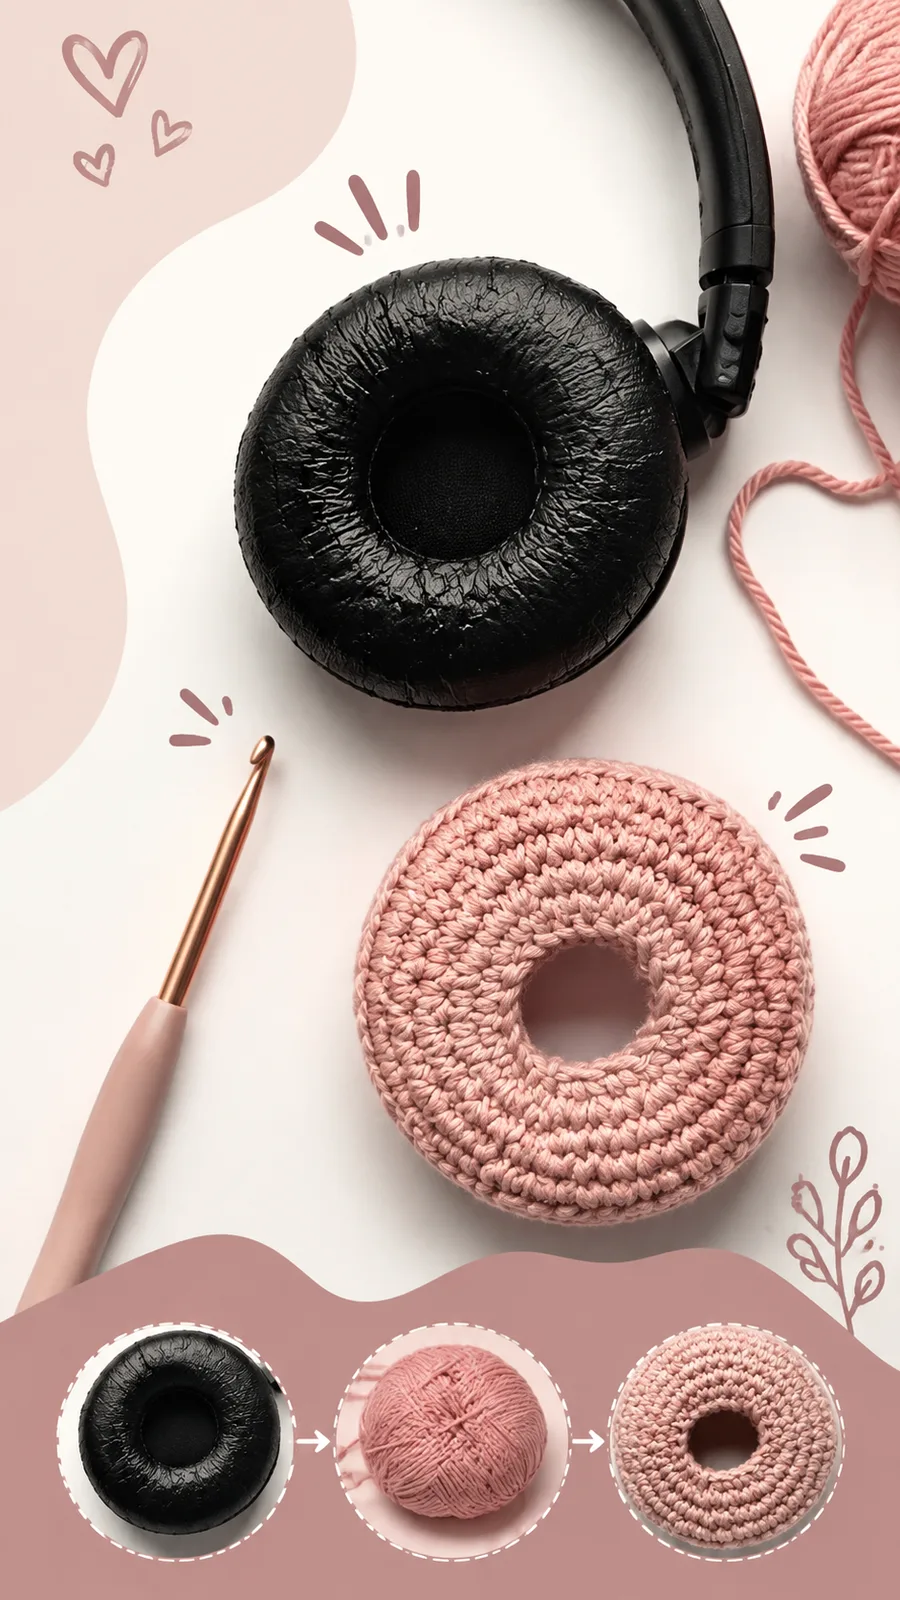
Eight rounds per piece make a pair of crochet covers for round headphone ear cushions.
- Skill
- Beginner
- Rounds
- 8 rounds
- Yarn weight
- DK
- Hook
- 3.5 mm
- Time
- 2-3 hours

Beginner
What the original page called it. Nothing here is graded a second time.

8 rounds
Each one gets its own line, with a box beside it to tick as you go.

DK
What the sample was made in. Any weight works — the size moves with it.
About this pattern
Each cover is a small, flat circle built in 8 rounds, so one piece can be ticked off in a single sitting before starting its match. The pair covers both ear cushions on a standard headset, giving worn padding a fresh, handmade surface without replacing the headphones themselves. Working two identical rounds of rounds keeps the project symmetrical, so the second cover goes faster once the stitch rhythm is set from the first.
The shape builds from a magic ring at the center and widens with a steady run of increases, so the circle grows flat instead of cupping. Slow down as the increase pattern shifts from round to round, since each one spaces the extra stitches one stitch further apart than the last. The final rounds taper into a slightly fitted edge, and this is the point to check the cover against the actual ear cushion before finishing.
- Start with a magic ring and build the first few rounds into a small, flat circle.
- Follow the increase pattern round by round, spacing extra stitches further apart each time.
- Watch the piece lie flat rather than cup, since dense single crochet shows curling early.
- Shape the final rounds into a slightly fitted edge that will hug the ear cushion.
- Repeat the same sequence for the second cover so both pieces match.
- Check the finished circle against an actual headphone cushion before weaving in ends.
What goes wrong
- Magic ring pulls loose Tug the tail firmly before working the first round so the center opening does not gape once stitches are added.
- Increases drift out of place Use a stitch marker at the start of each round and recount after every increase round to keep the spacing even.
- Circle starts to cup or ruffle Check tension on the single crochet stitches; a cover that cups usually has too many increases worked too tightly, while ruffling means too many stitches for the round.
- Join seam looks twisted Slip stitch into the first stitch of the round, not the chain, and keep the working yarn untwisted before closing each round.
Yarn, hook and the rest
Copied from the source pattern's own materials list.
- DK weight cotton or cotton-blend yarn
- 3.5 mm crochet hook (US E-4)
- Stitch marker
- Yarn needle
- Scissors
Progress tracker
0 of the 8 rounds on this page are ticked.
The pattern, round by round
Kept in the order and the wording the source used. Tick a round as you finish it; the ticks stay on this device.
Main Pattern
Round 1
Make a magic ring. Ch 1, work 8 sc into the ring. Join with a sl st to the first sc. (8 sts)
Round 2
Ch 1. Work 2 sc in each stitch around. Join with a sl st. (16 sts)
Round 3
Ch 1. *1 sc in next stitch, 2 sc in next stitch; repeat from * around. Join with a sl st. (24 sts)
Round 4
Ch 1. *1 sc in each of the next 2 stitches, 2 sc in next stitch; repeat from * around. Join with a sl st. (32 sts)
Round 5
Ch 1. *1 sc in each of the next 3 stitches, 2 sc in next stitch; repeat from * around. Join with a sl st. (40 sts)
Round 6
Ch 1. Work 1 sc in each stitch around. Join with a sl st. (40 sts)
Round 7
Ch 1. *Sc in next 4 stitches, sc2tog over next 2 stitches; repeat from * around. Join with a sl st. (32 sts)
Round 8
Ch 1. Sc in each stitch around. Join with a sl st. (32 sts) Fasten off, leaving a long tail for sewing if needed. Make a second matching cover using the same instructions.
Assembly Instructions
Place each crochet circle over the corresponding headphone cushion. The center opening should sit over the speaker area. If the cover feels loose, add one additional decrease round before fastening off.
For a more secure fit, weave a thin strand of yarn through the final round stitches and gently pull to tighten the opening around the cushion edge. Tie securely and hide the yarn ends inside the crochet fabric.
Finishing Instructions
Weave in all ends using a yarn needle. Lightly steam block the covers if needed, keeping the crochet shape rounded. Avoid heavy blocking because too much stretching may affect the headset fit.
Customization and Size Adjustment Guidance
Because headphone cushions come in many shapes and sizes, this crochet headset accessories pattern can easily be customized.
For smaller ear cushions, stop after Round 4 or 5.
For larger headphones, continue increasing evenly before working the straight rounds.
Use a smaller hook for a tighter cover.
Use a larger hook for extra stretch.
Create matching sets with different colors for seasonal styles.
Common Mistakes and Troubleshooting Cover Is Too Loose
If the cover slides around, your circle may be slightly too large. Remove one increase round or use a smaller hook size.
Circle Is Curling
Curling usually means the fabric needs more stitches added through increases. Check that each increase round has the correct number of stitches.
Texture Feels Too Stiff Try a softer cotton blend yarn or increase your hook size slightly for a more flexible fabric.
Finishing, Care, and Maintenance
Handmade crochet headset covers should be cared for gently. Cotton yarn is a good option because it is breathable and washable.
Hand wash with mild soap when needed.
Lay flat to dry to maintain the round shape.
Avoid high heat that can shrink cotton fibers.
Remove covers before cleaning the electronic headset.
At a Glance Best yarn choice: Soft DK cotton or cotton blend.
Skill level: Beginner-friendly crochet accessory.
Key technique: Circular crochet with single crochet stitches.
Customization: Adjust rounds for different headset sizes.
Finishing method: Gentle shaping and secure yarn weaving.
Create Your Own Crochet Headset Accessories
This crochet headset accessories pattern is a simple way to combine creativity and everyday function. With basic crochet stitches, soft yarn, and a little customization, you can create comfortable covers that reflect your personal style.
Choose your yarn carefully, check the fit as you work, and read through the complete pattern before beginning. Whether you make a matching pair for yourself or create a handmade crochet gift idea for someone special, this small project is a rewarding way to enjoy crochet.
Tags Crochet Headset Accessories Free Crochet Pattern Easy Crochet Project Handmade Crochet Crochet Accessories DIY Crochet Gifts
Join
Step 1Handmade crochet headset covers should be cared for gently. Cotton yarn is a good option because it is breathable and washable.
Step 2Hand wash with mild soap when needed.
Step 3Lay flat to dry to maintain the round shape.
Step 4Avoid high heat that can shrink cotton fibers.
Step 5Remove covers before cleaning the electronic headset.
Check your count
- Main Pattern · Round 2: 16 sts
- Main Pattern · Round 4: 32 sts
- Main Pattern · Round 6: 40 sts
- Main Pattern · Round 7: 32 sts
Finish
- Weave in the starting tail from the magic ring and the ending tail from the last round, working them through a few stitches on the wrong side.
- Stretch each finished cover gently over its ear cushion to settle the fitted edge into place.
- Lay both covers flat to set their round shape before putting them into regular use.
Bigger or smaller
- Smaller or custom fit
- Stop increasing a round earlier than written, or add one extra increase round before the fitted edge, and compare against the actual ear cushion before finishing.
FAQs
Asked and answered
These answers came from whoever first published the pattern, kept word for word.
Do both headset covers need to match exactly?
They should, since the pattern is written as two identical pieces worked from the same round sequence. Keeping tension consistent between the two makes them sit evenly on both ear cushions.
Why does the pattern say to measure before the final round?
Headphone ear cushions vary in size, so the written rounds are only an approximate guide. Checking the piece against the actual cushion before the last round avoids a cover that is too loose or too tight.
Is cotton yarn necessary for this project?
DK weight cotton or a cotton blend is recommended because it holds its shape in dense single crochet and washes easily. A different fiber can work but may stretch or felt differently when cleaned.
Can the covers be removed for washing?
Yes, they are designed as separate pieces that slip over the ear cushion rather than being sewn to the headset. Remove both covers before cleaning the electronic parts of the headphones.