 STITCH ROUND
 Crochet hen amigurumi pattern for beginners
7 rounds shape this plush hen, from body to comb, before assembly and finishing.
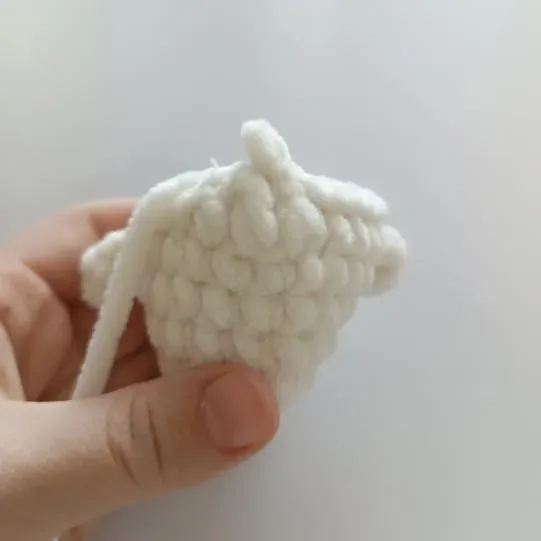
- Skill
- Intermediate
- Rounds
- 7 rounds
- Yarn weight
- Worsted
- Hook
- 3.5 mm
- Time
- 4-6 hours

Intermediate
What the original page called it. Nothing here is graded a second time.

7 rounds
Each one gets its own line, with a box beside it to tick as you go.

Worsted
What the sample was made in. Any weight works — the size moves with it.
About this pattern
This plush hen takes shape from a single body-and-head piece worked over 7 rounds, so there is no separate head to attach later. The plush or velvet yarn gives the finished bird a soft, feathery texture without any extra fluffing or brushing. One piece, one stitch marker, and a steady spiral carry the whole shape from base to crown.
This pattern is written in US crochet terminology. Stitch counts are given at the end of each round or row in parentheses. Using the recommended plush worsted weight yarn and a 3.5 mm hook, the finished hen measures approximately 2.75 inches tall and 3 inches long; gauge is not critical for this project — it will only affect the finished size of your hen, not the construction.
Glue the safety eyes in place once the head shaping is complete, and lightly stuff the body before closing to keep her shape soft but stable. Keep your stitch marker in place throughout the spiral rounds — the pattern relies on specific stitches landing at the center front and center back, so accurate stitch placement matters more than usual here.
- Start the body and head as one continuous piece, building the base with increases before moving upward.
- Watch for the point where the spiral rounds hand off to rows, since that shift shapes the head.
- Stuff the body and head firmly as the piece closes in, keeping the shape even throughout.
- Work the small red comb separately and attach it along the ridge where the folded fabric meets.
- Add the safety eyes and glue them level on either side of the head before finishing details.
- Embroider the orange beak by hand, then tack down any loose spots so the hen sits neatly.
What goes wrong
- Working the comb too loosely The comb's small double crochet clusters need a firm tension to stand up on their own. Keep the red yarn snug as the stitches go into the ridge.
- Placing safety eyes before checking level Glue the eyes only after confirming they sit even with one another on both sides of the head. Fabric glue sets fast, so line up placement first and adjust before pressing down.
- Underestimating the plush yarn's stitch definition Plush or velvet yarn hides stitch detail, which makes it easy to miscount increases. Count stitches out loud or pause at the marker each round to stay accurate.
Yarn, hook and the rest
Copied from the source pattern's own materials list.
- Plush/velvet yarn, worsted weight, approximately 130 yd (120 m) per 3.5 oz (100 g) skein, in 3 colors: white or cream (main color, for body), red (comb), and a small amount of orange (embroidered beak)
- 3.5 mm (US E-4) crochet hook
- 6 mm safety eyes (2)
- Polyester fiberfill stuffing
- Stitch marker
- Yarn needle (blunt tip)
- Scissors
- Fabric glue, for securing safety eyes
Progress tracker
0 of the 7 rounds on this page are ticked.
The pattern, round by round
Kept in the order and the wording the source used. Tick a round as you finish it; the ticks stay on this device.
Body & Head (make 1)
Begin with the main color. Keep your stitch marker centered as you work.
Round 1
Ch 7, starting in the 2nd chain from hook, inc, 4 sc, in last chain work 4 sc, working down the other side of the foundation chain: 4 sc, inc. (16)
Round 2
2 inc, 4 sc, 4 inc, 4 sc, 2 inc. (24)
Round 3
sc in each st around. (24)
Round 4
sc in each st around. (24)
Round 5
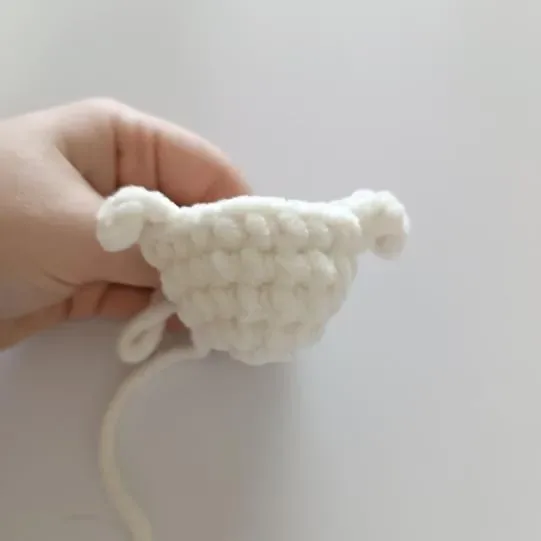
8 sc, work wing (ch 4, then working back along the chain: sl st, sc, hdc, sl st into the base stitch), 9 sc, work wing (repeat as above), 7 sc. (24)
Round 6
8 sc up to the wing, 9 sc between the wings (the 5th stitch of this section must land at center front), 6 sc after the wing. This round ends one stitch short of a full round. (23)From this point forward, specific stitches must land at center front or center back as noted. If your stitch count doesn't line up exactly, work one extra stitch or skip a stitch so the marked stitch falls precisely where indicated.
Row 7
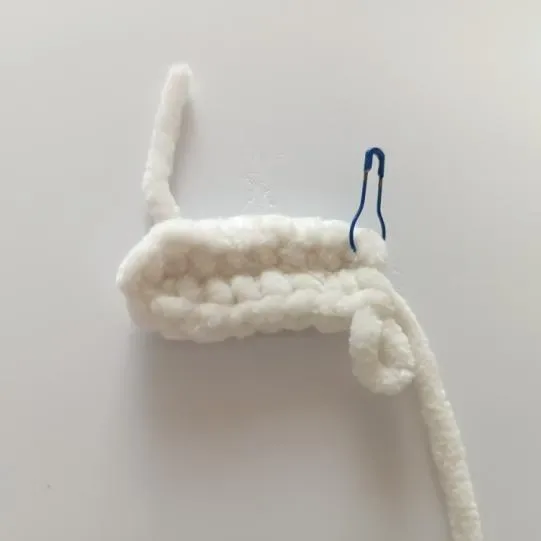
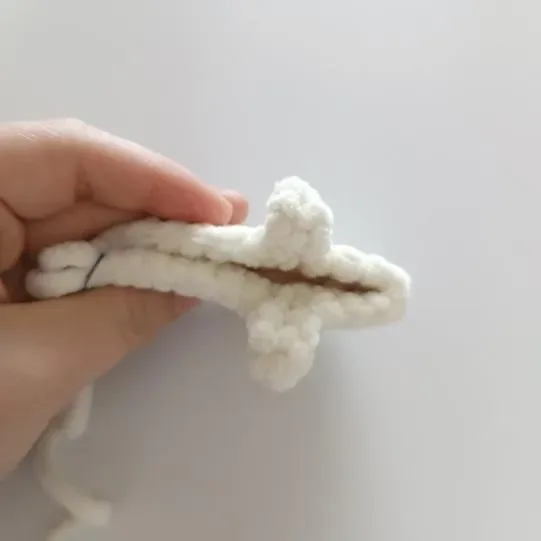
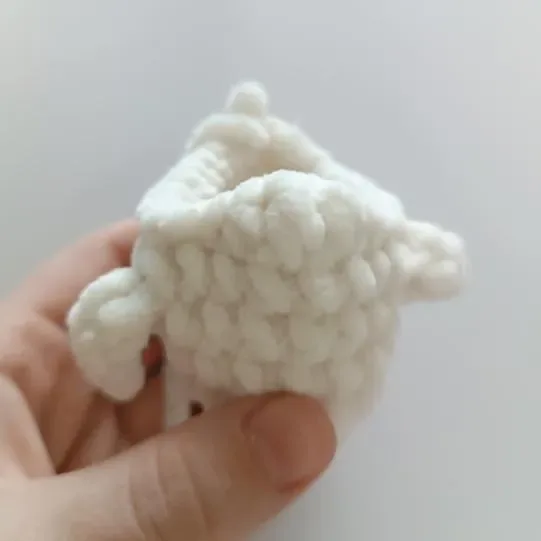
3 dc (the 2nd dc must land at center back), 9 sl st, hdc, dc (this stitch must land at center front), hdc, 12 sl st.Fold the piece flat so the two layers of the head come together. Work 7 sl st through both layers to close the seam — a small opening will remain at the top. Do not stuff before this step.Work a finishing round of sc around this small opening (9 sc used here), joining with a sl st to the first stitch of the round.Fold the head in half again and work 4 sl st through both loops of both layers together. In the last stitch, change to red yarn — you're ready to build the comb.
Comb
Work the comb directly into the ridge formed where the two sides of the folded fabric meet, using red yarn.
Ch 2 into this same stitch, work 2 dc into the same stitch, sl st in the next stitch, ch 2, work 2 dc into the 3rd stitch, sl st to finish.
Glue the safety eyes in place now, positioning them evenly on either side of the head above the beak area, before you move to finishing.
Join
Step 1Weave in the yarn tail left from the color change at the comb, securing it firmly at the base of the crest.
Step 2Using orange yarn and a yarn needle, embroider a small triangular beak on the front of the head, centered below the eyes.
Step 3Glue the 6 mm safety eyes in place on either side of the head, checking that they sit level with one another before the glue sets.
Step 4If your wings are sitting away from the body, tack them down with a few small stitches using main color yarn and a yarn needle so they lie flat against the sides.
Step 5Weave in all remaining ends, working them through the plush stitches so they stay hidden inside the body.
Check your count
- Body & Head (make 1) · Round 2: 24 sts
- Body & Head (make 1) · Round 4: 24 sts
- Body & Head (make 1) · Round 6: 23 sts
Finish
- Weave in the tail left from the comb color change, anchoring it firmly at the base of the crest so the red yarn stays put.
- Stuff the body and head lightly and evenly with fiberfill before the final rounds close, checking that the shape stays smooth rather than lumpy — because plush yarn already has volume and loft, overstuffing will distort the rounded shape rather than making her firmer.
- Glue the safety eyes level on either side of the head, then embroider the orange beak centered below them for a finished face.
Bigger or smaller
- Smaller
- Drop to a finer worsted-weight yarn and a smaller hook than the 3.5 mm called for, which tightens the gauge and shrinks the finished hen without changing the pattern's structure.
Photographs of this one
Every photograph on this page was taken by whoever published the pattern, and they are printed in the order the source listed them.
FAQs
Asked and answered
These answers came from whoever first published the pattern, kept word for word.
What skill level is this crochet hen pattern suited for?
This pattern is designed for confident beginners who already know how to single crochet, chain, and slip stitch. The only techniques you'll need to learn are basic increases and simple folding and seaming, which are explained step by step in the instructions.
What size will my finished hen be?
Using the recommended plush worsted weight yarn and a 3.5 mm hook, your hen will measure approximately 2.75 inches tall and 3 inches long. Keep in mind that your finished size may vary slightly depending on your yarn choice, hook size, and how tightly or loosely you crochet.
Why do specific stitches need to land at center front or center back?
The head shaping rounds rely on certain stitches lining up precisely so the folded seam creates the correct beak and head shape. If your stitch count drifts even slightly, adding or skipping a single stitch will realign everything before you continue, which keeps the finished head symmetrical.