 STITCH ROUND
 Crochet orca whale amigurumi plush for beginners
Tick off 28 rounds to crochet this orca whale amigurumi plush with fins and belly panel.
- Skill
- Beginner
- Rounds
- 76 rounds
- Yarn weight
- DK/Light Worsted
- Hook
- 3.5 mm
- Time
- 6-8 hours

Beginner
What the original page called it. Nothing here is graded a second time.

76 rounds
Each one gets its own line, with a box beside it to tick as you go.

DK/Light Worsted
What the sample was made in. Any weight works — the size moves with it.
About this pattern
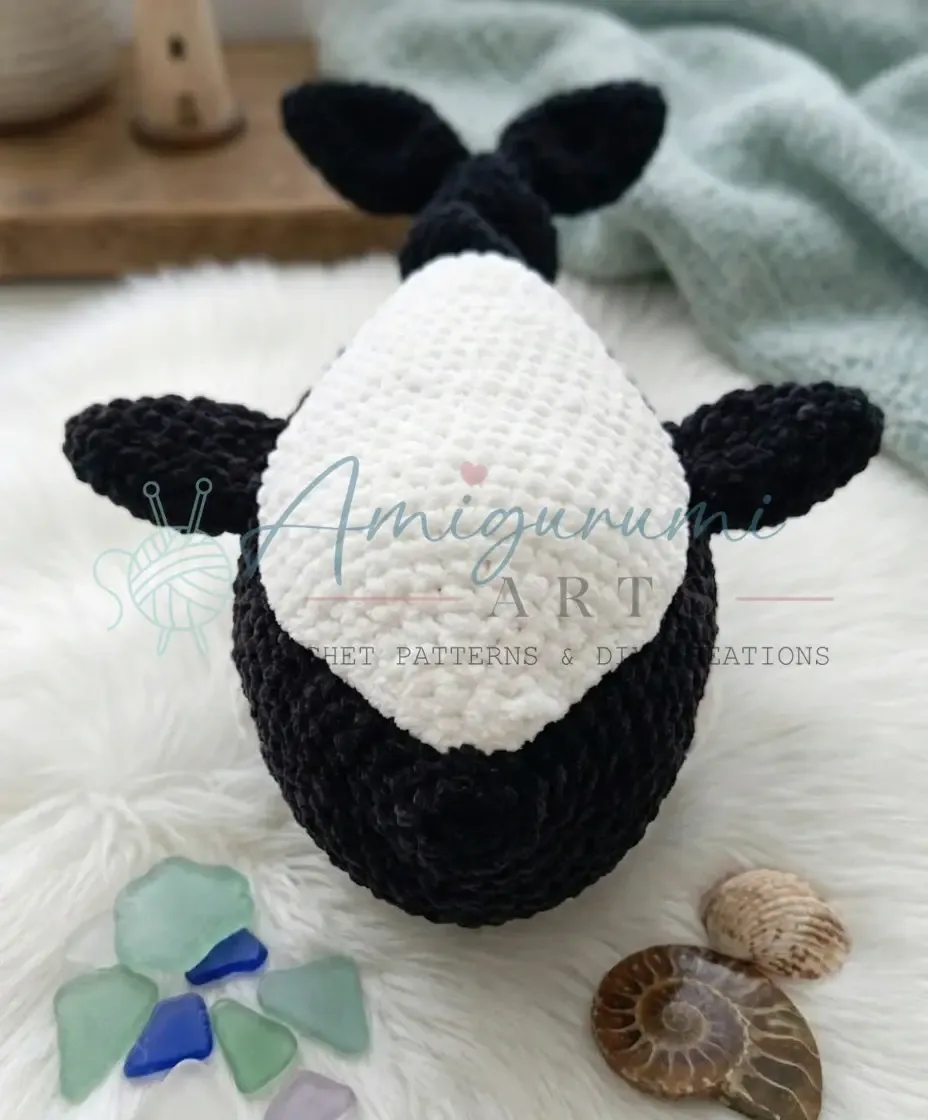
The shaping to watch sits in two places: the color change from black to cream on the body, and the belly panel worked flat in turning rows from a starting chain. Slow down when the safety eyes go in between Rounds 16 and 17, since spacing them evenly across the face makes or breaks the finished expression. The belly panel attachment, sewn from Row 8 up to the tail, also rewards a careful pin-and-check before stitching.
Gauge is not critical for this project, but the fabric should be worked tight enough that fiberfill does not show through the stitches.
This pattern is written in US crochet terminology, and rounded pieces are worked in a continuous spiral (not joined) unless otherwise noted.
- Make the tail fin twice and the pectoral fin twice, since both repeat on the finished whale.
- Work the belly panel flat in turning rows with cream yarn, starting from a foundation chain.
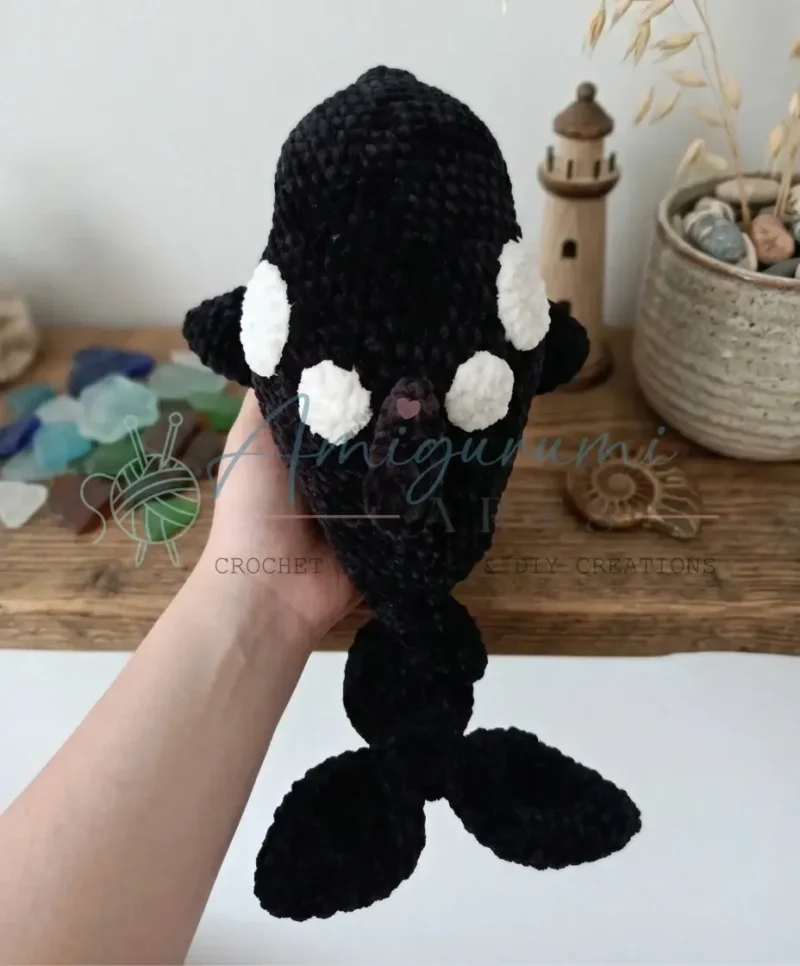
- Crochet the dorsal fin and the two small spots as quick, separate pieces before assembly.
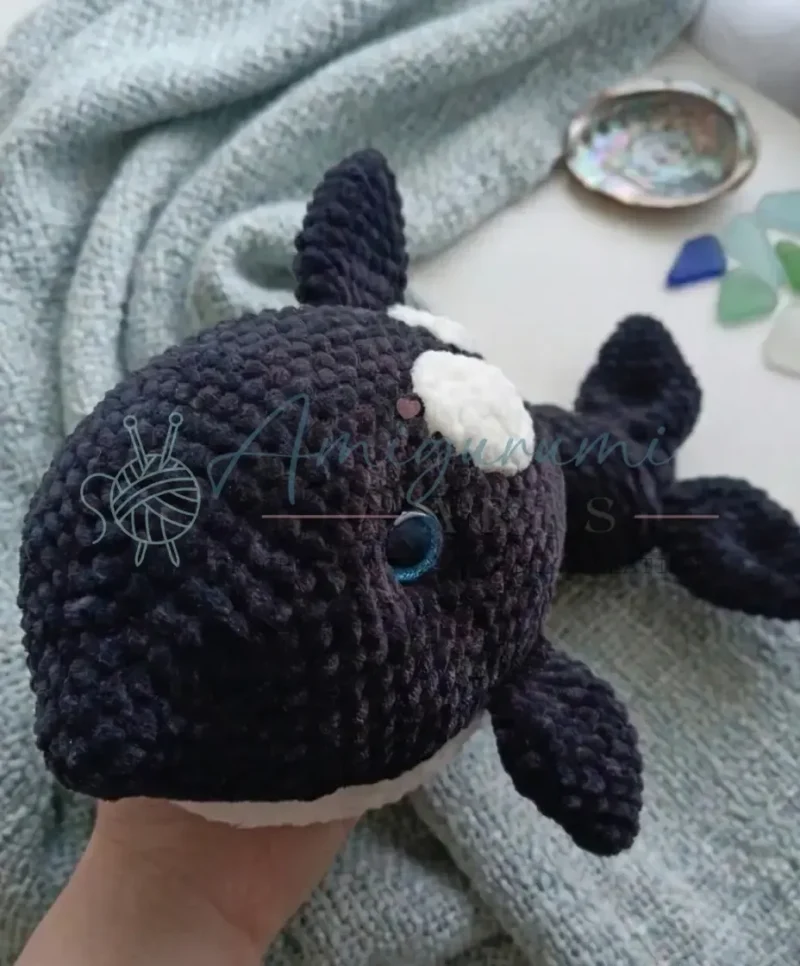
- Set the safety eyes between two of the body rounds and edge them with cream for the eye patch.
- Sew the belly panel down the underside, then attach both pectoral fins to close out the shape.
What goes wrong
- Losing the round start in the spiral Drop a stitch marker at the first stitch of every round and move it up each time, since the body has no join to mark the spot for you.
- Eyes set too close together Count stitches on both sides before inserting hardware, leaving the roughly 22 stitches the pattern calls for between the inner edges.
- Belly panel puckers when sewn Pin the panel along its full length before stitching and sew from Row 8 to the tail knot with even tension, rather than pulling tight as you go.
Yarn, hook and the rest
Copied from the source pattern's own materials list.
Yarn A
- Wolans Bunny Baby — Black (100-10), 1 full skein — DK/Light Worsted weight plush yarn
Yarn B
- Wolans Bunny Baby — Milk/Cream (100-02), less than half a skein
Yarn C
- YarnArt Jeans — Milk/Cream color, for sewing and edging
Hook
- E-4 / 3.5 mm
Safety eyes
- 18 mm, 2 pieces
- Fiberfill stuffing
- Stitch markers or contrast yarn (to mark round beginnings)
- Tapestry/yarn needle
- Scissors
- Lighter (to seal plastic joint hardware, if using)
Progress tracker
0 of the 76 rounds on this page are ticked.
The pattern, round by round
Kept in the order and the wording the source used. Tick a round as you finish it; the ticks stay on this device.
Body
Work in black yarn in a continuous spiral.
Round 1
6 sc in MR. (6)
Round 2
Inc in each st around. (12)
Round 3
Sc in each st around. (12)
Round 4
(1 sc, inc) × 6. (18)
Round 5
(2 sc, inc) × 6. (24)
Round 6
(3 sc, inc) × 6. (30)
Round 7
(4 sc, inc) × 6. (36)
Round 8
(5 sc, inc) × 6. (42)
Round 9
(6 sc, inc) × 6. (48)
Round 10
(7 sc, inc) × 6. (54)
Round 11
(8 sc, inc) × 6. (60)
Rounds 12–23
Sc in each st around. (60) Work 12 rounds even.After Round 23: Mark the placement of the safety eyes between Rounds 16 and 17 using contrast yarn. Leave approximately 22 stitches between the inner edges of each eye before installing them.
Round 24
16 sc, 2 dec, 8 sc, 2 dec, 8 sc, 2 dec, 16 sc. (54)
Rounds 25–26
Sc in each st around. (54)
Round 27
14 sc, 2 dec, 2 sc, 1 dec, 3 sc, 2 dec, 3 sc, 1 dec, 2 sc, 2 dec, 14 sc. (46)
Rounds 28–29
Sc in each st around. (46)
Round 30
14 sc, 1 dec, 1 sc, 1 dec, 1 sc, 3 dec, 1 sc, 1 dec, 1 sc, 1 dec, 14 sc. (39)
Round 31
(11 sc, dec) × 3. (36)
Rounds 32–33
Sc in each st around. (36)
Round 34
12 sc, 6 dec, 12 sc. (30)
Round 35
Sc in each st around. (30)Begin stuffing the body now. Pack the head and mid-body firmly. As you approach the tail, reduce the stuffing density so the tail end is softer and more flexible.
Round 36
(3 sc, dec) × 6. (24)
Round 37
Sc in each st around. (24)
Round 38
(2 sc, dec) × 6. (18)
Round 39
Sc in each st around. (18)
Round 40
(1 sc, dec) × 6. (12)
You are now beginning the tail “knot” section. Switch to double crochet for Rounds 41–62 to create a flexible, rope-like tube.
Rounds 41–62
Dc in each st around. (12) Work 22 rounds even.
Rounds 63–65
Sc in each st around. (12) Work 3 rounds even.Leave a long yarn tail and cut. Tie the tube into a knot. Add a small amount of fiberfill into the tail tip if desired. Pull the opening closed and weave in the end.
After installing the safety eyes: sink them using a yarn needle and knot technique according to your preferred eye-weighting method. Edge around each eye with cream/milk yarn (Yarn B or Yarn C) to create the white eye patch effect.
Tail Fin — Make 2
Work in black yarn in a continuous spiral. Do not stuff.
Round 1
6 sc in MR. (6)
Round 2
(1 sc, inc) × 3. (9)
Round 3
(2 sc, inc) × 3. (12)
Round 4
Sc in each st around. (12)
Round 5
(3 sc, inc) × 3. (15)
Round 6
(4 sc, inc) × 3. (18)
Round 7
Sc in each st around. (18)
Round 8
(5 sc, inc) × 3. (21)
Round 9
Sc in each st around. (21)
Round 10
(5 sc, dec) × 3. (18)
Round 11
(4 sc, dec) × 3. (15)
Round 12
(3 sc, dec) × 3. (12)
Round 13
(2 sc, dec) × 3. (9)
Flatten the piece and sc through both layers to close: work 4 sc through both walls. Fasten off, leaving a long tail for sewing. Attach to the tail section of the body at the sc rounds using a tapestry needle. To prevent the fins from drooping, you may optionally tack them to each other.
Dorsal Fin — Make 1
Work in black yarn in a continuous spiral. Do not stuff.
Round 1
6 sc in MR. (6)
Round 2
(1 sc, inc) × 3. (9)
Round 3
(2 sc, inc) × 3. (12)
Round 4
Sc in each st around. (12)
Round 5
(3 sc, inc) × 3. (15)
Round 6
Sc in each st around. (15)
Round 7
(4 sc, inc) × 3. (18)
Round 8
Sc in each st around. (18)
Round 9
(1 sc, dec) × 6. (12)Flatten and close by working 6 sc through both walls. Fasten off, leaving a long tail for sewing. Sew the dorsal fin to the center top of the body between Rounds 25 and 30.
Side Pectoral Fin — Make 2
Work in black yarn in a continuous spiral. Do not stuff.
Round 1
6 sc in MR. (6)
Round 2
(1 sc, inc) × 3. (9)
Round 3
(2 sc, inc) × 3. (12)
Round 4
(3 sc, inc) × 3. (15)
Round 5
Sc in each st around. (15)
Round 6
(4 sc, inc) × 3. (18)
Round 7
Sc in each st around. (18)
Round 8
(4 sc, dec) × 3. (15)
Round 9
(3 sc, dec) × 3. (12)Flatten and close by working 6 sc through both walls. Fasten off, leaving a long tail for sewing. Attach after the belly panel is sewn on.
Belly Panel
Work flat in turning rows using Yarn B (cream/milk). Chain 10 to begin.
Round 1
Starting in the 2nd ch from hook, sc across. (9)
Round 2
Inc, 7 sc, inc. (11)
Round 3
Sc in each st across. (11)
Round 4
Inc, 9 sc, inc. (13)
Rounds 5–14
Sc in each st across. (13) Work 10 rows even.
Round 15
Dec, 9 sc, dec. (11)
Rounds 16–20
Sc in each st across. (11) Work 5 rows even.
Round 21
Dec, 7 sc, dec. (9)
Rounds 22–24
Sc in each st across. (9) Work 3 rows even.
Round 25
Dec, 5 sc, dec. (7)
Rounds 26–28
Sc in each st across. (7) Work 3 rows even.
Round 29
Dec, 3 sc, dec. (5)Edging Round 1 (right side, work around entire panel):6 sc, hdc, dc, tr, dc, hdc, 17 sc, inc at corner, 2 sc, hdc, dc, hdc, 2 sc, inc at corner, 17 sc, hdc, dc, tr, dc, hdc, 6 sc, inc at corner, 2 sc, hdc, 2 sc, inc at corner.
Edging Round 2 (in Back Loop Only):
6 sl st in BLO, hdc, 3 dc, hdc, 18 sl st in BLO, ch 1, 9 sl st in BLO, ch 1, 18 sl st in BLO, hdc, 3 dc, hdc, 6 sl st in BLO, ch 1, 7 sl st, 6 sl st in BLO.
Fasten off and cut yarn. Sew the belly panel to the body using Yarn C (YarnArt Jeans, cream), beginning at Row 8 of the panel and continuing up to the tail knot section.
Small Spot — Make 2
Work in cream/milk yarn.
Round 1
6 sc in MR. (6)
Round 2
Inc in each st around. (12)Fasten off, leaving a tail for sewing. Sew on using Yarn C (YarnArt Jeans, cream).
Large Spot — Make 2
Work in cream/milk yarn.
Round 1
6 sc in MR. (6)
Round 2
Inc in each st around. (12)
Round 3
(1 sc, inc) × 6. (18)Fasten off, leaving a tail for sewing. Sew on using Yarn C (YarnArt Jeans, cream).
Join
Step 1Safety eyes: Install between Rounds 16 and 17, leaving approximately 22 stitches between the inner edges. Sink and weight using your preferred needle-and-knot technique. Edge with cream yarn to form the white eye patch.
Step 2Belly panel: Pin the panel centered along the underside of the body. Sew in place from Row 8 of the panel up to the tail knot, using Yarn C in cream.
Step 3Side pectoral fins: Once the belly panel is sewn, position one fin on each side of the body. Sew firmly with long yarn tail using a whipstitch or mattress stitch.
Step 4Dorsal fin: Sew centered on top of the body between Rounds 25 and 30, with the base flat against the body.
Step 5Tail fins: Attach both tail fin pieces to the tail section at the sc rounds (where the dc tube ends). Optionally tack the two fins together where they meet to prevent them from splaying.
Step 6Spots: Sew one small and one large spot above each eye in your preferred arrangement.
Step 7Weave in all ends securely on the wrong side of every piece.
Check your count
- Body · Round 8: 42 sts
- Body · Round 30: 39 sts
- Body · Round 39: 18 sts
- Body · Round 40: 12 sts
- Tail Fin — Make 2 · Round 4: 12 sts
- Tail Fin — Make 2 · Round 8: 21 sts
Finish
- Weave in every yarn end as each part finishes, tucking cream tails into the belly panel and eye patches so they stay hidden against black.
- Stuff the body firmly while closing the top rounds, keeping fill dense enough that no black stitches show gaps.
- Whipstitch the tail fins, dorsal fin, and pectoral fins onto the body once stuffing is complete, pinning each in place first to check symmetry.
Bigger or smaller
- Larger
- Move up to a heavier yarn and a larger hook than the E-4 / 3.5 mm called for, keeping the same round counts for a bigger, chunkier plush.
- Smaller
- Drop to a finer yarn and a smaller hook, working the same rounds throughout for a more compact whale without changing any shaping.
Photographs of this one
Every photograph on this page was taken by whoever published the pattern, and they are printed in the order the source listed them.
FAQs
Asked and answered
These answers came from whoever first published the pattern, kept word for word.
Is this orca whale pattern actually beginner-friendly?
Yes, the body relies on a continuous spiral with basic single crochet and increases, and the smaller pieces like the fins and spots follow the same simple stitch pattern. No advanced shaping techniques are needed anywhere in the make.
How does the belly panel attach to the body?
The panel is worked flat in turning rows, then pinned centered along the underside of the body. It gets sewn in place from Row 8 up to the tail knot using cream yarn.
What size safety eyes does the pattern use?
The pattern calls for 18 mm safety eyes, installed between Rounds 16 and 17 of the body. Edging them with cream yarn creates the white eye patch look.
Why does the pattern use two different yarns?
Wolans Bunny Baby in black and cream forms the whale's main color blocking, while YarnArt Jeans in cream is used separately for sewing and edging. Keeping the sewing yarn distinct makes seams and eye patches easier to control.