 STITCH ROUND
 Amigurumi bunny and bear crochet pattern
16 rounds to tick off for a pair of amigurumi bunny and bear toys with jointed arms and legs.
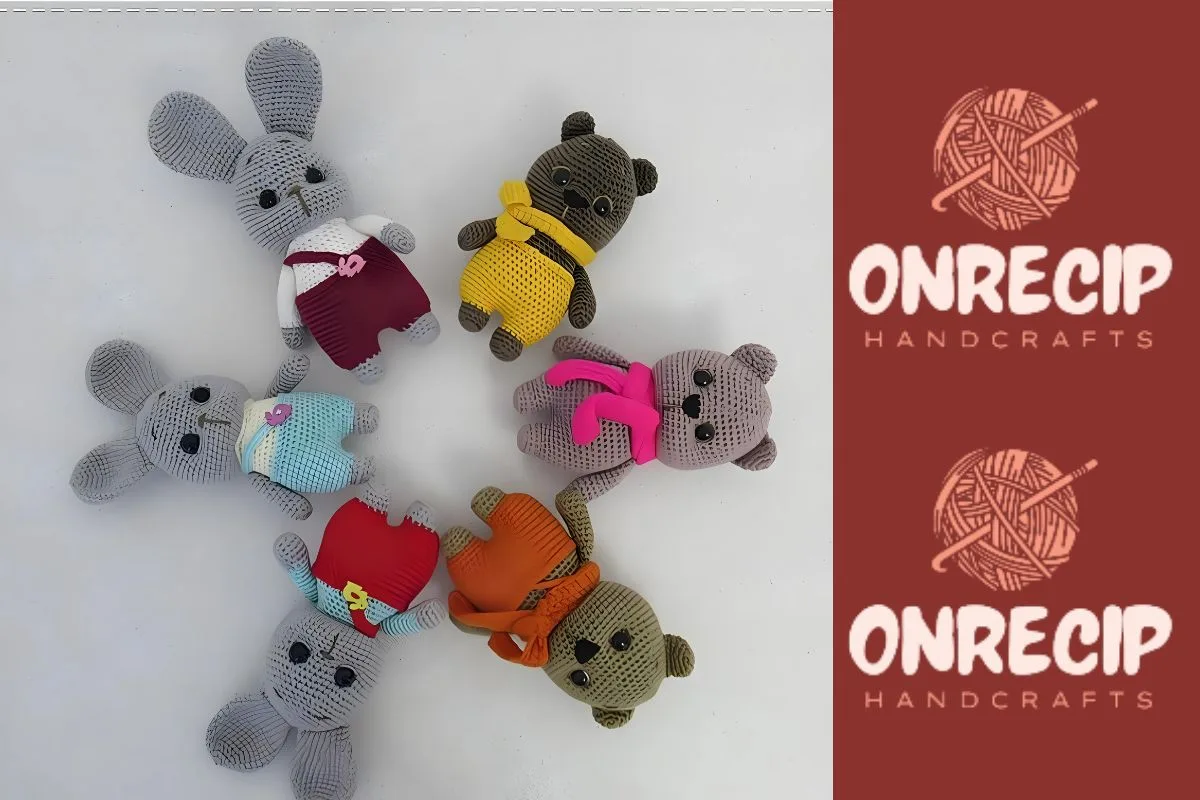
- Skill
- Intermediate
- Rounds
- 12 rounds
- Yarn weight
- Fingering
- Hook
- 2.0 mm
- Time
- 4-6 hours

Intermediate
What the original page called it. Nothing here is graded a second time.

12 rounds
Each one gets its own line, with a box beside it to tick as you go.

Fingering
What the sample was made in. Any weight works — the size moves with it.
About this pattern
This one builds a small stuffed pair from separate parts worked flat-bottomed, then joined. The leg starts from an oval base and climbs through shaping rounds; the arms follow a similar oval start before narrowing off; the body runs its own stack of rounds up to round 16. Each piece is short enough to tick off in a sitting, which makes the whole project feel like a checklist rather than a single long climb.
The oval starts (chain, then working around both sides) are the trickiest moment on each limb, since the stitch count doubles fast in that first round. Slow down there and at the increase clusters that shape the leg and arm width — missing one inc or losing track of where the round begins throws the rest of the shaping out. Once past those early rounds, the remaining rows settle into steadier, more repetitive stitching.
- Start each leg from a chained oval base and build up through shaping rounds to set the foot width.
- Work the arms the same way, from an oval base through their own set of shaping rounds.
- Crochet the body separately, working straight through to the final rounds before closing it off.
- Stuff each limb and the body firmly with fiberfill as the rounds narrow toward closing.
- Set the safety eyes into the head area before sewing it shut for good.
- Sew the finished legs, arms, and button in place once every piece is stuffed and closed.
What goes wrong
- Losing count in the oval base round Mark the first and last stitch of the chain before working around both sides, since the increase at the turn is easy to miss. Recount the total before moving to the next round.
- Skipping stitch markers between rounds Drop a marker in the first stitch of every round from the start. Without one, it is easy to drift off the true beginning and throw off later increase placement.
- Underfilling limbs before closing Stuff the legs and arms as the rounds narrow, not all at once at the end. Firm, even stuffing keeps the pieces from going floppy once sewn on.
- Placing safety eyes too late Insert and secure the eyes before the head is fully stuffed and closed. Once the opening shrinks, adjusting eye position becomes far harder.
Yarn, hook and the rest
Copied from the source pattern's own materials list.
Yarn
- Pekhorka Detskaya novinka (100% acrylic, 200 m/50 g)
- Hook size: 2.0 mm
- 12 mm safety eyes
- One button
- Sewing needle and scissors
- Fiberfill
Progress tracker
0 of the 12 rounds on this page are ticked.
The pattern, round by round
Kept in the order and the wording the source used. Tick a round as you finish it; the ticks stay on this device.
Right leg
With grey yarn: Make 5 ch.
Make an oval starting from the 2nd ch from hook, work on both sides of the chain.
Round 1
From the 2nd ch from hook: 3 sc, 3 sc in last st, turn and crochet on the opposite side of the chain: 3 sc, inc (11)
R 2
Round 1
inc, 2 sc, 3 inc, 4 sc (15)
R 7
Round 1
inc, 8 sc, (1 sc, inc)*3 (19)
Arms (make 2)
With grey yarn: Make 4 ch.
Make an oval starting from the 2nd ch from hook, work on both sides of the chain.
Round 1
From the 2nd ch from hook: 2 sc, 3 sc in last st, turn and crochet on the opposite side of the chain: 2 sc, inc in 1st st (9)
R 2
Round 1
inc, 2 sc, 2 inc, 3 sc (12)
R 7
Round 1
(3 sc, dec)*6, 3 sc (11)
R 15
Round 1
(1 sc, dec)*3, 2 sc (8)
Round 16
8 sc Stuff gently with fiberfill F.o. Ears (bunny) , make 2 With grey yarn:
R 4
Round 5
12 sc Do not stuff with fiberfill. Fold top of ear flat and sc through both sides across.
F.o. and leave a long tail for sewing.
Attach jointed arms on the body using threads Sew ears on the head Embroider eye brows and nose with brown yarn Embroider tail
Designed and photos by Marina Umerova Instagram: @my_knitted_toys
R 7
3 sc, (1 sc, inc)*4, 5 sc (20)
Round 8
20 sc Do not fasten off. Continue crocheting the body. From the left leg: 1 ch, join with the right leg.
Body
Round 9
20 sc on the right leg, 3 sc in 1 ch, 20 sc on the left leg, 3 sc in 1 ch (opposite side) (46)
R 16
Rounds 17–19
18 sc (3 rows) Do not stuff with fiberfill. Fold top of ear flat and sc through both sides across.
F.o. and leave a long tail for sewing.
Ears (bear) , make 2
Check your count
- Right leg · Round 1: 11 sts
- R 2 · Round 1: 15 sts
- R 7 · Round 1: 19 sts
- Arms (make 2) · Round 1: 9 sts
- R 2 · Round 1: 12 sts
- R 7 · Round 1: 11 sts
Finish
- Weave in every yarn tail on the legs, arms, and body before assembly so nothing works loose during sewing.
- Stuff each piece firmly but evenly with fiberfill, checking the shape holds before the last rounds close over it.
- Attach the safety eyes and button, then stitch the legs and arms to the body to complete the figure.
Bigger or smaller
- Smaller
- Drop to a finer yarn and a smaller hook while keeping every round as written. The stitches sit tighter and the finished toy shrinks proportionally.
FAQs
Asked and answered
These answers came from whoever first published the pattern, kept word for word.
Can the bunny and bear be made from the same set of parts?
Yes, the leg, arm, and body rounds are shared between both figures. Swap yarn color and add ears or other details separately to tell them apart.
What yarn weight does this pattern expect?
The original uses Pekhorka Detskaya novinka, a fine acrylic yarn, worked on a 2.0 mm hook. Any yarn of similar weight paired with a matching hook size will give comparable results.
Why does the leg start with a chain instead of a magic ring?
The oval base gives the foot a flatter, longer profile than a round start would. It is worked from both sides of the chain in the first round before joining into a normal spiral.
Is the button decorative or functional?
The button is listed alongside the safety eyes and fiberfill as an attachment piece, sewn on once the body is stuffed and closed. It reads as a design detail rather than a joint mechanism.