 STITCH ROUND
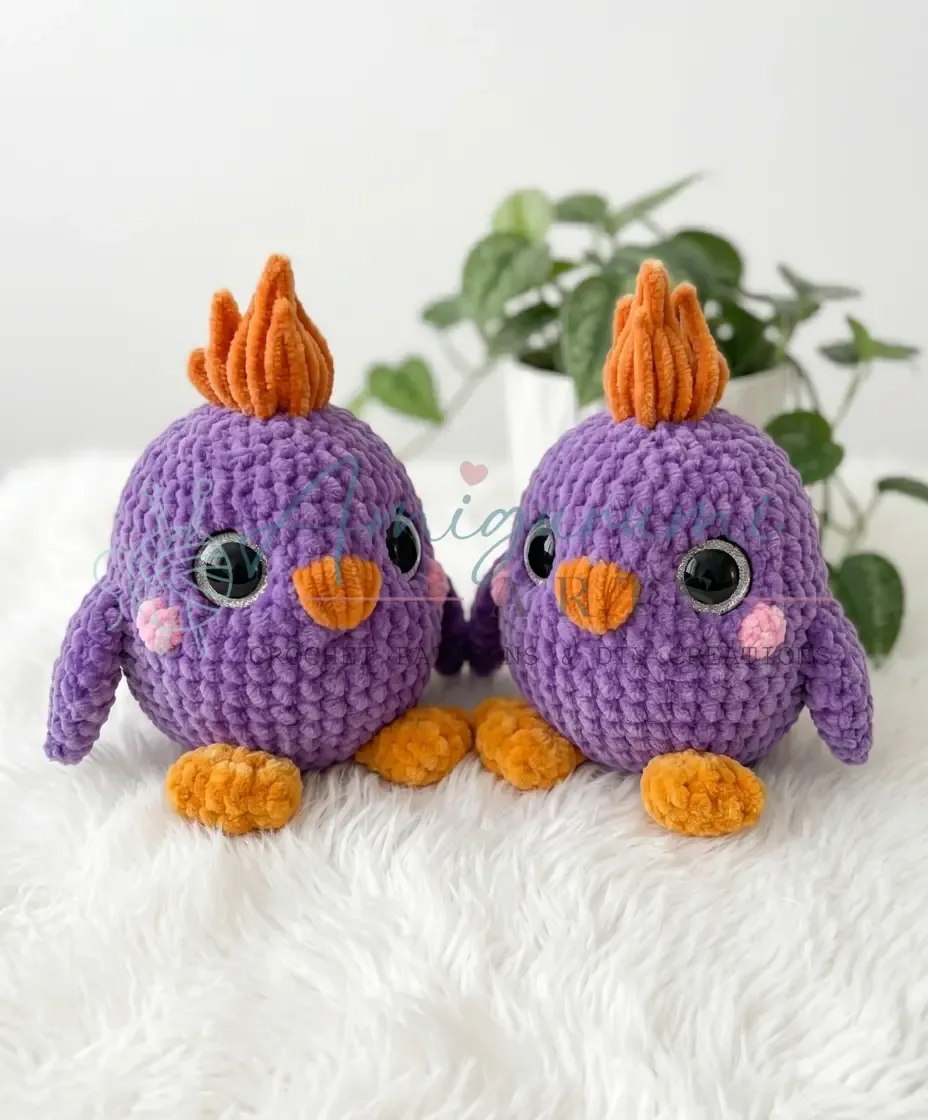
Crochet a plump bird amigurumi for beginners
28 rounds shape this bouclé bird amigurumi with velvet legs, a topknot crest and a cinched face.
- Skill
- Beginner
- Rounds
- 27 rounds
- Yarn weight
- Super Bulky
- Hook
- 4.0 mm
- Time
- 4-6 hours

Beginner
What the original page called it. Nothing here is graded a second time.

27 rounds
Each one gets its own line, with a box beside it to tick as you go.

Super Bulky
What the sample was made in. Any weight works — the size moves with it.
About this pattern
This little bird comes together from four separate pieces: wings worked flat and unstuffed over four rounds each, legs in a smooth velour yarn over four rounds plus a short flat row, and a body built in one continuous spiral over twenty-eight rounds. Cheeks add a final single round each. Nothing here runs long, so each part gets ticked off quickly before moving to the next.
The real shaping happens once the body rounds are done and stuffing goes in. Slow down at the cinching stage, since pulling the head into shape is what gives the face its structure, and rushing it leaves the features flat. Take the same care placing the crest and cheeks afterward, since their position is what makes the finished bird read as a face rather than a plain stuffed ball.
This pattern is written in US crochet terminology, and stitch counts appear in parentheses at the end of each round. Gauge is not critical, but the fabric should be worked snugly enough that stuffing doesn't show through — if you can see light through the stitches, size down your hook. Finished size runs roughly 18–20 cm tall, depending on the yarn weight and hook size used.
- Work the wings and legs separately before starting on the main body.
- Build the body from the crown down in one continuous spiral round.
- Join the wings directly into the body during the marked round instead of sewing them on later.
- Cinch the top of the head once stuffing is complete to pull the face into shape.
- Add the crest or topknot once the head shaping is fully finished.
- Embroider the beak and sew on the cheeks to finish the face.
What goes wrong
- Losing track of the round count Bouclé yarn hides stitch definition, so move the stitch marker up every round and check it against the row counter as work progresses.
- Sewing the wings on afterward Join the wings directly into the body during the marked round as instructed. Sewing them on after the fact leaves a bulky, visible seam.
- Overstuffing the velour legs Pack the legs lightly, since dense stuffing distorts the shape right where the rounds transition into the short flat row at the toe.
- Cinching the face too loosely Pull the cinching yarn snug and secure it with a knot before tucking it inside. A loose cinch leaves the face flat instead of shaped.
- Miscounting velour leg stitches Velour yarn has almost no stretch, so any miscount shows immediately. Count stitches after every round and mark the round start, since velour stitches can be hard to distinguish visually.
Yarn, hook and the rest
Copied from the source pattern's own materials list.
Main yarn
- Himalaya Dolphin Baby (or equivalent super bulky / bouclé-style yarn), color #80348
Contrast yarn
- LaVita Maxi Velur (or equivalent velvet/velour yarn), color #3012 — for the legs
Hook size
- US G-6 / 4.0 mm
Safety eyes
- 25 mm, x2
Stuffing
- Polyester fiberfill
Additional yarn
- Orange (for embroidered beak), pink (for cheeks), and a neutral yarn for cinching the toe details
- Tapestry needle / yarn needle
- Stitch markers
- Row counter
- Scissors
Progress tracker
0 of the 27 rounds on this page are ticked.
The pattern, round by round
Kept in the order and the wording the source used. Tick a round as you finish it; the ticks stay on this device.
Wings (make 2)
Work in main yarn. Do not stuff.
Round 1
6 sc in MR. (6)
Round 2
inc in each st around. (12)
Round 3
sc, inc repeat around. (18)
Round 4
sc, inc, 2 sc, inc repeat 5 times, sc. (24)Fold the piece in half so the two edges meet, lining up the edges precisely — pinning a stitch marker through both layers keeps them from shifting while you work across. Working through both layers together, sc across — 12 sc. (12) Fasten off, weave in ends. Make the second wing the same way.
Legs (make 2)
Work in contrast velour yarn. Stuff lightly.
Round 1
Foundation chain of 6 ch. Starting in the 2nd ch from hook: inc, 3 sc, 2 inc in the same base stitch, 3 sc, inc. (14)
Rounds 2–3
sc in each st around. (14) — 2 rounds total
Round 4
dec, 5 sc repeat twice. (12)
Round 5
sl st, ch 1, turn work: sc, dec, sc, sl st.Fasten off, leaving a yarn tail of approximately 15 cm for sewing. Make the second leg the same way.Toe detail: Thread a length of cinching yarn onto your needle. Pull it tightly between the toe sections to define individual toes, shaping them with your fingers as you go. Fasten off and hide the ends.
Body
Work in main yarn, keeping your tension firm — with a fluffy bouclé yarn, loose tension can let the fiberfill peek through, so size down your hook if you can see light through the stitches.
Round 1
6 sc in MR. (6)
Round 2
inc in each st around. (12)
Round 3
sc, inc repeat around. (18)
Round 4
2 sc, inc repeat around. (24)
Round 5
3 sc, inc repeat around. (30)
Round 6
2 sc, inc, 4 sc, inc repeat 5 times, 2 sc. (36)
Round 7
5 sc, inc repeat around. (42)
Round 8
3 sc, inc, 6 sc, inc repeat 5 times, 3 sc. (48)
Rounds 9–14
sc in each st around. (48) — 6 rounds totalIn the next round, attach both wings. Position them with the curved fold facing toward the back of the bird.
Round 15
11 sc, [2 sc worked together through body and wing edge], 22 sc, [2 sc worked together through body and wing edge], 11 sc. (48)
Rounds 16–21
sc in each st around. (48) — 6 rounds total
Round 22
6 sc, dec repeat around. (42)
Round 23
5 sc, dec repeat around. (36)Insert safety eyes (25 mm) between Rounds 17 and 18. Space them 10 stitches apart, each sitting 6 stitches from the nearest wing attachment point.
Round 24
4 sc, dec repeat around. (30) — begin stuffing firmly now
Round 25
3 sc, dec repeat around. (24)
Round 26
2 sc, dec repeat around. (18)
Round 27
sc, dec repeat around. (12)
Round 28
dec around. (6)Fasten off and close the opening.
Cheeks (make 2)
Work in pink yarn.
Round 1
6 sc in MR, sl st into first sc to join. (6)Fasten off, leaving a yarn tail of approximately 15 cm for sewing. Make the second cheek the same way.
Cinching (Shaping the Face)
Thread a length of yarn onto your tapestry needle. Insert the needle into the center base of the beak area — this is Point 1. Pull through to Point 2, then Point 3, then Point 4, then Point 5, returning finally to Point 1. Pull the yarn ends gently while pressing and shaping with your fingers to sculpt the face. Tie off securely and hide the ends inside the body.
Embroider the beak using orange yarn directly onto the front of the face.
Crest / Topknot
Join a yarn of your choice at the closing point of the body (where you finished the last round). Work 2–3 rows of sc to create a small upright crest.
Join
Step 1Position each leg on the underside of the body . Sew firmly in place using the long yarn tail and a whipstitch. Make sure both legs sit symmetrically.
Step 2The wings were attached directly during Round 15 of the body — no additional sewing needed.
Step 3Sew each cheek onto the face, placing it 2 stitches out from the eye and 1 row below eye level. Use small, even whipstitches around the outer edge — sewn too tightly it will pucker, too loosely it will flap; aim for a flat, flush finish.
Step 4Confirm that the beak embroidery is secure and the cinching yarn is hidden inside the body.
Step 5Weave in all remaining yarn tails.
Check your count
- Wings (make 2) · Round 1: 6 sts
- Wings (make 2) · Round 2: 12 sts
- Wings (make 2) · Round 3: 18 sts
- Wings (make 2) · Round 4: 24 sts
- Legs (make 2) · Round 1: 14 sts
- Legs (make 2) · Round 4: 12 sts
Finish
- Stuff the body firmly as the spiral rounds close in, checking that the fiberfill does not show through the bouclé fabric. Add the fiberfill gradually as you decrease rather than all at once — this gives a rounder, more even shape and makes it easier to control firmness without overstuffing.
- Cinch the top of the head once stuffing is complete, then tuck the neutral cinching yarn inside the body where it stays hidden.
- Weave in every tail from the wings, legs, cheeks and body, then sew each leg to the underside of the body with a whipstitch.
Bigger or smaller
- Hook and yarn size
- Go up a hook size with a bulkier yarn to scale the whole bird larger, or drop down a hook size with a finer yarn to make it smaller, keeping every round the same.
- Body length
- Repeat one of the plain body rounds before the decreases begin to add height, or skip it to keep the body shorter and more compact.
Photographs of this one
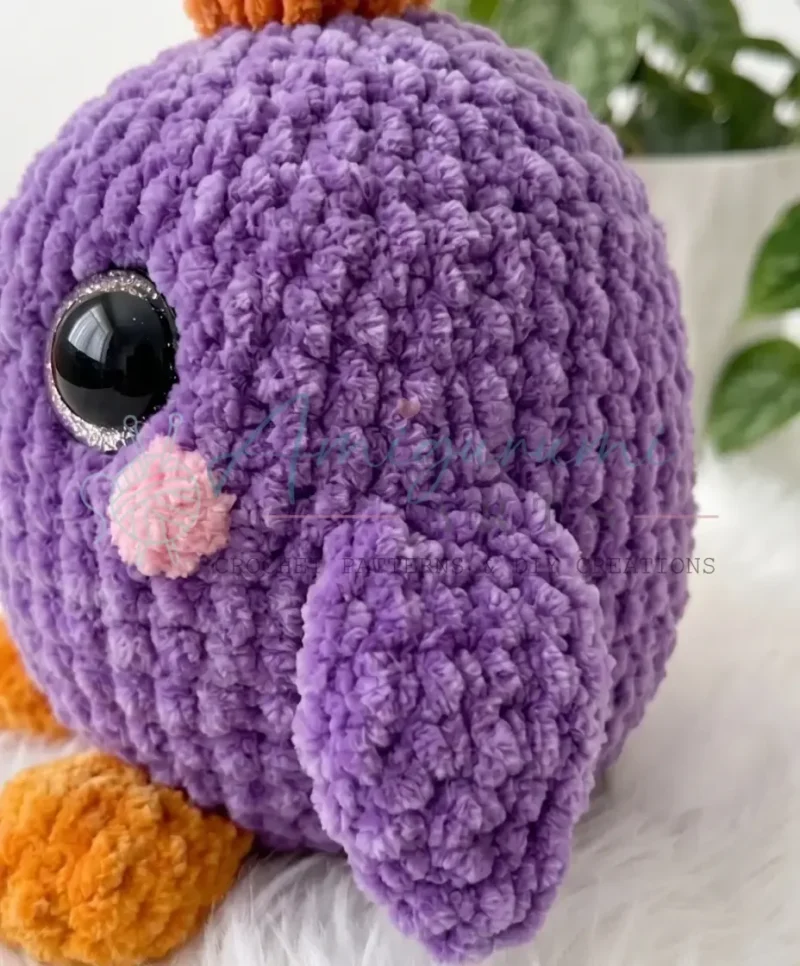
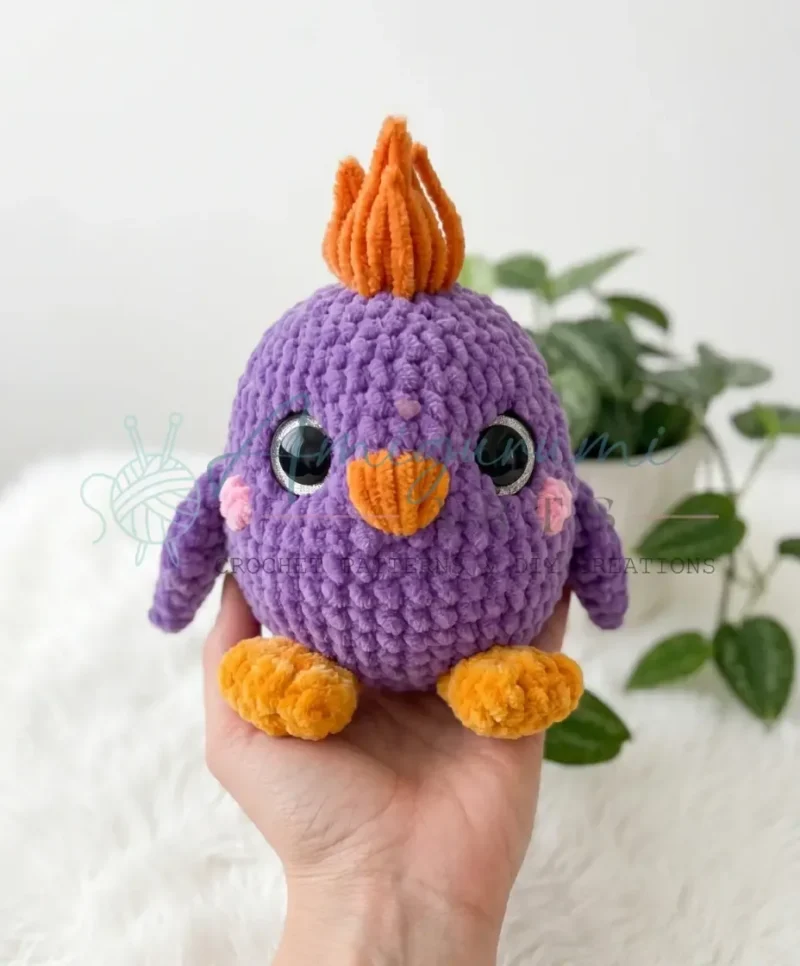
Every photograph on this page was taken by whoever published the pattern, and they are printed in the order the source listed them.
FAQs
Asked and answered
These answers came from whoever first published the pattern, kept word for word.
Can I substitute a different yarn for the main body?
Yes — the key is choosing a yarn of similar weight and texture. The original pattern uses a super bulky bouclé-style yarn, which gives the bird its fluffy, soft appearance. If you substitute, match the weight carefully and swatch a few rounds to check that your fabric is tight enough to hold stuffing without gaps.
How do I attach the wings cleanly in Round 15?
Hold the folded wing against the outside of the body with the curved edge facing back, and align the flat joined edge with the body stitches. When you reach the attachment point, insert your hook through the body stitch and the corresponding edge stitch of the wing at the same time, then complete the single crochet as normal. Work 2 stitches this way per wing to secure it firmly in place.
What is the cinching technique used for the face?
Cinching is a shaping method where yarn is threaded through several points on the face in sequence and then pulled tight to sculpt a three-dimensional feature — in this case, the beak area. By pulling between five labeled points and using your fingers to guide the shape, you create a gentle indent that defines the beak without any additional crocheted pieces.
My finished bird is smaller than 18–20 cm. What went wrong?
The finished size depends heavily on the yarn weight and hook size you used. If your bird is smaller, you likely worked with a lighter yarn or a smaller hook than the pattern calls for. Try swatching with a G-6 / 4.0 mm hook and a super bulky main yarn before restarting. You can also size up your hook by half a millimeter if your tension runs tight.