 STITCH ROUND
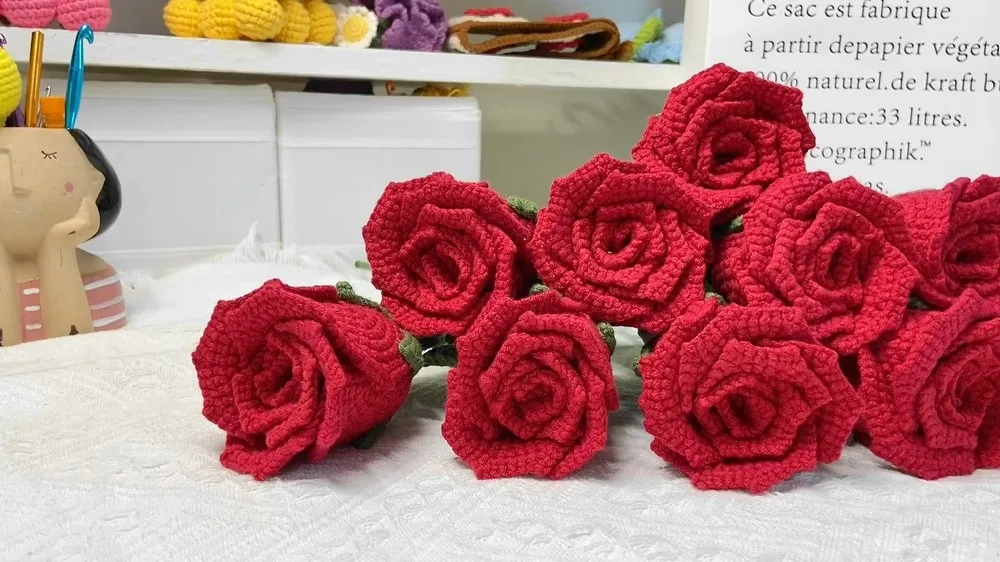
 Crochet rose flower bouquet pattern for gifts and decor
5 rounds build the rose, 3 shape the center. A petal-and-leaf bouquet for gifts or decor.
- Skill
- Intermediate
- Rounds
- 8 rounds
- Yarn weight
- Worsted
- Time
- 4-6 hours

Intermediate
What the original page called it. Nothing here is graded a second time.

8 rounds
Each one gets its own line, with a box beside it to tick as you go.

Worsted
What the sample was made in. Any weight works — the size moves with it.
About this pattern
This rose comes together from separate petals, a torus-shaped center, and leaves, each worked flat in rounds before assembly. The main petal pattern ticks off across 5 rounds, worked twice over for small petals and twice over again at a larger size for the big outer layer. The torus center adds its own 3 rounds, built from the same magic ring start so the whole flower shares one technique throughout.
The shaping sits entirely in the increases: Round 2 doubles the starting stitches, and the rounds after split into plain stitches plus single increases to keep the circle flat and even. Slow down whenever a round mixes increase stitches with plain ones, since losing track there throws off how the petal lies once it is pinned into the finished bouquet.
- Start each petal and the center with a magic ring closed into a tight circle.
- Work the small petals first, repeating the main pattern rounds to make four of them.
- Build the flower center separately using its own short set of rounds for the torus shape.
- Crochet two leaves to frame the finished rose before any assembly begins.
- Arrange the petals around the torus center and attach the leaves at the base to finish.
What goes wrong
- Losing count during increase rounds Mark the start of each round with a stitch marker so the plain-stitch-plus-increase pattern stays easy to track. Recount before closing with the slip stitch if the round feels off.
- Magic ring pulled too loose Cinch the magic ring tight before working the first round of sc, especially on the torus center where a loose ring leaves a visible gap. Check the hole is closed before moving on.
- Petals and center mismatched in size Keep the large petals consistent with each other by extending their rounds the same way every time. Compare petals side by side before assembly rather than after.
- Rushing the final arrangement Lay the small petals, large petals, torus center, and leaves out before attaching anything permanently. Adjust spacing around the center until the arrangement looks balanced from the front.
Yarn, hook and the rest
Copied from the source pattern's own materials list.
- Yarn in desired colors for small petals, large petals, flower center (torus), and leaves.
- Crochet hook (size not specified in the text).
- Magic ring technique for starting rounds.
Progress tracker
0 of the 8 rounds on this page are ticked.
The pattern, round by round
Kept in the order and the wording the source used. Tick a round as you finish it; the ticks stay on this device.
Main Pattern
Round 1
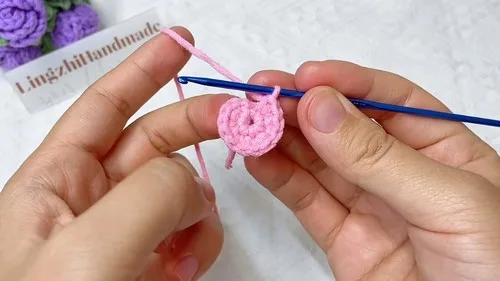
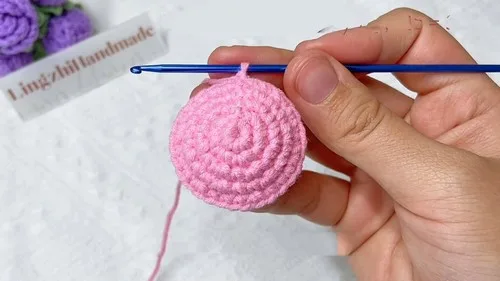
6 single crochet (sc) in the ring. Close the ring with a slip stitch (sl st).
Round 2
Chain 1. Do 2 sc in each stitch around for a total of 12 stitches. Close with sl st.
After Round 3:
Chain 1. 1 sc in the first stitch, then 2 sc in the next stitch (increase). Repeat around to get 18 stitches. Close with sl st.
Round 4
Chain 1. Do 2 sc, then an increase. Repeat for the whole round.
Round 5
Chain 1. 1 sc, 1 increase, then 3 sc. Repeat this pattern around. For Round 6: Chain 1. 4 sc, then 1 increase. Repeat for total of 36 stitches.
Round 7
Last round for small petal Chain 1. 9 sc, then in next stitch do 1 sc, chain 2, and 1 sc in the same stitch. From the next space, 2 sc, and repeat the pattern around. End with a sl st to close the round. Secure and cut off the yarn.
Large Petal Pattern (Make 4):
The large petals follow a similar pattern as the small ones but might extend the rounds for a larger size which isn't specified in the text provided.
Flower Center (Torus)
Start with a double knot or magic ring.
Chain 1 (does not count as a stitch).
Round 1
6 sc in the ring. Close with a sl st.
Round 2
Chain 1, then make 2 sc in each space. You should have 12 stitches at the end. Close with sl st.For Rounds 3 and 4:Follow a similar pattern to create the torus. Details for these rounds are not provided in the text.
Petals on the Flower Center (Torus):
Chain 13, find the second stitch from the hook and follow a pattern of increasing stitches from single crochet up to triple crochet to create a petal shape.
Repeat to create a total of 6 petals around the torus, each petal taking up 3 stitches.
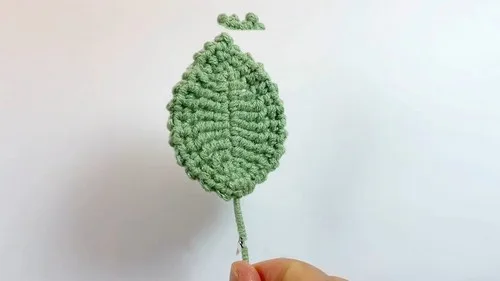
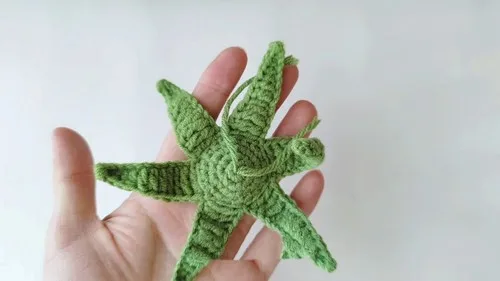
Leaves Pattern: Start with a slip knot, then chain 12. Insert the wire if desired for stiffness.
Start with single crochet and increase the height of stitches until reaching double triple crochets, then decrease back down to single crochet for the leaf shape.
Round 2
of the leaf involves chain spaces and picot stitches for added texture.
Join
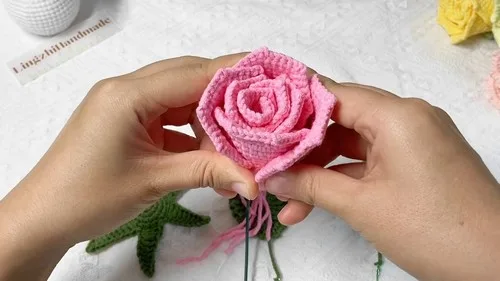
Step 1Once you have all parts made (4 small petals, 4 large petals, 1 flower center (torus), and 2 leaves), assemble the rose by attaching the petals around the center in a pleasing arrangement and adding the leaves to the base.
Step 2While the provided text lacks some detail that might be present in the actual video, this reconstructed pattern based on your scrap provides an overview for crocheting a traditional rose. Adjustments might be needed as you work through the pattern.
Finish
- Weave in every loose end from the small petals, large petals, torus center, and leaves before assembly so nothing works loose later.
- Close each round's slip stitch neatly and check the torus center lies flat, since it sits visibly at the heart of the finished rose.
- Attach the petals around the center and the leaves at the base, adjusting their placement until the arrangement sits evenly from every angle.
Bigger or smaller
- Smaller
- Drop to a finer yarn with a smaller hook so the small petals, large petals, and leaves shrink together without changing the pattern itself.
Photographs of this one
Every photograph on this page was taken by whoever published the pattern, and they are printed in the order the source listed them.
FAQs
Asked and answered
These answers came from whoever first published the pattern, kept word for word.
How many petals does one rose need?
Each rose uses four small petals and four large petals, plus one torus center and two leaves. All parts are made separately and joined during assembly.
Do the large petals use a different pattern?
They follow the same main pattern as the small petals but are worked with extra rounds to reach a bigger size. The exact round count for the larger size is left to the maker's judgment.
What is the torus center for?
The torus is the rounded shape at the heart of the rose, worked in its own 3 rounds starting from a magic ring. It gets attached first and the petals build out around it.
Can leaves be left off for a simpler flower?
Yes, the two leaves attach at the base during assembly and are separate from the petals and center. Skipping them still leaves a complete rose, just without the base framing.