 STITCH ROUND
 Dusty Rose Crochet Backpack Pattern With Flap And Straps
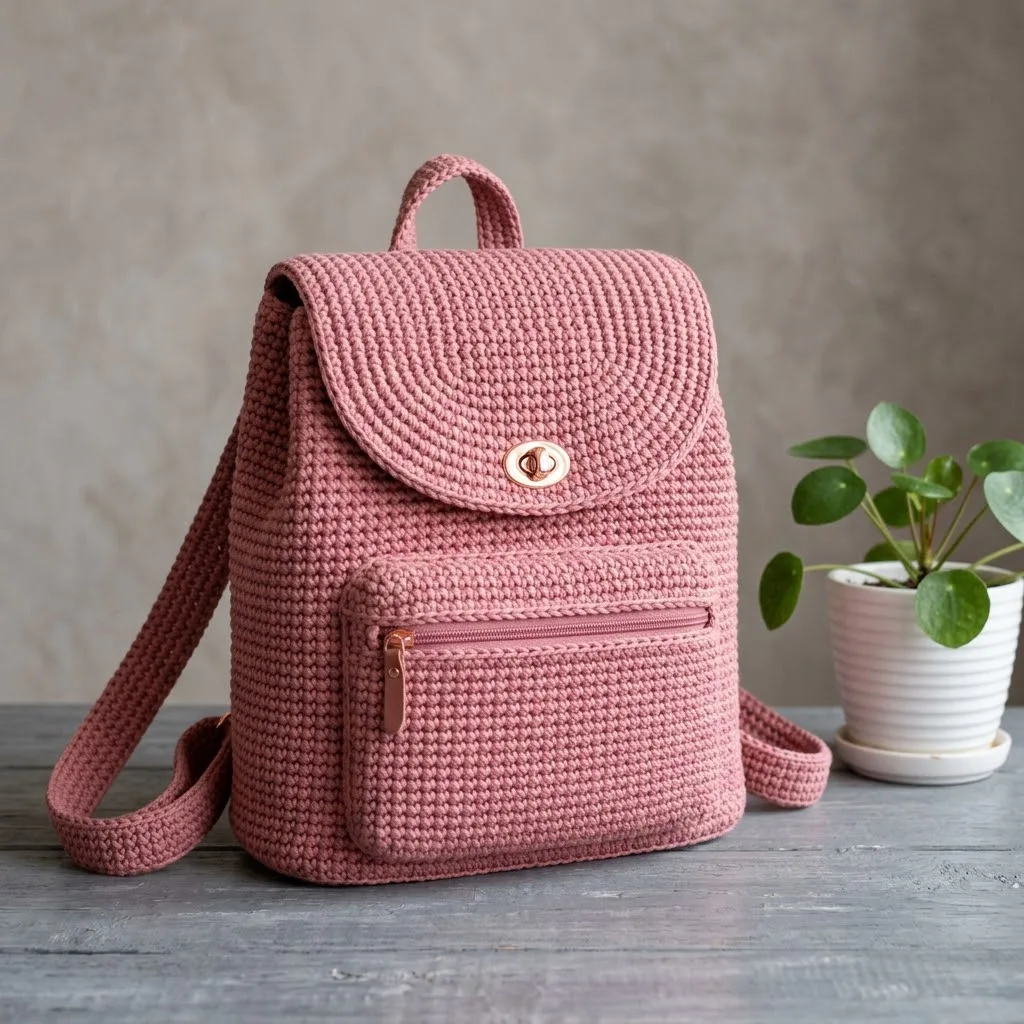
50 rounds shape this dusty rose crochet backpack, from spiral base to curved flap.
- Skill
- Intermediate
- Rounds
- 27 rounds
- Yarn weight
- Worsted
- Hook
- 4.0 mm
- Time
- 10-14 hours

Intermediate
What the original page called it. Nothing here is graded a second time.

27 rounds
Each one gets its own line, with a box beside it to tick as you go.

Worsted
What the sample was made in. Any weight works — the size moves with it.
About this pattern
This is a structured single crochet backpack built from the base up in a continuous spiral, with the body ticking off through round fifty before the smaller pieces come into play. The flap is worked flat afterward over its own set of rows, then straps, tabs, and closures are added to finish the shape. Each section is short enough to track in one sitting, which makes the overall project easy to pick up and put down.
The body shapes itself in the first two rounds with corner increases at the base, then settles into plain single crochet for the long straight climb to full height. Slow down at the flap, where several straight rows give way to a curved bottom edge formed by decreases worked at both ends of the row. That shaping section is the one place where a miscount shows immediately, so count stitches at the start and end of each decrease row.
- Start at the base corners and build the body upward in one continuous single crochet spiral.
- Set the body aside once the sides reach full height and move on to the flap.
- Work the flap flat in turned rows, then shape its bottom edge with paired decreases at the row ends.
- Make the smaller pieces, including the strap and D-ring tabs, using the same single crochet technique.
- Join the D-rings onto their tabs before stitching the straps and flap onto the finished body.
What goes wrong
- Losing track of the spiral round Drop a stitch marker into the first stitch of each round and move it up as you go. Recount stitches before starting the next round so a missed increase does not carry through fifty rounds.
- Fabric too loose for a bag Check gauge before starting and size the hook down if stitches look open. Dense, gap-free fabric is what keeps the bag from sagging once it is loaded.
- Uneven flap curve Work the sc2tog decreases at exactly both ends of the row, not just one. An uneven curve usually means a decrease was skipped on one side.
- Missed corner increases on round two Mark all four corner stitches from round one before starting round two. Work two single crochet only into the marked stitches so the increase count stays correct.
Yarn, hook and the rest
Copied from the source pattern's own materials list.
- Approximately 400 to 450 grams of worsted weight cotton yarn (Weight 4). Cotton or a cotton blend works best for bags because it holds its shape, does not stretch over time, and creates a sturdy fabric. I recommend a tightly spun yarn rather than something soft and drapey. Look for yarn labeled as "dishcloth cotton" or "kitchen cotton" for the best results.
- 4.0mm (US G/6) crochet hook. You may need to adjust based on your tension. The fabric should be dense with no gaps between stitches.
- Two D rings (15mm to 20mm)
- Tapestry needle for weaving ends
- Sewing needle and matching thread
- Fabric for optional lining (approximately half a yard of cotton fabric)
- Scissors
Progress tracker
0 of the 27 rounds on this page are ticked.
The pattern, round by round
Kept in the order and the wording the source used. Tick a round as you finish it; the ticks stay on this device.
Notions
Tapestry needle for weaving ends Stitch markers Sewing needle and matching thread Fabric for optional lining (approximately half a yard of cotton fabric)
Scissors Pins Gauge and Finished Dimensions
Gauge: 18 stitches and 20 rows equals 4 inches in single crochet worked in rows. Please check your gauge before starting. A bag that is too loose will stretch and sag when you use it.
Finished Dimensions: Approximately 10 inches tall, 9 inches wide, and 4 inches deep. Strap length is adjustable, approximately 24 to 32 inches.
Stitch Abbreviations and Definitions
Ch (Chain): Yarn over, pull through the loop on your hook. This creates the foundation for your work.
Sl st (Slip Stitch): Insert hook into stitch, yarn over, pull through both the stitch and the loop on your hook in one motion. Used for joining and creating a flat seam.
Sc (Single Crochet): Insert hook into stitch, yarn over and pull up a loop (2 loops on hook), yarn over and pull through both loops. This creates the dense, sturdy fabric perfect for bags.
Inc (Increase): Work 2 single crochet stitches into the same stitch. This adds one stitch to your total count.
Sc2tog (Single Crochet 2 Together): Insert hook into first stitch, yarn over and pull up a loop, insert hook into next stitch, yarn over and pull up a loop (3 loops on hook), yarn over and pull through all 3 loops. This decreases one stitch.
Round 1
Ch 19. Sc in 2nd ch from hook and in each ch across. Turn. (18 sts)
Round 2
through 18: Ch 1, sc in each st across. Turn. (18 sts) Fasten off and weave in ends. You should have a rectangle measuring approximately 4 inches by 4 inches.
Body of the Backpack
Now we work in continuous rounds around the base to build up the sides of the bag. Place a stitch marker at the beginning of each round and move it up as you go.
Part 3
Round 1
Join yarn to any corner of the base. Ch 1, work 18 sc across the short edge, 3 sc in corner, 18 sc across the long edge, 3 sc in corner, 18 sc across the short edge, 3 sc in corner, 18 sc across the long edge, 3 sc in corner. Do not join. Work in a continuous spiral. (84 sts)
Round 2
Sc in each st around, working 2 sc in each corner stitch. (88 sts)
Round 3
through 5: Sc in each st around. (88 sts) Now we continue without corner increases to build straight sides.
Round 6
through 50: Sc in each st around. (88 sts) Sl st to next st to join. Fasten off and weave in ends.
Your body should measure approximately 10 inches tall from the base.
Flap
The flap is worked flat and then shaped into a curved bottom edge. This is what folds over the top of your backpack.
Round 1
Ch 37. Sc in 2nd ch from hook and in each ch across. Turn. (36 sts)
Round 2
through 20: Ch 1, sc in each st across. Turn. (36 sts) Now we shape the curved bottom edge.
Round 21
Ch 1, sc2tog, sc in each st to last 2 sts, sc2tog. Turn. (34 sts)
Round 22
Ch 1, sc in each st across. Turn. (34 sts)
Round 23
Ch 1, sc2tog, sc in each st to last 2 sts, sc2tog. Turn. (32 sts)
Round 24
Ch 1, sc in each st across. Turn. (32 sts)
Round 25
Ch 1, sc2tog, sc in each st to last 2 sts, sc2tog. Turn. (30 sts)
Round 26
Ch 1, sc2tog, sc in each st to last 2 sts, sc2tog. Turn. (28 sts)
Round 27
Ch 1, sc2tog, sc in each st to last 2 sts, sc2tog. Turn. (26 sts)
Round 28
Ch 1, sc2tog, sc in each st to last 2 sts, sc2tog. Turn. (24 sts)
Round 29
Ch 1, sc2tog, sc in each st to last 2 sts, sc2tog. Turn. (22 sts)
Round 30
Ch 1, sc2tog twice, sc to last 4 sts, sc2tog twice. Turn. (18 sts)
Round 31
Ch 1, sc2tog twice, sc to last 4 sts, sc2tog twice. (14 sts) Fasten off, leaving a long tail for sewing.Work one round of sc evenly around the entire flap edge to create a clean finished border. Join with sl st and fasten off.
Front Pocket This pocket sits on the front of the bag and holds the zipper.
Part 5
Round 1
Ch 33. Sc in 2nd ch from hook and in each ch across. Turn. (32 sts)
Round 2
through 20: Ch 1, sc in each st across. Turn. (32 sts) Fasten off. You should have a rectangle approximately 7 inches wide and 4 inches tall.For the pocket back panel, repeat the same instructions to create a matching piece.
Top Handle
Part 6
Round 1
Ch 7. Sc in 2nd ch from hook and in each ch across. Turn. (6 sts)
Round 2
through 25: Ch 1, sc in each st across. Turn. (6 sts) Fasten off. Fold the strip in half lengthwise and slip stitch or whip stitch the long edges together to create a tube. This gives the handle more structure and a professional finish.
Shoulder Straps (Make 2)
Part 7
Round 1
Ch 9. Sc in 2nd ch from hook and in each ch across. Turn. (8 sts)
Round 2
through 130: Ch 1, sc in each st across. Turn. (8 sts) Fasten off. This creates a strap approximately 26 inches long. Adjust the number of rows for your preferred length.
Optional: Fold each strap in half lengthwise and whip stitch closed for added durability and a rounder appearance.
Strap Connectors (Make 2)
These small tabs attach to the bottom of the bag and hold the D rings.
Part 8
Round 1
Ch 5. Sc in 2nd ch from hook and in each ch across. Turn. (4 sts)
Round 2
through 8: Ch 1, sc in each st across. Turn. (4 sts) Fasten off. Thread the tab through a D ring, fold in half, and sew the ends together securely.
Assembly Instructions
Take your time with assembly. This is where your backpack really comes together, and careful sewing makes all the difference in the finished look.
Attach the Base
If you worked the body in rounds starting from the base, your base is already attached. If you worked them separately, pin the base to the bottom of the body and whip stitch around all edges using a tapestry needle and matching yarn.
Install the Front Pocket with Zipper
Step 1: Position the zipper between the two pocket panels. The zipper teeth should be visible between the panels.
Step 2: Using a sewing needle and matching thread, hand stitch the zipper tape to the wrong side of each panel along the top edges. Take your time and keep your stitches small and even.
Step 3: Once the zipper is installed, sew the pocket panels together along the sides and bottom, wrong sides facing.
Step 4: Position the completed pocket on the front of the backpack body, approximately 1 inch up from the bottom. Pin in place and whip stitch around the sides and bottom, leaving the top open for access.
Attach the Flap
Position the straight edge of the flap along the back top edge of the backpack body. The flap should fold forward over the front. Pin in place and whip stitch securely.
Install the Twist Lock Step 1: Mark the center of the curved flap edge, approximately 1 inch up from the bottom curve.
Step 2: Following the hardware manufacturer’s instructions, install the decorative portion of the twist lock on the flap.
Step 3: Close the flap over the front of the bag and mark where the catch portion should go on the bag body.
Step 4: Install the catch portion, making sure the lock aligns properly.
Attach the Top Handle
Position the handle ends on either side of the flap attachment point on the back of the bag. The handle should form a loop at the top. Sew each end securely to the bag body, reinforcing with several passes of yarn.
Attach the Strap Connectors
Sew the strap connector tabs with D rings to the bottom corners of the back of the bag. These should be positioned at the side seams, about 1 inch up from the base.
Attach the Shoulder Straps
Step 1: Sew the top of each strap to the back top corners of the bag, just below where the flap attaches.
Step 2: Thread the bottom of each strap through the D rings at the bottom of the bag.
Step 3: If using adjustable sliders, thread the strap through the slider hardware before attaching to the D ring. This allows you to adjust the length.
Optional Lining For a more professional finish and to protect the inside of your bag, you can add a fabric lining.
Cut your lining fabric to match the dimensions of the bag body, adding half an inch seam allowance on all sides. Sew the lining into a bag shape. Fold the top edge under and hand stitch the lining inside the crocheted body, just below the top edge.
Helpful Tips for Success
Tension matters. For bags, you want tight, firm stitches. If your fabric feels floppy or you can see through it, go down a hook size.
Block your pieces before assembly. Wet blocking your crocheted panels helps even out stitches and makes sewing much easier.
Use stitch markers generously. Mark your corners, your stitch counts, and any shaping points. You will thank yourself later.
Do not skip the test swatch. I know, I know. Nobody loves making gauge swatches. But spending 15 minutes on a swatch can save you from a bag that is too small or too floppy.
Reinforce stress points. The strap attachments and handle attachment points take a lot of weight and pulling. Sew these areas multiple times with strong stitches.
Customization Ideas This beginner friendly crochet pattern is easily adapted to your personal style.
Consider adding an internal pocket by sewing a small fabric pouch inside the lining. You can change the flap shape to a pointed or squared design. Try adding decorative stitches, such as a row of puff stitches or a simple texture stripe, around the body for visual interest. Swap the twist lock for a magnetic snap closure for a more casual look.
The straps can also be crocheted wider for more comfort, or you can use leather straps from a craft store for a mixed media look.
I truly hope you love making this dusty rose crochet backpack as much as I loved designing it. It is one of those projects that feels so satisfying to finish, and you will reach for it constantly once it is done.
If you make this crochet backpack pattern, I would absolutely love to see it! Share your finished project with me on Instagram or in our Facebook group. Seeing your creations genuinely makes my day.
Do not forget to save this pattern to your Pinterest boards so you can find it easily when you are ready to start. And if you make this backpack, please leave a comment below! I love hearing which colors you chose, how the construction went for you, and any tips you discovered along the way. Happy crocheting, friend!
Check your count
- Notions · Round 1: 18 sts
- Part 3 · Round 1: 84 sts
- Part 3 · Round 2: 88 sts
- Flap · Round 22: 34 sts
- Flap · Round 25: 30 sts
- Flap · Round 28: 24 sts
Finish
- Weave in every tail left from the body, flap, and smaller pieces before any assembly begins.
- Cut and sew in the optional cotton lining to reinforce the base and give the sides more structure.
- Stitch the flap, straps, and D-ring tabs into place with sewing needle and thread, then check that both strap tabs sit level.
Bigger or smaller
- Smaller or larger height
- Repeat or shorten the straight single crochet rounds that run from round six through round fifty to change the body height without touching the base footprint or the flap.
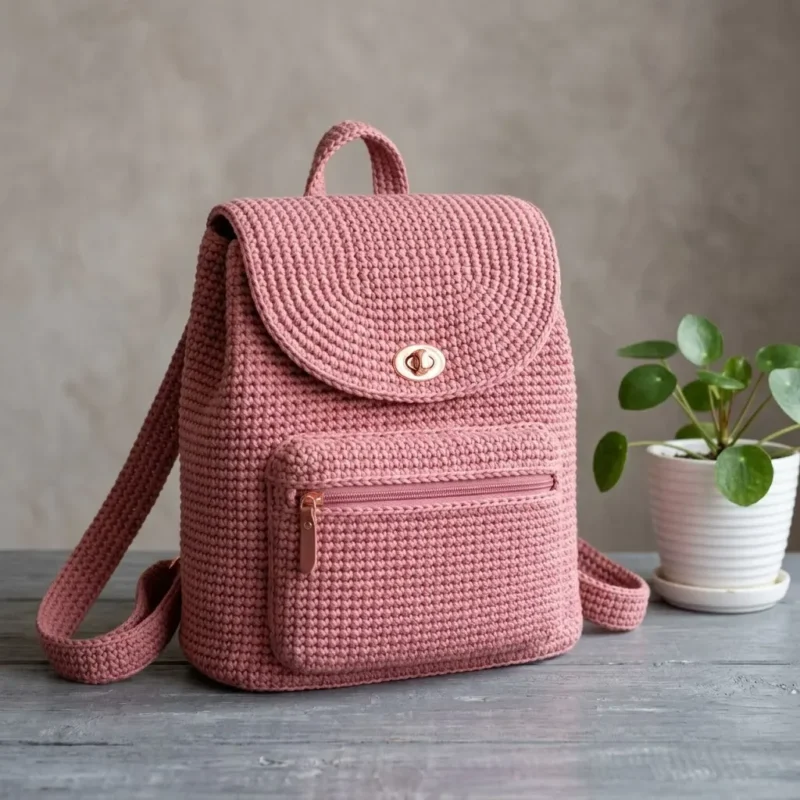
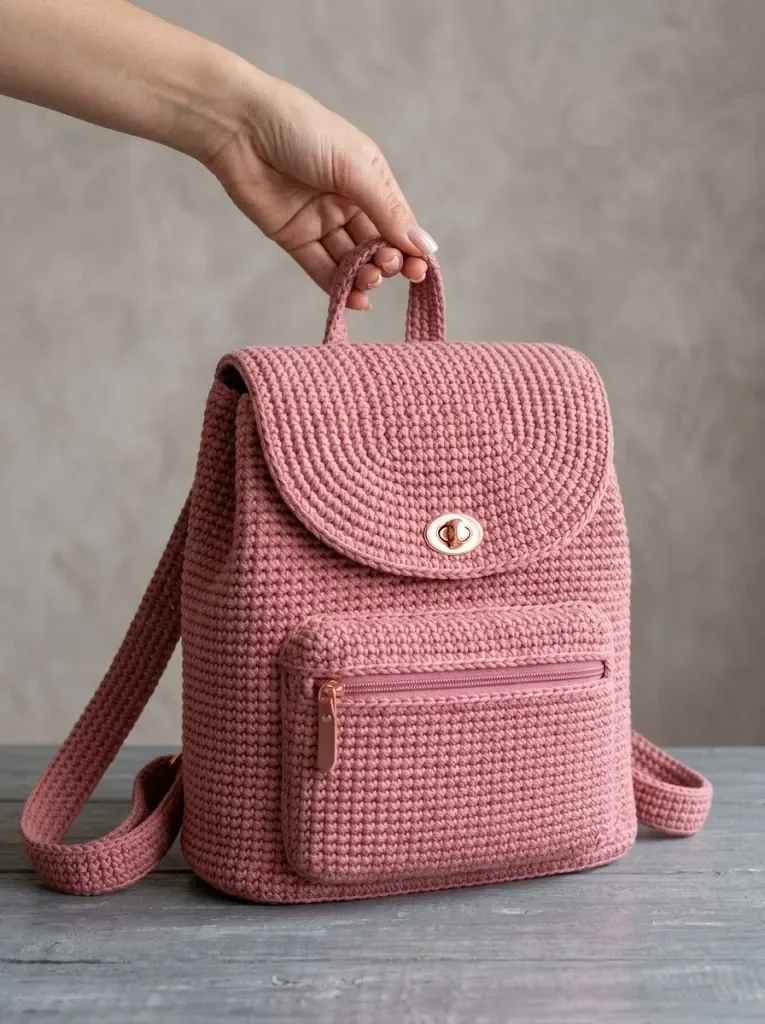
Photographs of this one
Every photograph on this page was taken by whoever published the pattern, and they are printed in the order the source listed them.
FAQs
Asked and answered
These answers came from whoever first published the pattern, kept word for word.
What yarn gives the best results for this backpack?
A tightly spun worsted cotton, often labeled dishcloth or kitchen cotton, holds its shape and resists stretching far better than a soft, drapey yarn. That firmness is what keeps the bag structured once it carries any weight.
Why does gauge matter so much for a bag like this?
The pattern is checked against 18 stitches and 20 rows over 4 inches in single crochet. A looser gauge produces fabric that stretches and sags once the bag is in use, so checking gauge first avoids redoing the body later.
Is the fabric lining necessary?
No, the lining is listed as optional, but sewing in the cotton fabric adds extra structure and a finished interior. Skip it for a faster make, or add it for a sturdier bag.
How does the flap get its curved bottom edge?
The flap is worked straight for its first rows, then shaped with sc2tog decreases worked at both ends of the row starting at row twenty-one. The decreases continue over several more rows to pull the bottom edge into a curve.