 STITCH ROUND
 Spring crochet bag pattern with G and GV stitch texture
18 rounds to tick off, building a spring-ready crochet bag with G and GV stitch texture.

- Skill
- Intermediate
- Rounds
- 6 rounds
- Yarn weight
- Not specified
- Time
- 4-6 hours

Intermediate
What the original page called it. Nothing here is graded a second time.

6 rounds
Each one gets its own line, with a box beside it to tick as you go.

Not specified
What the sample was made in. Any weight works — the size moves with it.
About this pattern
This crochet pattern is perfect for those looking to create a unique and colorful crochet bag with fun embellishments. The design uses a combination of G and GV stitches, along with creative color changes and playful details like strawberries and leaves. Whether you're a beginner or have some experience, this pattern is easy to follow, with clear instructions for each round and even the bag's handle and decoration.
The versatility of this pattern allows you to customize the colors and embellishments to match your personal style. It's not just about creating a bag—it's about making a one-of-a-kind accessory that showcases skills and creativity.
- Begin with a circular start and chain two before working the first ring of G stitches.
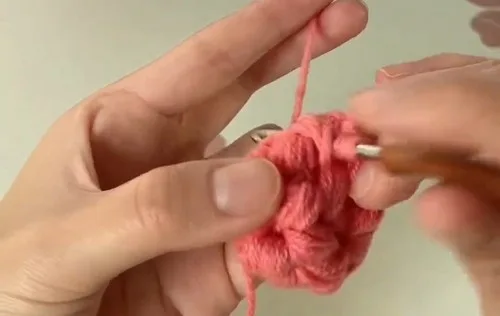
- Close the starting ring by tightening the yarn tail, then slip stitch into the first stitch.
- Work the GV increase round, adding a second G stitch into every space around the circle.
- Repeat the G and GV rounds through round thirteen, watching the stitch count climb steadily.
- Simplify the stitch pattern at round eighteen by dropping the chain one between G stitches.
What goes wrong
- Losing count of G stitch spaces Mark the first G stitch space with a stitch marker before starting the GV increase round, since it becomes easy to lose track once the stitches multiply.
- Loose starting ring Tighten the yarn tail firmly before slip stitching into the first G stitch, or the center of the bag base will show a visible gap.
- Uneven color changes Carry the unused color loosely inside the stitch and pull the new color through on the last pull of the previous stitch to keep the alternating pattern crisp.
- Dropping the chain 1 too early Keep the chain 1 between G stitches for every round before round eighteen, and only remove it once that round is reached.
Yarn, hook and the rest
Copied from the source pattern's own materials list.
- Different colors of yarn for the bag and decorations
- A crochet hook
- A sewing needle (to attach leaf decorations and weave in ends)
- Scissors
- Stitch marker (optional)
- Cotton (to stuff the strawberries)
Progress tracker
0 of the 6 rounds on this page are ticked.
The pattern, round by round
Kept in the order and the wording the source used. Tick a round as you finish it; the ticks stay on this device.
Main Pattern
Round 1
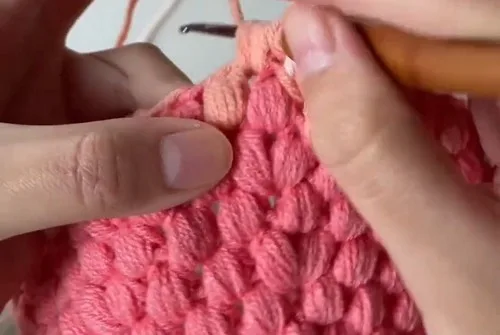
Create a circular starting point. Chain 2. Create a G stitch (early-type stitch) by making 5 mid-length stitches.Chain 1.Repeat the G stitch and chain 1 sequence three more times.Tighten the yarn tail to close the circle.Slip stitch into the first G stitch.
Round 2
Chain 2. Create a GV stitch (early-type stitch increase) in each space between the G stitches from the previous round: Make two G stitches in the same space.Chain 1 after each GV stitch.
You should have 8 G stitches in this round.
Slip stitch to join.
Round 3
Chain 2. Repeat the sequence " one G stitch, one GV stitch " four times: Chain 1 after each G stitch. Chain 2 after each GV stitch.
You will have 12 G stitches in this round.
Slip stitch to join.
Round 4
Chain 2. Create one G stitch in each space: Chain 1 after each G stitch. Slip stitch to join.
Round 5
Chain 2. Repeat the sequence " one G stitch, one G stitch, one GV stitch ": Chain 1 after each G stitch.Repeat until the end of the round.Slip stitch to join.
Round 6
Chain 2. Create one G stitch in each space: Chain 1 after each G stitch.Slip stitch to join.
Continued Rounds
Rounds 7-13: Repeat patterns of G and GV stitches, with an increasing stitch count in some rounds.
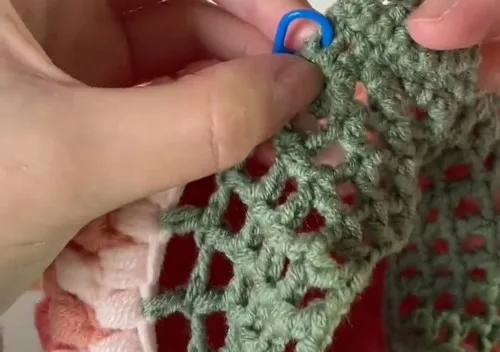
Round 14: Introduces a color change technique, alternating colors every stitch.
Rounds 15-17: Continue with color changes and maintain a consistent stitch count.
Round 18 Simplifies the pattern by eliminating the chain 1 between G stitches.
Finish
- Weave in every yarn tail from the color changes so the bag interior stays clean and snag-free.
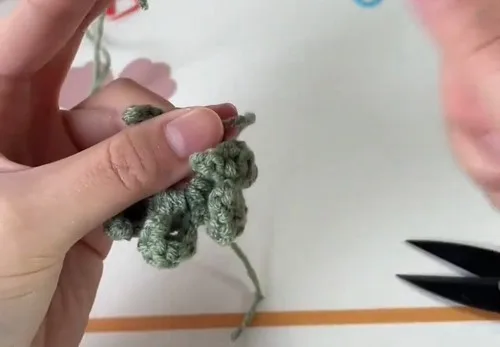
- Stuff the strawberry decorations lightly with cotton before closing them for a rounded finish.
- Sew the leaf decorations onto the bag using a sewing needle to secure them firmly.
Bigger or smaller
- Larger
- Move up to a heavier yarn weight and a larger hook so each G and GV stitch grows, scaling the entire bag upward while the round count stays the same.
- Smaller
- Drop to a finer yarn and a smaller hook to shrink every stitch, or work fewer repeats of the Continued Rounds section for a shorter bag body.
Photographs of this one
Every photograph on this page was taken by whoever published the pattern, and they are printed in the order the source listed them.
FAQs
Asked and answered
These answers came from whoever first published the pattern, kept word for word.
What do the G and GV stitches actually look like?
The G stitch groups five mid-length stitches into one textured cluster, and the GV stitch doubles that cluster by working two G stitches into the same space. Together they build the bumpy, floral-like texture across the bag.
Why drop the chain 1 at round eighteen?
Removing the chain 1 between G stitches tightens the fabric and marks the shift from the textured body into a plainer finishing round. It also helps keep the top edge from flaring.
What are the cotton and leaf decorations for?
The cotton lightly stuffs strawberry-shaped decorations so they hold their rounded form, and the leaf pieces are sewn on afterward with a sewing needle. Both are optional finishing touches rather than structural parts of the bag.