 STITCH ROUND
Easy mesh crochet shirt for a breezy summer top
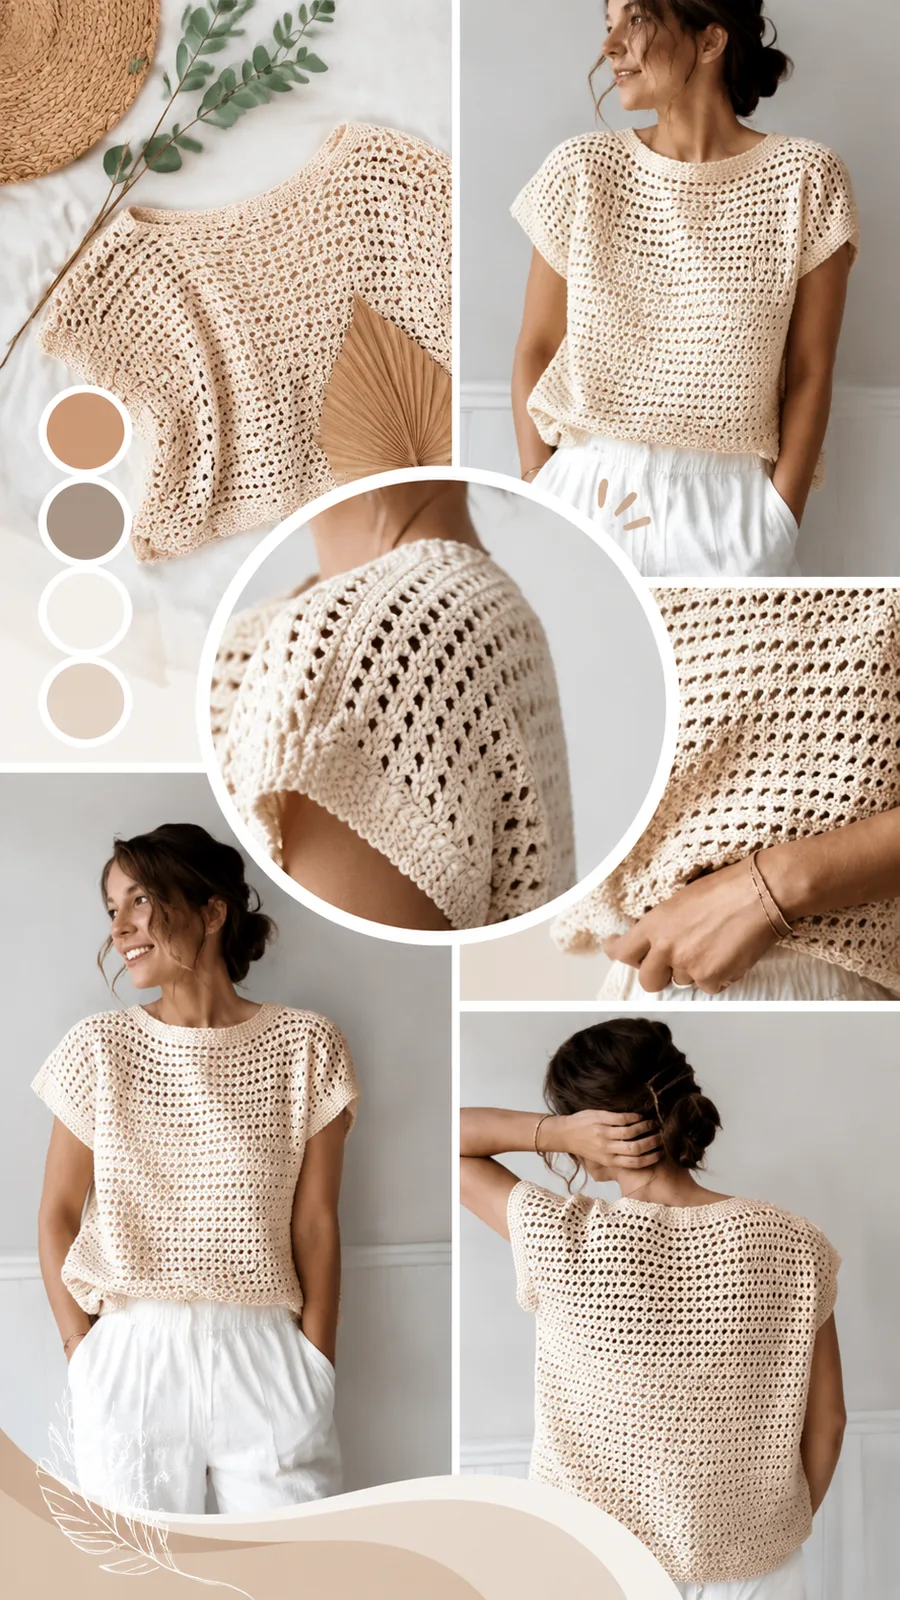
A 3-row mesh repeat builds this boxy cotton crochet shirt, panel by panel.
- Skill
- Beginner
- Rounds
- 5 rounds
- Yarn weight
- DK
- Hook
- 4.5 mm
- Time
- 6-10 hours

Beginner
What the original page called it. Nothing here is graded a second time.

5 rounds
Each one gets its own line, with a box beside it to tick as you go.

DK
What the sample was made in. Any weight works — the size moves with it.
About this pattern
This boxy summer shirt comes down to two matching rectangles, each ticked off in the same three rows: a foundation row of double crochet, a mesh row of chain-one spaces, then a solid row that locks the mesh in place. Repeat that pair until the panel reaches the finished length, fasten off, and the front is done. The back panel repeats the exact same three rows, so once the rhythm is set, the second piece is a quick repeat rather than a new pattern to learn.
There is no waist shaping or sleeve cap here; the shirt gets its form entirely from assembly, not from increases or decreases. Slow down at the point where front and back panels meet at the shoulders and sides, since that seam line decides how the armholes and neckline sit. The mesh rows themselves move fast, but keeping the chain-one spaces even row to row is what keeps the open texture looking deliberate rather than uneven.
This pattern is designed for a confident-beginner skill level, with a finished Small/Medium size of about 42 in (107 cm) bust circumference and 6 to 10 in (15 to 25 cm) of positive ease built in for the relaxed fit. The mesh stitch gauge runs about 18 dc by 10 rows for every 4 in (10 cm) square, so a gauge swatch before starting is worth the time.
The sample shown here uses a neutral cream yarn for a classic handmade look, but the open mesh pattern works just as well in soft pastels, natural earth tones, or bolder seasonal colors.
- Chain a long foundation row and work the first row of double crochet across it.
- Fasten off the front panel, then build an identical back panel using the same row sequence.
- Lay both panels together and join them at the shoulders and down each side seam.
- Add a single crochet border around the neckline and sleeve openings for a clean, stable edge.
- Block the joined shirt flat so the mesh relaxes open and the fabric drapes properly.
What goes wrong
- Counting the turning chain as a stitch The turning chain does not count as a stitch in this pattern unless stated. Counting it anyway shifts the mesh alignment row after row.
- Uneven panel sizes Count stitches regularly, especially after mesh rows, since open stitch patterns can make mistakes harder to notice. Checking measurements every few rows helps the two panels come out the same size.
- Seaming panels before blocking Join the front and back while the mesh is still unblocked and the finished width can be hard to judge. Block each panel first so the seams line up at the true finished size.
- Working fabric that feels too stiff A stiff fabric usually means the hook is too small or the yarn lacks drape. Try a slightly larger hook size or a softer cotton blend.
- Skipping the gauge swatch Always make a gauge swatch before crocheting the full garment. Even small differences in tension can noticeably change the width and length of a wearable crochet shirt.
Yarn, hook and the rest
Copied from the source pattern's own materials list.
- DK weight cotton or cotton-blend yarn: approximately 900 yards (823 meters)
- 4.5 mm crochet hook (US 7)
- Yarn needle for weaving ends
- Stitch markers
- Measuring tape
- Scissors
Progress tracker
0 of the 5 rounds on this page are ticked.
The pattern, round by round
Kept in the order and the wording the source used. Tick a round as you finish it; the ticks stay on this device.
Front Panel
The shirt is made from two identical rectangles: one front panel and one back panel. Each panel begins at the lower edge and is worked upward. Turning chains do not count as stitches unless stated.
Ch 96.
Row 1
Dc in 4th ch from hook and across. Turn. (94 dc)
Row 2
Ch 2, dc in first st, *ch 1, sk next st, dc in next st; rep from * across. Turn. (94 sts including chain spaces)
Row 3
Ch 2, dc in each dc and ch-1 space across. Turn. (94 sts)Repeat Rows 2 and 3 until the panel measures approximately 20 in (51 cm) from the starting edge.Fasten off.
Special Stitch
Mesh Stitch: Ch 1, skip 1 stitch, dc in next stitch. Repeat across. This creates an airy fabric with small openings.
Back Panel
Repeat the front panel instructions exactly to create a second rectangle.
Shoulder Assembly
Place front and back panels together with the right sides facing outward.
Measure approximately 8 in (20 cm) inward from each outer edge.
Join yarn at one shoulder edge.
Use slip stitches through both layers to join the shoulder seam.
Repeat for the second shoulder.
Side Seams
Fold the garment so the front and back panels align.
Starting at the bottom edge, sew or slip stitch the sides upward.
Leave approximately 8 in (20 cm) open at the top for arm openings.
Fasten off and weave in ends.
Neckline and Sleeve Edging
Attach yarn at the neckline edge.
Round 1
Work one round of sc evenly around the opening.
Round 2
Join with a sl st and fasten off.Repeat around both sleeve openings.
Join
Step 1Blocking is an important finishing step for this crochet shirt because it helps relax the stitches and improve the drape. Gently wash or dampen the completed panels, shape them to the correct measurements, and allow them to dry completely before wearing.
Step 2Wash gently according to the yarn fiber instructions.
Step 3Avoid stretching the garment while wet.
Step 4Store folded to help maintain the shape.
Step 5Refresh the fabric with gentle steaming if needed.
Finish
- Weave in every loose end along the panel edges before joining, so none get trapped in the seams.
- Join the front and back panels at the shoulders and sides, then finish neckline and sleeve openings with the single crochet border.
- Wash or dampen the completed shirt, shape it to the intended measurements, and let it dry flat before wearing.
Bigger or smaller
- Wider
- a wider shirt, increase the starting chain in multiples of 2.
- Longer
- a longer shirt, add more mesh stitch rows before finishing.
- Shorter sleeves
- shorter sleeves, reduce the arm opening depth.
- Cropped
- a cropped style, stop earlier when working the panels.
- Larger sizes
- larger sizes, create wider panels and maintain the same stitch pattern.
FAQs
Asked and answered
These answers came from whoever first published the pattern, kept word for word.
What yarn does this shirt need?
A lightweight cotton or cotton-blend yarn in DK weight works best, with roughly 900 yards needed for the full shirt. Cotton gives the soft drape and open stitch definition the mesh relies on.
Why use a larger hook than usual?
The 4.5 mm hook is sized up on purpose to keep the mesh loose and airy rather than dense. A looser fabric moves better and feels more comfortable to wear.
How long should each panel be before fastening off?
Keep repeating the mesh and solid row pair until the panel measures about 20 inches (51 cm) from the starting edge. Measure against the finished garment measurements before fastening off.
Are the front and back panels really identical?
Yes, the back panel repeats the exact same row sequence as the front panel. The two rectangles are joined afterward at the shoulders and sides to form the shirt.