 STITCH ROUND
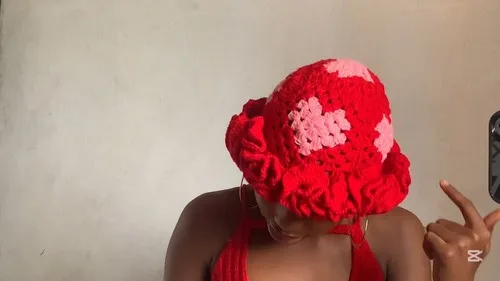
 Granny square ruffle hat crochet pattern
A five-square granny pattern with a ruffled double crochet border, joined with an invisible seam for a cozy finished hat.
- Skill
- Intermediate
- Rounds
- 7 rounds
- Yarn weight
- Worsted
- Hook
- 4.0 mm
- Time
- 4-6 hours

Intermediate
What the original page called it. Nothing here is graded a second time.

7 rounds
Each one gets its own line, with a box beside it to tick as you go.

Worsted
What the sample was made in. Any weight works — the size moves with it.
About this pattern
This hat turns the classic granny square into a wearable ruffle, built from five squares joined into a crown and brim. The Main Pattern squares clock in at five rounds each, and Part 2 adds a four-round border that flares the edge into its signature ruffle. Pink and red yarn worked across two hook sizes keep the color changes and gauge shifts doable in a single sitting.
Shaping lives in the corner chain-2 spaces of the Main Pattern and the stitch-by-stitch increase of Part 2, where each round adds a full set of double crochets into every stitch around. Slow down when the half double crochet joining round of Part 2 sets up the stitch count for the ruffle rounds that follow, since an uneven join there throws off how the flare sits once the squares are seamed together.
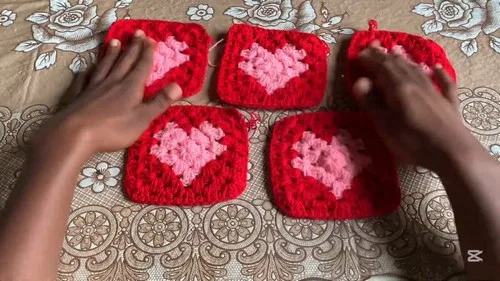
- Build five separate granny squares using the Main Pattern rounds before joining anything.
- Lay four squares in a row to form the brim shape of the hat.
- Center the fifth square on top of that row to form the crown.
- Seam the squares together through the back loops with a contrasting red yarn for definition.
- Weave in ends once every square is joined into the finished hat shape.
What goes wrong
- Loose magic circle tail Pull the tail snug before the first slip stitch closes the round. A loose circle leaves a visible hole at the center of every square.
- Miscounting corner chain-2 spaces Mark each chain-2 space with a stitch marker as it is made in the Main Pattern. Skipping one throws off the symmetry of the square before Part 2 is even started.
- Seaming through both loops Work the invisible seam through the back loops only, as the assembly steps specify. Catching both loops flattens the ridge and makes the join visible from the front.
- Uneven tension across the row of four Keep seaming stitches evenly spaced along the entire row before attaching the fifth square. Tight spots in the row pull the brim out of shape once the crown square is added.
Yarn, hook and the rest
Copied from the source pattern's own materials list.
- Yarn in pink and red
- 4.0 mm crochet hook
- 5.0 mm crochet hook
- Darning needle
Progress tracker
0 of the 7 rounds on this page are ticked.
The pattern, round by round
Kept in the order and the wording the source used. Tick a round as you finish it; the ticks stay on this device.
Main Pattern
Magic Circle Start with a magic circle.
Round 1
Chain 3 (counts as 1 double crochet). Make 2 double crochets in the circle (3 DC total).Chain 2.Make 3 double crochets, chain 2 — repeat this set three more times.Pull the tail to close the circle.Slip stitch to the top of chain 3 to close the round.
Round 2
Slip stitch to the next chain-2 space. Chain 3, make 2 double crochets in the same space.Chain 2, make 3 more double crochets in the same space.Repeat the corner (3 DC, ch 2, 3 DC) in each of the 3 remaining chain-2 spaces.Slip stitch to close the round.
Round 3
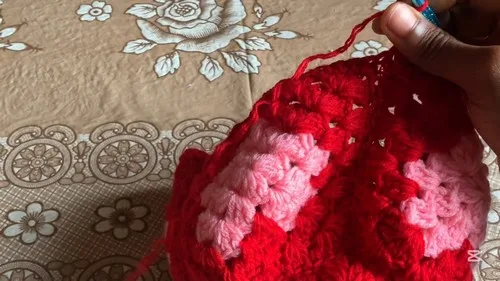
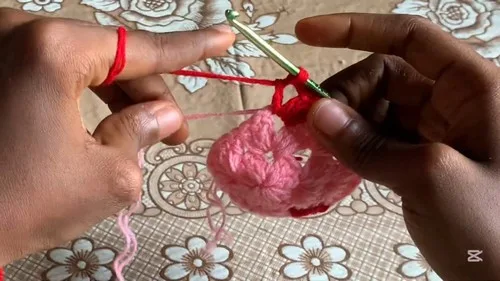
Color Change Slip stitch to chain-2 space. Chain 3, 2 DC in same space, ch 2, 2 DC.For 3rd DC, switch to red yarn.Make 3 DC with red yarn in the next chain-2 space.Switch back to pink for final DC.Continue alternating colors and making corners (3 DC, ch 2, 3 DC).Slip stitch to close, chain 1, and cut yarn.
Round 4
Red Yarn Join red yarn in any corner. Ch 3, 2 DC, ch 2, 3 DC in same corner. 3 DC in each chain space between corners.Repeat corner pattern.Slip stitch to close.
Round 5
Slip stitch to corner space. Ch 3, 2 DC, ch 2, 3 DC in each corner. 3 DC in each chain-2 space around.Slip stitch to close, chain 1, cut yarn.Repeat for a total of 5 squares.
Part 2
Creating the Ruffle Switch to the 5.0 mm hook for the ruffle rounds in Part 2.
Round 1
Join yarn in any corner. Chain 2. Make 1 half double crochet in each stitch around.Slip stitch to top of chain 2 to close.
Rounds 2–4
Chain 3, make 2 DC in same stitch. 3 DC in each stitch around. Slip stitch to top of chain 3.Repeat for a total of 3 rows.Finish Fasten off and weave in all ends.
Join
Step 1Preparation: Thread a darning needle with red yarn.
Step 2Invisible Seam: Place two squares wrong sides out.
Step 3Sew through the back loops only using an invisible seam method.
Step 4Keep stitches even for a neat finish.
Step 5Assembly: Join four squares in a row.
Step 6Attach the fifth square centered on top of the four using the same seam method.
Finish
- Weave in all loose ends from each of the five squares before starting any seaming.
- Thread the darning needle with red yarn and seam the squares through the back loops only, keeping every stitch even for a flat join.
- Attach the fifth square centered on top of the joined row of four, then give the finished hat a light steam or hand-shape to help the ruffle rounds sit open.
Bigger or smaller
- Smaller
- Work the Main Pattern and Part 2 fully with the 4.0 mm hook only, keeping stitches tighter so each square and the assembled hat come out more compact.
Photographs of this one
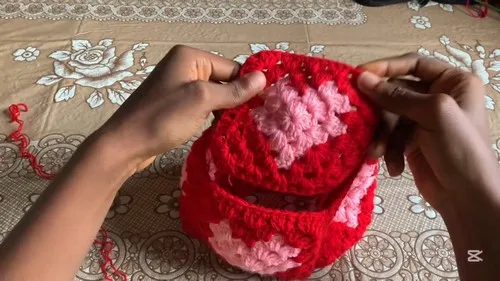
Every photograph on this page was taken by whoever published the pattern, and they are printed in the order the source listed them.
FAQs
Asked and answered
These answers came from whoever first published the pattern, kept word for word.
Can one color be used instead of pink and red?
Yes, the pattern works with any two colors or even a single color throughout. The contrast simply highlights the granny square rounds and the ruffle border of Part 2.
Why does the pattern call for two hook sizes?
The 4.0 mm and 5.0 mm hooks create a slight gauge shift between sections, which helps the ruffle rounds in Part 2 flare rather than lie flat. Using only one hook size throughout changes how open the finished brim looks.
How are the five squares arranged to form the hat shape?
Four squares are joined in a row to form the brim, then the fifth square is centered on top of that row to form the crown. The seaming steps use the same invisible method for both joins.
Does the seaming need to be invisible?
The assembly steps specify an invisible seam through the back loops for a neat finish. A visible seam will still hold the hat together but will show along every join line.