 STITCH ROUND
 Granny Square Crochet Top with Sleeve Shaping
Three rounds build each granny square for this crochet top with double crochet waistband shaping.
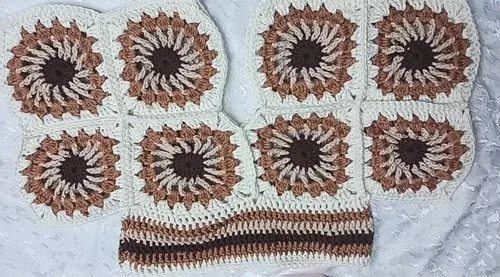
- Skill
- Intermediate
- Rounds
- 3 rounds
- Yarn weight
- Worsted
- Time
- 4-6 hours

Intermediate
What the original page called it. Nothing here is graded a second time.

3 rounds
Each one gets its own line, with a box beside it to tick as you go.

Worsted
What the sample was made in. Any weight works — the size moves with it.
About this pattern
This top is built entirely from granny squares, and each one ticks off in just three rounds before it goes into a panel. Round one sets the base with a magic ring and a ring of double crochets, round two adds height and spacing with triple crochets, and round three brings in a cluster stitch to square off the edges. Once a stack of squares is finished, the real construction begins with laying them out and joining them into panels.
The shaping here comes entirely from folding and seaming rather than increases or decreases, so accuracy in the join matters more than stitch counting. Slow down when arranging squares into the grid before sewing, since a misplaced square is easier to fix before seams go in than after. The fold that forms the sleeves is the other spot worth double-checking, since it decides how the top sits at the shoulder and underarm.
- Each granny square builds up in three rounds, changing yarn color at the start of round two and again for round three.
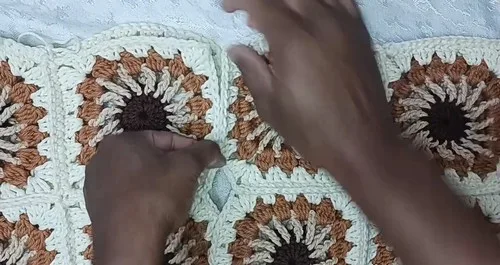
- Work a stack of squares, then arrange them into two panels in a grid layout before any seaming begins.
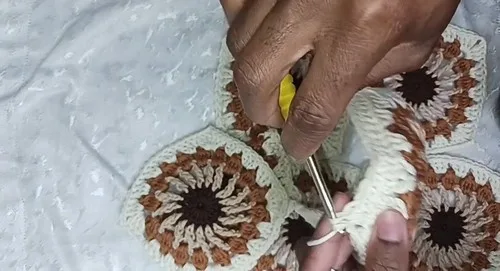
- Single crochet the long sides of each panel together with right sides facing out for a visible seam line.
- Join both finished panels along one long edge to bring the front and back of the top together.
- Fold the joined panel in half and sew a square's width at each side to shape the sleeves.
- Close the remaining front and back panels halfway up, leaving the rest open for the neckline.
What goes wrong
- Loose magic ring center Pull the tail firmly before closing round one, then tug each of the 15 double crochets snug before slip stitching to close.
- Skipping the double yarn over Round two's triple crochet needs two yarn overs before going into the stitch, not one, or the chain-2 spaces come out uneven.
- Uneven chain-2 spaces around round two Keep the chain length consistent in every repeat so the round three clusters land evenly and the square sits flat.
- Seaming panels wrong side out Join the long sides with single crochet and right sides facing out, since the seam texture is meant to show.
Yarn, hook and the rest
Copied from the source pattern's own materials list.
- Yarn in four colors (brown, tan, a second brown, and ivory used in example)
- Scissors
- Needle for weaving in ends
- Crochet hook (size of your choice)
Progress tracker
0 of the 3 rounds on this page are ticked.
The pattern, round by round
Kept in the order and the wording the source used. Tick a round as you finish it; the ticks stay on this device.
Main Pattern
Round 1
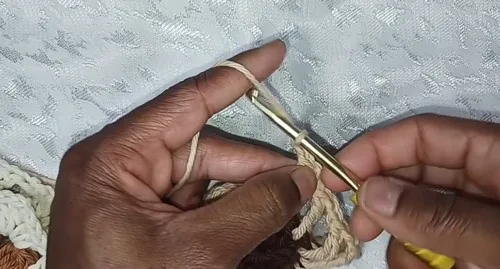
Start with a magic ring Chain 3 Work 15 double crochets into the ring Pull the tail to close the circleSlip stitch to the top of the first stitch to close
Round 2
Attach new color with slip knot Chain 6Yarn over twice and place a triple crochet in the next stitch Chain 2 Repeat triple crochet + chain 2 in each stitch aroundSlip stitch to top of starting chain For Round 3 Attach new color Chain 3 In each chain-2 space, work a 4 double crochet clusterChain 2 between each cluster Repeat around
Round 4
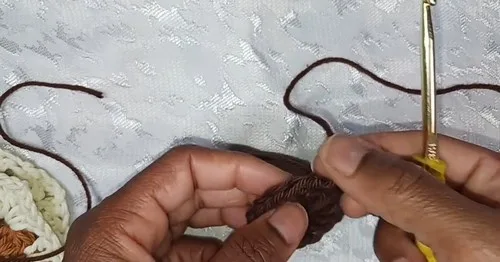
Attach final color Chain 3 In the first chain-2 space: 3 double crochets, chain 2, 3 double crochets (corner)In next 3 chain-2 spaces: 3 double crochets each In next chain-2 space: create another corner (3 dc, ch 2, 3 dc)Repeat the corner-every-4-spaces sequence around Slip stitch to top of chain 1 to close Top Assembly Instructions Create PanelsMake two panels using 8 squares each Arrange squares in a 4x2 layout Join Panels Sew long sides of each panel together using single crochets with right sides outJoin both panels together along one long side Form Sleeves Fold the connected panel in half Sew together one square’s width at each side for the sleevesClose the Body Sew front panels together halfway up Repeat for the back panels Waistband Instructions Create Waistband Attach yarn at the waist areaChain 2 In the same space, place 2 double crochets Double crochet in each stitch around Change Colors (Optional)In the last stitch of the old color, pull up a loop Yarn over with the new color and pull through Slip stitch to the top of the chain to joinRepeat Rounds Continue double crocheting in each stitch around Work as many rounds as needed for your desired waistband length
Join
Step 1Create Panels: Make two panels using 8 squares each
Step 2Arrange squares in a 4x2 layout
Step 3Join Panels: Sew long sides of each panel together using single crochets with right sides out
Step 4Join both panels together along one long side
Step 5Form Sleeves: Fold the connected panel in half
Step 6Sew together one square’s width at each side for the sleeves
Step 7Close the Body: Sew front panels together halfway up
Step 8Repeat for the back panels
Finish
- Lay the finished panels flat and block them so every square sits square and even before any joining seams go in.
- Once the panels and sleeves are sewn together, weave in the remaining seaming tails and steam the joins flat.
Bigger or smaller
- Larger
- Add extra squares to each panel and extend the grid layout, which lengthens the body and adds more rows before the sleeves are formed.
- Smaller
- Drop down to a lighter yarn weight and a smaller hook, which shrinks each granny square and scales the whole top down proportionally.
Photographs of this one
Every photograph on this page was taken by whoever published the pattern, and they are printed in the order the source listed them.
FAQs
Asked and answered
These answers came from whoever first published the pattern, kept word for word.
Does the color sequence have to match the example?
No, the four colors used are just one example combination. Any four yarns, or fewer repeated across rounds, will work since each square is color-blocked round by round.
What hook size should be used?
The pattern leaves hook size open to choice. Pick a hook that matches the yarn weight and gives a fabric that feels firm but not stiff.
How are the sleeves shaped without separate shaping rounds?
Sleeves come from folding the joined panel in half and sewing a square's width at each side. No extra increases or decreases are worked.
What if the granny squares come out slightly different sizes?
Block each square before assembling the panels. Blocking evens out minor tension differences so the grid layout lines up cleanly.