 STITCH ROUND
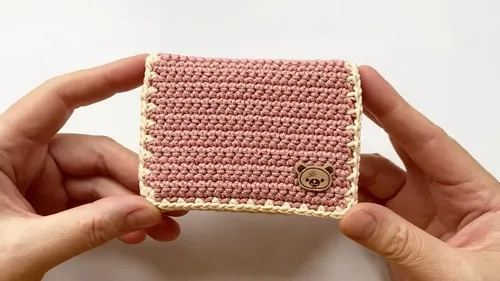
 Mini crochet card holder pattern with pocket panels
38 rounds builds the body, 15 shapes each pocket, for a flat single crochet card holder.
- Skill
- Intermediate
- Rounds
- 4 rounds
- Yarn weight
- Worsted
- Time
- 4-6 hours

Intermediate
What the original page called it. Nothing here is graded a second time.

4 rounds
Each one gets its own line, with a box beside it to tick as you go.

Worsted
What the sample was made in. Any weight works — the size moves with it.
About this pattern
This card holder builds from three flat pieces worked entirely in single crochet. The main body takes 38 rounds to complete, and each of the two pocket pieces ticks off in 15 rounds. Every row uses the same stitch count, so once the first few rows are set, the rest is steady, repeatable progress toward a finished rectangle ready for assembly.
There is no shaping to track here, which makes this a forgiving project for practicing even tension. The only point to slow down is the first round of each piece, where the starting chain and the first row of single crochet set the stitch count that every following row depends on. Get that opening row right and the rest follows without surprises.
This pattern is designed with simplicity in mind, making it a quick win for beginners and experienced crocheters alike. You can personalize the finished card holder with different yarn colors or added buttons for a unique touch.
- Work the main body piece in straight rows of single crochet until it reaches its full length.
- Make two smaller pocket pieces using the same stitch pattern but stopping them shorter.
- Lay the two pocket pieces over the base piece, lined up along the bottom edge.
- Single crochet through all three layers together to join the pockets to the body.
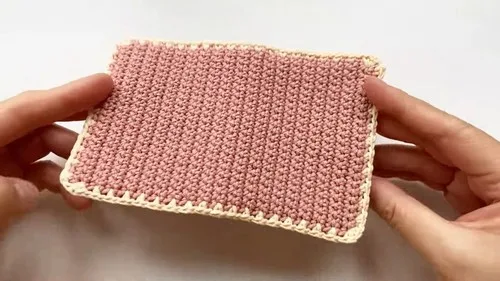
- Round each corner with extra stitches, then finish the open top edge with a decorative chain pattern.
- Weave in the yarn tails to leave a clean, finished edge all around.
What goes wrong
- Miscounting the starting chain Count the chain before working the first row, since every row afterward repeats the same stitch total. A chain that is off by even one stitch throws out the whole piece.
- Losing stitches at the turn Check the stitch count after chaining 1 and turning at the end of each row. It is easy to skip the first or last stitch when turning, which slowly narrows the piece.
- Pocket pieces placed unevenly Line up both pocket pieces against the bottom edge of the base piece before joining. Pin or clip them in place first so the single crochet seam goes through all three layers evenly.
- Rushing the corner rounding Slow down at each corner and work the extra single crochet stitches deliberately. Skipping this step leaves the corners squared off and the edge pulling oddly.
Yarn, hook and the rest
Copied from the source pattern's own materials list.
- Worsted weight yarn (any color)
- Crochet hook (size recommended for your yarn)
- Scissors
- Yarn needle
Progress tracker
0 of the 4 rounds on this page are ticked.
The pattern, round by round
Kept in the order and the wording the source used. Tick a round as you finish it; the ticks stay on this device.
Base Piece (Main Body)
Round 1
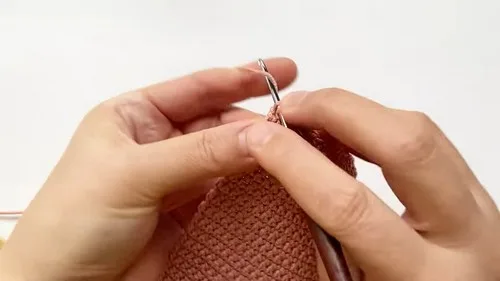
Make a slip knot; Chain 23; Single crochet in the second chain from the hook; Continue with 1 single crochet in each of the next 21 stitches (22 single crochet total); Chain 1, turn. (22 sc)
Round 2
22 single crochet across; Chain 1, turn. (22 sc)
Rounds 3–38
Repeat 22 single crochet for each row; Chain 1 and turn after each row. (22 sc)At the end of Row 38, chain 1 and cut the yarn, leaving a tail for assembly.
Pocket Pieces
Rounds 1–15
Follow the same steps as the base piece, 22 single crochet per row, only do 15 rows. (22 sc)Finish off by chaining 1 and cutting the yarn, leaving a tail.
Join
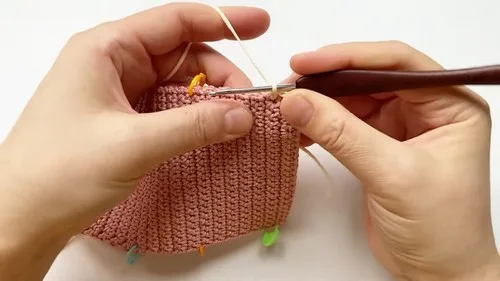
Step 1Lay the two small pocket pieces on top of the base piece, aligning them at the bottom.
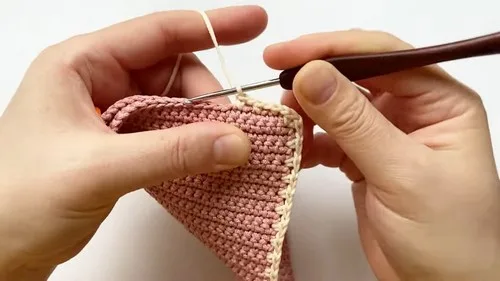
Step 2Use single crochet to join all three layers: insert your hook through all layers along the edges.
Step 3Repeat: Single crochet 1, chain 1.
Step 4At each corner: Do 2 single crochet to round the edges.
Step 5Along the top edge (open end of the card holder): Repeat: Single crochet 1, chain 1, skip 1 stitch to create a decorative edge.
Step 6Fasten off and weave in all ends with a yarn needle.
Check your count
- Base Piece (Main Body) · Round 1: 22 sts
- Base Piece (Main Body) · Round 2: 22 sts
- Base Piece (Main Body) · Rounds 3–38: 22 sts
- Pocket Pieces · Rounds 1–15: 22 sts
Finish
- Leave a generous tail at the end of the base piece and each pocket piece for use during assembly.
- Join all three layers with single crochet first, since this seam does double duty as both construction and finishing.
- Weave in every remaining tail with a yarn needle once the top edge trim is complete.
Bigger or smaller
- Smaller
- Repeat fewer rows on the base piece and pocket pieces than the pattern calls for, which shortens the finished holder while keeping the same single crochet structure.
Photographs of this one
Every photograph on this page was taken by whoever published the pattern, and they are printed in the order the source listed them.
FAQs
Asked and answered
These answers came from whoever first published the pattern, kept word for word.
What yarn weight works best for this card holder?
Worsted weight yarn is what the pattern calls for, and any color works fine. Stick with worsted for a sturdy, close fabric that holds its shape as a card holder.
Why do the pocket pieces stop short of the base piece?
The pocket pieces are worked for fewer rows than the base piece so they sit partway up the body once assembled. This leaves the top portion of the base piece as the open card slot.
Can the top edge be left plain instead of the decorative trim?
The decorative chain-and-skip pattern along the top edge is part of what finishes the open end cleanly. Skipping it is possible, but the edge will look and feel less finished without it.
How long should the yarn tails be left for assembly?
Leave a tail long enough to comfortably weave in later, since both the base piece and the pocket pieces are fastened off with a tail reserved for assembly. A short tail makes the final join awkward.