 STITCH ROUND
 Crochet V-stitch bandana and head scarf pattern
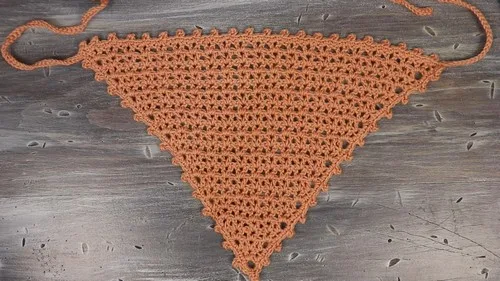
22 rounds of V-stitch shaping build this triangle bandana with ties and picot edging.
- Skill
- Intermediate
- Rounds
- 4 rounds
- Yarn weight
- Worsted
- Hook
- 4.5 mm
- Time
- 4-6 hours

Intermediate
What the original page called it. Nothing here is graded a second time.

4 rounds
Each one gets its own line, with a box beside it to tick as you go.

Worsted
What the sample was made in. Any weight works — the size moves with it.
About this pattern
This triangle bandana grows from a single magic circle to a full head scarf over 22 rounds, each one adding a fresh row of V-stitches along both sloped edges. The cotton yarn and 4.5 mm hook keep the fabric light and breathable, which suits a piece meant to sit against the hairline. Every round is a clear checkpoint, so progress is easy to track from the tight center point outward to the wide triangle base.
The shaping comes entirely from where the V-stitches land and which opening chain starts each row, alternating between a chain-3 double crochet start and a chain-4 V-stitch start. Slow down at the transition from the magic circle into Round 2 and Round 3, since placing the V-stitch into the correct chain-1 space is what keeps the two slanted edges matching. Miss that spot early on and the whole triangle skews.
There's plenty of room for personal style here: this pattern is a treasure trove of creativity, and the V-stitch fabric works just as well in a single color as it does with mixed hues and textures, so pick whichever cotton yarn colors suit your taste.
- Begin with a magic circle and a single V-stitch to set the point of the triangle.
- Turn the work at the end of every round and keep building outward from that center point.
- Alternate the opening chain between chain-3 and chain-4 so the increases land correctly each row.
- Nest each new V-stitch into the chain-1 space of the one below it, repeating until the triangle feels wide enough.
- Once the body is the right size, chain and slip stitch back along both edges to form the straps.
- Finish the lower edge with single crochet and picot stitches for a decorative trim.
What goes wrong
- Skipping the V-stitch chain-1 space Check that both double crochets of every V-stitch have a clear chain-1 between them before moving to the next stitch. A collapsed space throws off where the next round's V-stitch should land.
- Forgetting to turn each round This piece is built in turned rows, not a continuous spiral, so flip the work after finishing every round. Working two rounds in the same direction will twist the triangle.
- Confusing the chain-3 and chain-4 starts The opening chain alternates between counting as one double crochet and counting as a double crochet plus chain-1 for a V-stitch. Glance at how the previous round ended before deciding which chain to start with.
- Pulling the picot edging too tight Slip stitch into the front loop only of the single crochet when forming each picot, keeping tension even. Tight picots pucker the edge instead of lying flat.
Yarn, hook and the rest
Copied from the source pattern's own materials list.
- Cotton yarn
- 4.5 mm crochet hook
Progress tracker
0 of the 4 rounds on this page are ticked.
The pattern, round by round
Kept in the order and the wording the source used. Tick a round as you finish it; the ticks stay on this device.
Main Pattern
Round 1
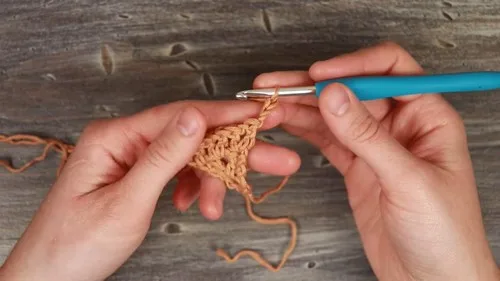
Make a magic circle; Chain 4 (this counts as 1 double crochet and chain 1); Work 1 V-stitch (1 double crochet, chain 1, 1 double crochet) inside the magic circle; Pull to tighten the magic circle.
Round 2
Turn your work; Chain 3 (counts as 1 double crochet); Work 1 V-stitch in the chain-1 space of the V-stitch from the previous round; Finish with a double crochet in the third chain of the chain-4 from the previous round.
Round 3
Turn your work; Chain 4 (counts as double crochet, chain 1); In the first stitch (same stitch you just chained from), work 1 double crochet; Work a V-stitch in the V-stitch from the previous round's chain-1 space; Work another V-stitch in the top of the chain-3 from Round 2.
Rounds 4–22
Alternate each round starting with chain 3 (counts as 1 double crochet) or chain 4 (counts as double crochet, chain 1), and work V-stitches into each V-stitch from the previous round; Increase by starting with a V-stitch in one round and a double crochet in the next; Repeat the V-stitch rounds, alternating your start stitch, until the bandana reaches the desired size (the example has 22 rounds).
Join
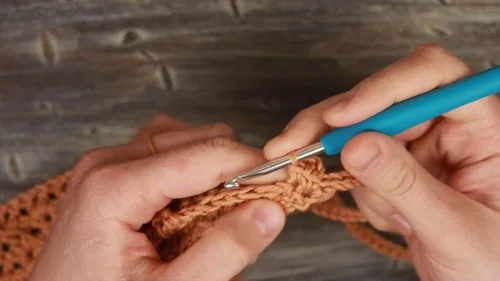
Step 1Straps: Once you have finished the main part of the bandana, you will work the straps directly from the bandana; Chain 70 (or the length you desire for your straps); Work back on the chain with slip stitches until reaching the bandana again; Repeat on the other side for the second strap.
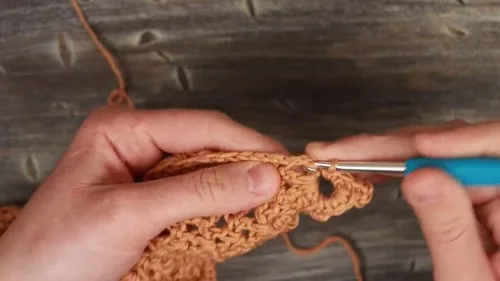
Step 2Decorative Edging: After completing the straps, single crochet into the top of the last stitch of your strap; Chain 3, then make a Pico by slip stitching into the front loop only of the same single crochet; Single crochet into the next 2 stitches or spaces, and then create another Pico every 3rd stitch.
Step 3Edging Around the Bandana: Single crochet evenly around the bandana, placing a single crochet in V-stitch rows and double, and keeping an even spacing for the Pico edging; At the point of the bandana, place a Pico stitch for a nice tip effect and continue the pattern symmetrically up the other side to match.
Step 4Finishing: Once you've placed the last Pico, and are back at the beginning, chain 1; Cut the yarn, leaving a tail for weaving in ends, and fasten off by pulling the tail through the last loop on your hook; Weave in all ends to finish your bandana.
Finish
- Weave in the magic-circle tail and any other loose ends along the wrong side of the triangle before adding straps.
- Secure both strap chains by slip stitching back along their length until they reconnect with the bandana body.
- Work the picot edging along the remaining edge, then lightly steam or block the piece flat so the V-stitch rows sit evenly.
Bigger or smaller
- Larger
- Swap in a heavier cotton yarn and a slightly bigger hook, or keep working the alternating V-stitch rounds past the example's 22 for a deeper, wider triangle.
- Smaller
- Use a finer cotton yarn with a smaller hook for a denser, more compact triangle, or stop the V-stitch rounds earlier than 22 for a shallower bandana; strap length stays adjustable either way.
Photographs of this one
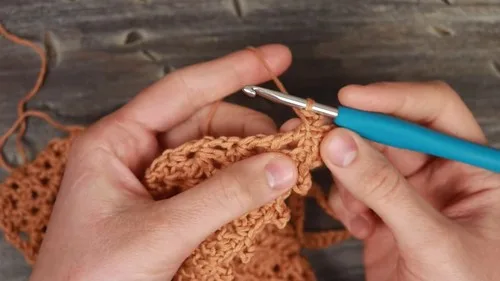
Every photograph on this page was taken by whoever published the pattern, and they are printed in the order the source listed them.
FAQs
Asked and answered
These answers came from whoever first published the pattern, kept word for word.
Why does the piece need to be turned after every round?
The bandana is worked in turned rows rather than a spiral, which keeps the V-stitch pattern consistent on the right side. Skipping the turn flips the stitch pattern and distorts the triangle shape.
Can the straps be made longer or shorter than the chain-70 suggestion?
Yes, the pattern notes chain 70 or the desired strap length, so adjust the chain count to fit comfortably. The slip stitch return row works the same regardless of length.
What causes the V-stitches to stop lining up between rounds?
This usually means a V-stitch was worked into the wrong spot instead of directly into the previous round's chain-1 space. Unpick back to the last clean round and recheck the placement before continuing.
Is the picot edging necessary to finish the bandana?
The picot trim is the pattern's intended finish along the lower edge, giving it a decorative scalloped look. It can be left off for a plainer single crochet edge if time is short.