 STITCH ROUND
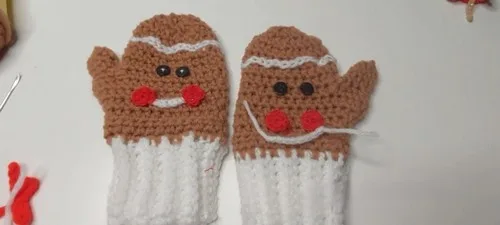
 Ribbed-cuff crochet mittens with button eyes
Ten rounds shape a thumb gusset and rounded top for folded-cuff crochet mittens with button eyes.
- Skill
- Intermediate
- Rounds
- 17 rounds
- Yarn weight
- Worsted
- Hook
- 4.5 mm
- Time
- 3-4 hours

Intermediate
What the original page called it. Nothing here is graded a second time.

17 rounds
Each one gets its own line, with a box beside it to tick as you go.

Worsted
What the sample was made in. Any weight works — the size moves with it.
About this pattern
These mittens start as a folded, ribbed cuff and finish as a rounded mitten top, with ten rounds carrying the thumb and body from thumbhole to closed tip. The cuff is worked back and forth until it reaches the chosen length, then joined into a loop before the mitten body begins. From there, three rounds shape the thumb, three more increase it to width, two rounds close the gap left by the thumbhole, and two final rounds taper the top.
Watch the corners of the thumbhole in Round 1 of the thumb, where two single crochets worked into each corner keep the base from puckering. The increase rounds that follow ask for evenly placed increases mid-round rather than at the seam, so count stitches before each join to keep the thumb symmetrical. The cuff's back-loop-only ribbing gives it stretch, but the seam that folds and joins the cuff wants a tidy, even single crochet line through both loops, since that seam sits right at the wrist edge where it shows most.
- Chain a foundation row and work a long ribbed strip in back loop single crochet to shape the cuff.
- Fold that strip in half and seam the open edge closed to form a snug, doubled wristband.
- Pick up stitches around the top of the cuff and build the mitten body upward in half double crochet.
- Leave an opening partway up the hand for the thumb, then set it aside while the body continues.
- Return to the opening and build the thumb from its corners, increasing it before closing the tip.
- Shape and close the top of the mitten, then weave in ends and stitch on the button eyes.
What goes wrong
- Skipping the back loop only Working through both loops on the cuff kills its stretch and flattens the ribbing; catch only the back loop on every row.
- Joining cuff edges unevenly A stretched or bunched seam at the fold throws off the stitch count for the mitten body; keep the single crochet seam even and count as you go.
- Missing the thumbhole corners Skipping the two single crochets in each corner of Round 1 leaves small gaps at the base of the thumb; work both corner stitches before continuing around.
- Uneven increase placement Bunching increases together in the thumb or top-shaping rounds distorts the shape instead of rounding it smoothly; space them out evenly around each round.
Yarn, hook and the rest
Copied from the source pattern's own materials list.
- Light brown and white yarn
- Four buttons for the eyes
- Scissors
- 4.5 mm crochet hook
- Two needles (one yarn needle, one sewing needle)
- Sewing thread
- Measuring tape
Progress tracker
0 of the 17 rounds on this page are ticked.
The pattern, round by round
Kept in the order and the wording the source used. Tick a round as you finish it; the ticks stay on this device.
Cuff Construction
Foundation Row
Chain 10 stitches. Single crochet in the second chain from the hook and in each chain across to make 9 single crochets.
Ribbing Rows
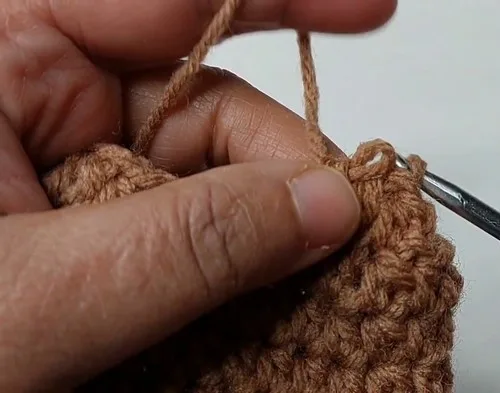
Chain one and turn your work. Work single crochets in the back loop of each stitch across. Repeat until the cuff measures your desired length (4.5 inches for adults, 3 inches for babies).
Join Cuff
Fold the cuff in half and join the edges using single crochets through both loops.
Mitten Body
Round 1
Attach yarn to the top edge of the cuff. Make 26 single crochets evenly around the top edge and join with a slip stitch.
Round 2
Chain one and turn. Make one half double crochet in each stitch around and join with a slip stitch.
Round 3
Repeat for another round of half double crochet.
Thumb Increase Rounds
Chain one and turn.
Round 4
Make 12 half double crochets, two half double crochets in the next stitch twice, one half double crochet in the remaining stitches, and join with a slip stitch (28 stitches).
Round 5
Make 13 half double crochets, increase twice, finish the round, and join (30 stitches).
Round 6
Make 14 half double crochets, increase twice, finish the round, and join (32 stitches).
Thumbhole Creation
Chain one and turn.
Round 7
Make 12 half double crochets. Chain 3 stitches, skip the next 8 stitches, and make a half double crochet in the 9th stitch. Continue half double crochets until the end and join with a slip stitch (24 stitches plus 3 chains).
Mitten Body (Post-Thumbhole)
Round 8
Chain one and turn. Make 12 half double crochets, one half double crochet in each chain stitch, finish the round, and join (27 stitches).
Rounds 9–11
Chain one and turn. Make one half double crochet in each stitch and join with a slip stitch at the end of each round.
Mitten Top Shaping
Round 12
Chain one and turn. Work a sequence of three half double crochets, then two half double crochets together (decrease) around.
Round 13
Chain one and turn. Work a sequence of two half double crochets, then two half double crochets together (decrease) around.Cut the yarn and leave a long tail. Use a yarn needle to weave the tail through the remaining stitches and pull tight to close the top.
Thumb Construction
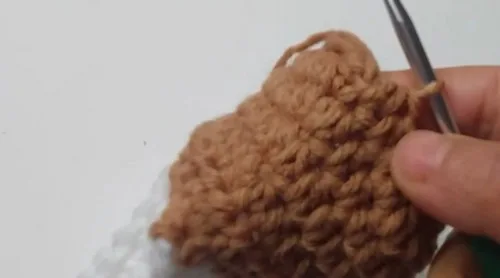
Attach yarn to one corner of the thumbhole.
Round 1
Make two single crochets in the corner, one single crochet in each chain stitch, two single crochets in the other corner, and one single crochet in each remaining stitch. Join with a slip stitch.
Round 2
Chain one and turn. Make decreases by crocheting two single crochets together around the thumb. Join with a slip stitch.
Rounds 3–4
Chain one and turn. Make one half double crochet in each stitch and join with a slip stitch at the end of each round.Cut the yarn and leave a long tail. Weave through the remaining stitches and pull tight to close the top.
Gingerbread Decoration
Using white yarn, embroider a zigzag mouth on the mitten.
Optional: Use red yarn to crochet two small cheek circles using a magic ring with 6 single crochets.
Sew two buttons onto the mitten for the eyes.
Optional: Chain 7 stitches with red yarn to create a mouth outline and sew it onto the mitten.
Arrange and securely sew all decorative elements in place.
Check your count
- Cuff Construction · Foundation Row: 9 sts
- Mitten Body · Round 1: 26 sts
- Thumb Increase Rounds · Round 4: 28 sts
- Thumb Increase Rounds · Round 5: 30 sts
- Thumb Increase Rounds · Round 6: 32 sts
- Thumbhole Creation · Round 7: 24 sts
Finish
- Weave in every yarn tail from the cuff seam, thumb closure and mitten top before handling the piece further.
- Pull the thumb's tail tight through its final round to close the tip, then anchor it firmly inside.
- Sew the buttons on as eyes using sewing thread, checking placement on both mittens before trimming any loose ends.
Bigger or smaller
- Larger
- Go up a hook size and use a heavier yarn than worsted weight; the mitten grows in every direction without changing the round-by-round instructions.
- Smaller
- Work fewer of the plain half double crochet rounds in the mitten body, and stop the cuff short of the stated adult or baby length for a smaller, closer fit.
Photographs of this one
Every photograph on this page was taken by whoever published the pattern, and they are printed in the order the source listed them.
FAQs
Asked and answered
These answers came from whoever first published the pattern, kept word for word.
Can the mitten size be adjusted for different hand sizes?
Yes. Change the cuff length between the stated adult and baby measurements, or adjust the hook and yarn weight to size the whole mitten up or down.
Why does the cuff use back loop single crochet instead of regular single crochet?
Working only through the back loop leaves ridges that let the ribbing stretch and recover, which is what makes the folded cuff sit snugly at the wrist.
Are the button eyes safe for a baby version?
Buttons are a choking hazard for babies and infants, so swap them for embroidered eyes or omit them entirely on the smaller, 3-inch cuff size.
What happens if the thumbhole corners are skipped?
Skipping the corner single crochets in Round 1 of the thumb leaves gaps at the base where the thumb meets the hand, so work both corners before joining.