 STITCH ROUND
Lavender kitty face crochet tote bag pattern
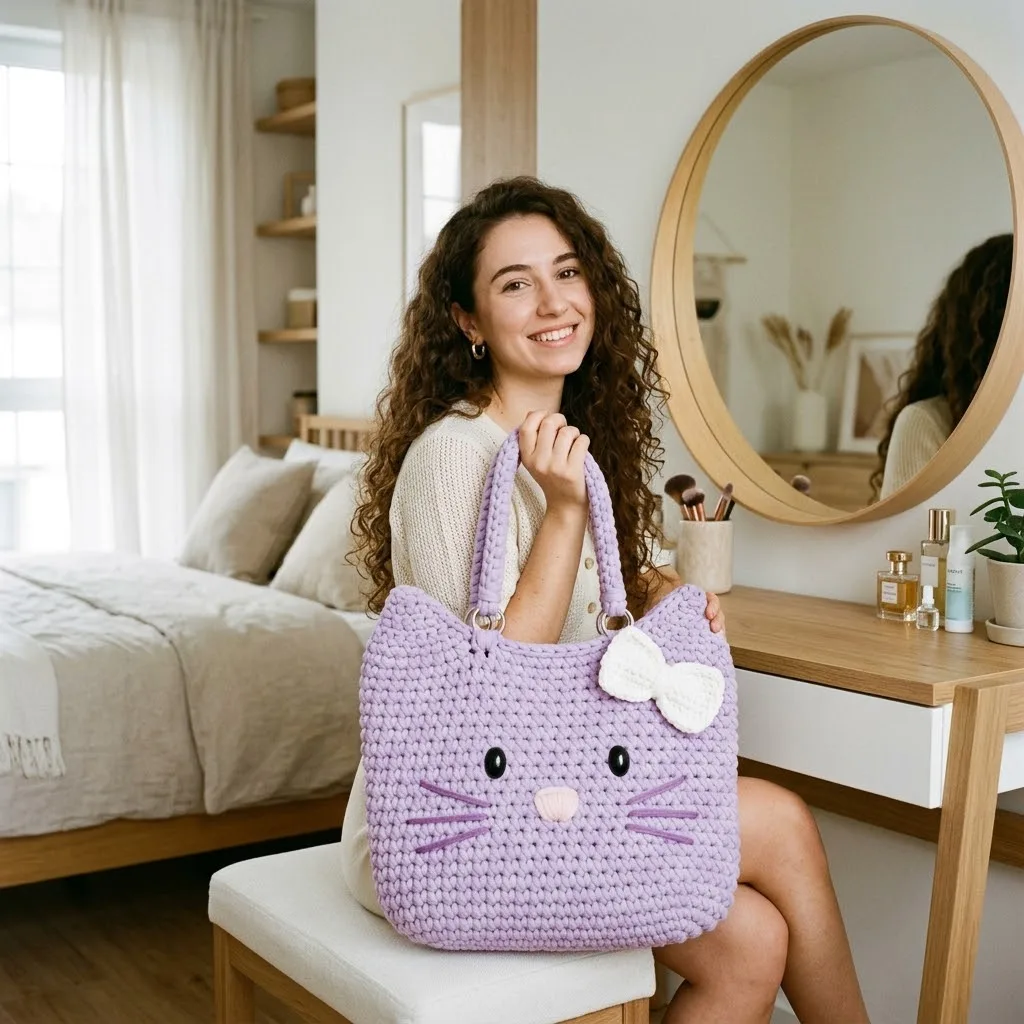
Crochet a lavender kitty tote bag from an oval base up through shaped ears, handles, and a bow.
- Skill
- Intermediate
- Rounds
- 19 rounds
- Yarn weight
- Super Bulky
- Hook
- 8 mm
- Time
- 4-6 hours

Intermediate
What the original page called it. Nothing here is graded a second time.

19 rounds
Each one gets its own line, with a box beside it to tick as you go.

Super Bulky
What the sample was made in. Any weight works — the size moves with it.
About this pattern
This lavender kitty tote bag works from the base up in continuous rounds: an oval base increases over five rounds, then 25 rounds of straight single crochet build the sides before two triangular ears are shaped at the top corners. Two crocheted handles attach to the inside of the bag, and a small bow, a crocheted nose, and embroidered whiskers finish the face. It all comes together quickly in chunky t-shirt yarn on an oversized hook.
All the shaping lives in the ears: each row skips the first and last stitch while the previous row loses two more, so the strip narrows evenly down to a single point. Slow down on the last row, where the final two stitches get worked together in one decrease; miss that step and the ear tip looks blunt instead of pointed. Keep tension even throughout, since t-shirt yarn pulls out of shape fast if rows are rushed.
The finished bag is large enough to hold books, a tablet, your lunch, or a small haul from the farmer's market. The structured shape comes from working tight single crochet stitches with chunky yarn, and every cat face detail is surface embroidery or a small crocheted piece, with no colorwork or charts involved. Skill level: confident beginner to intermediate — if you can single crochet in the round and sew pieces together, you can make this bag.
- Shape two matching ears by decreasing row after row until each one tapers to a point.
- Work the small center piece as a flat panel worked straight in single crochet.
- Crochet an oval base, then build the main body of the tote in straight single crochet rounds using t-shirt yarn and the oversized hook.
- Set the black safety eyes in place before the face closes up for good.
- Crochet the small nose piece, then embroider the whiskers in darker purple with a few simple stitches.
- Crochet and attach the two handles with D-rings, then finish with the bow loops so the tote has its face and handles.
What goes wrong
- Uneven ear taper Count each decrease row carefully, skipping the first and last stitch every time so both sides of the ear narrow at the same rate.
- Safety eye backing not flush Push the washer fully onto the post before closing up the face, and check from the back that it sits tight against the fabric.
- T-shirt yarn stretching mid-row Work with even, steady tension rather than pulling the yarn tight in spots; a tighter overall tension also makes the finished bag sturdier.
Yarn, hook and the rest
Copied from the source pattern's own materials list.
- Approximately 250-300 grams of t-shirt yarn or tube yarn in lavender (main color)
- Small amount of cream or white tube yarn for the bow
- Small amount of light pink yarn for the nose
- Small amount of darker purple or lavender yarn for the whiskers
- 8mm or 9mm crochet hook (the size depends on your yarn and how tight you crochet)
- 2 black safety eyes, approximately 18-20mm
- 2 D-rings or O-rings, approximately 25mm
- Yarn needle for weaving ends
- Stitch marker
- Scissors
- Working in single crochet with t-shirt yarn and an 8mm hook, approximately 8 stitches and 8 rows equals 4 inches. Gauge is not critical for this project, but a tighter tension creates a sturdier bag.
- Fabric glue (optional, for securing the nose)
Progress tracker
0 of the 19 rounds on this page are ticked.
The pattern, round by round
Kept in the order and the wording the source used. Tick a round as you finish it; the ticks stay on this device.
Hook
8mm or 9mm crochet hook (the size depends on your yarn and how tight you crochet)
Notions
2 black safety eyes, approximately 18-20mm 2 D-rings or O-rings, approximately 25mm Yarn needle for weaving ends Stitch marker
Scissors Fabric glue (optional, for securing the nose)
Gauge
Working in single crochet with t-shirt yarn and an 8mm hook, approximately 8 stitches and 8 rows equals 4 inches. Gauge is not critical for this project, but a tighter tension creates a sturdier bag.
Base of the Bag
The base is an oval shape created by working around both sides of a foundation chain.
Round 1
Ch 16. Starting in the 2nd ch from hook, sc in each of the next 14 ch. In the last ch, work 3 sc (this turns the corner). Now working along the opposite side of the foundation chain, sc in each of the next 13 ch. Work 2 sc in the last ch (this completes the oval). Place a stitch marker in the first stitch. (32 sts)
Round 2
Inc in first st, sc in next 13 sts, inc in next 3 sts, sc in next 13 sts, inc in last 2 sts. (38 sts)
Round 3
Sc in first st, inc in next st, sc in next 13 sts, (sc in next st, inc in next st) 3 times, sc in next 13 sts, (sc in next st, inc in next st) 2 times. (44 sts)
Round 4
Sc in first 2 sts, inc in next st, sc in next 13 sts, (sc in next 2 sts, inc in next st) 3 times, sc in next 13 sts, (sc in next 2 sts, inc in next st) 2 times. (50 sts)
Round 5
Sc in first 3 sts, inc in next st, sc in next 13 sts, (sc in next 3 sts, inc in next st) 3 times, sc in next 13 sts, (sc in next 3 sts, inc in next st) 2 times. (56 sts)
Your base should now measure approximately 10 inches long by 5 inches wide. If you want a larger bag, continue increasing in this pattern for one or two more rounds.
Body of the Bag
Now you'll work straight up without increases to build the sides.
Rounds 6–30
Sc in each st around, moving your stitch marker up as you go. (56 sts per round)
That's 25 rounds of straight single crochet. The body should measure approximately 9-10 inches tall. You can adjust this height by adding or removing rounds based on your preference. At the end of Round 30, sl st to the next st to even out your work. Do not fasten off yet.
First Ear
The cat ears are created by working short rows at the top corners of the bag. This is where the magic happens.
Row 1
Ch 1, sc in next 8 sts, turn. (8 sts)
Row 2
Ch 1, skip first st, sc in next 6 sts, skip last st, turn. (6 sts)
Row 3
Ch 1, skip first st, sc in next 4 sts, skip last st, turn. (4 sts)
Row 4
Ch 1, skip first st, sc in next 2 sts, skip last st, turn. (2 sts)
Row 5
Ch 1, dec over both sts. (1 st) Fasten off and weave in the end.
Second Ear
Count 20 stitches from the base of the first ear along the top edge. Rejoin yarn with a sl st.
Repeat Rows 1-5 exactly as for the first ear.
You should now have two triangular ears standing up from the top of your bag, with an opening between them at the front and back.
Handles (Make 2)
The handles are simple chains covered with single crochet for durability.
Row 1
Ch 50 (or desired length for your handles). Starting in 2nd ch from hook, sc in each ch across. (49 sts)
Row 2
Ch 1, turn. Sc in each st across. (49 sts)
Row 3
Ch 1, turn. Sc in each st across. Fasten off, leaving a long tail for sewing. (49 sts)
Your handles should be approximately 18-20 inches long. Adjust the starting chain if you prefer longer or shorter straps.
Attaching the Handles
Position each handle on the inside of the bag, approximately 3-4 inches from each side edge. The handles should sit just below where the ears begin.
If using D-rings or O-rings, fold the end of each handle through the ring and sew it back onto itself. Then attach the ring to the bag by sewing through the bag fabric. This adds a professional touch and distributes weight evenly.
Alternatively, you can sew the handles directly to the inside of the bag using a whip stitch or mattress stitch. Make sure to reinforce the attachment points with several passes of yarn.
Center Piece
The cute white bow adds extra character to your kitty tote. This component is optional.
Row 1
Ch 6. Starting in 2nd ch from hook, sc in each ch across. (5 sts)
Rows 2–4
Ch 1, turn. Sc in each st across. (5 sts) Fasten off, leaving a tail.
Bow Loops
Ch 20. Sl st to first ch to form a ring. Ch 1, sc around the entire ring, working approximately 24-26 sc evenly around. Sl st to first sc to join. Fasten off.
Pinch the ring in the center to create the bow shape. Wrap the center piece around the pinched middle and sew in place at the back.
Attach the bow to the top corner of the bag, near one of the ears, using the remaining tail.
Nose
Round 1
Using light pink yarn, make a magic ring. Work 6 sc into the ring, pull tight. (6 sts)
Round 2
Inc in each st around. (12 sts)
Round 3
Sc in each st around. (12 sts) Sl st to first st, fasten off, leaving a long tail for sewing.
The nose should be a small rounded triangle or oval shape. You can also use a pom pom maker for a fuzzy nose, or cut a small felt triangle if you prefer.
Center the crocheted nose below and between the eyes, approximately 2-3 inches down. Sew in place using a yarn needle and the tail, stitching around the edges.
Eyes
Position the safety eyes approximately 2-3 inches down from the ear bases and about 4 inches apart from each other. The eyes in the photo appear to be placed slightly above center on the bag front.
Push each safety eye through the fabric from the front. Secure with the washer backing on the inside. Make sure they're even before locking them in place.
Whiskers
Thread a yarn needle with darker purple yarn. Using long straight stitches, embroider 3 whiskers on each side of the nose. Each whisker should be approximately 2-3 inches long, angling slightly upward.
Make sure to secure your yarn ends on the inside of the bag so they don't come loose with use.
Check your count
- Base of the Bag · Round 1: 32 sts
- Base of the Bag · Round 2: 38 sts
- Base of the Bag · Round 3: 44 sts
- Base of the Bag · Round 5: 56 sts
- Body of the Bag · Rounds 6–30: 56 sts
- First Ear · Row 1: 8 sts
Finish
- Weave in every tail left from the ears, the center piece, and the main body panels.
- Pin the ears, bow, nose, and whiskers onto the finished face and check for symmetry before stitching each one down.
- Attach the D-rings or O-rings at the top corners so the handles sit straight and swivel freely.
Bigger or smaller
- Larger
- Move up to the 9mm hook, or use a thicker tube yarn, which loosens every stitch and scales the ears, center piece, and body up together.
- Smaller
- Drop to the 8mm hook with a slimmer t-shirt yarn, which tightens the fabric and shrinks the whole tote while keeping the same shaping.
Photographs of this one
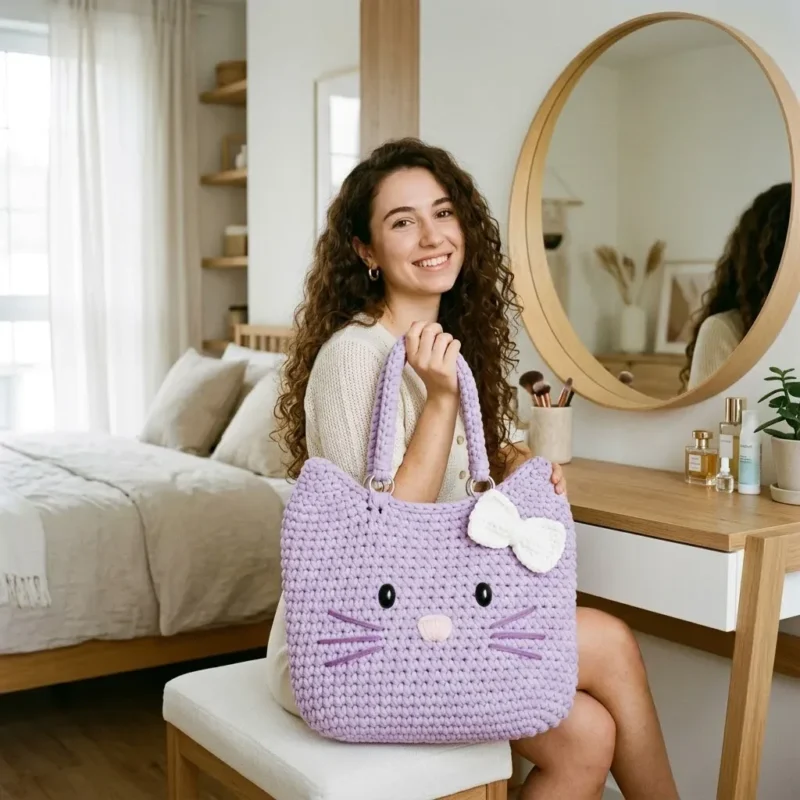
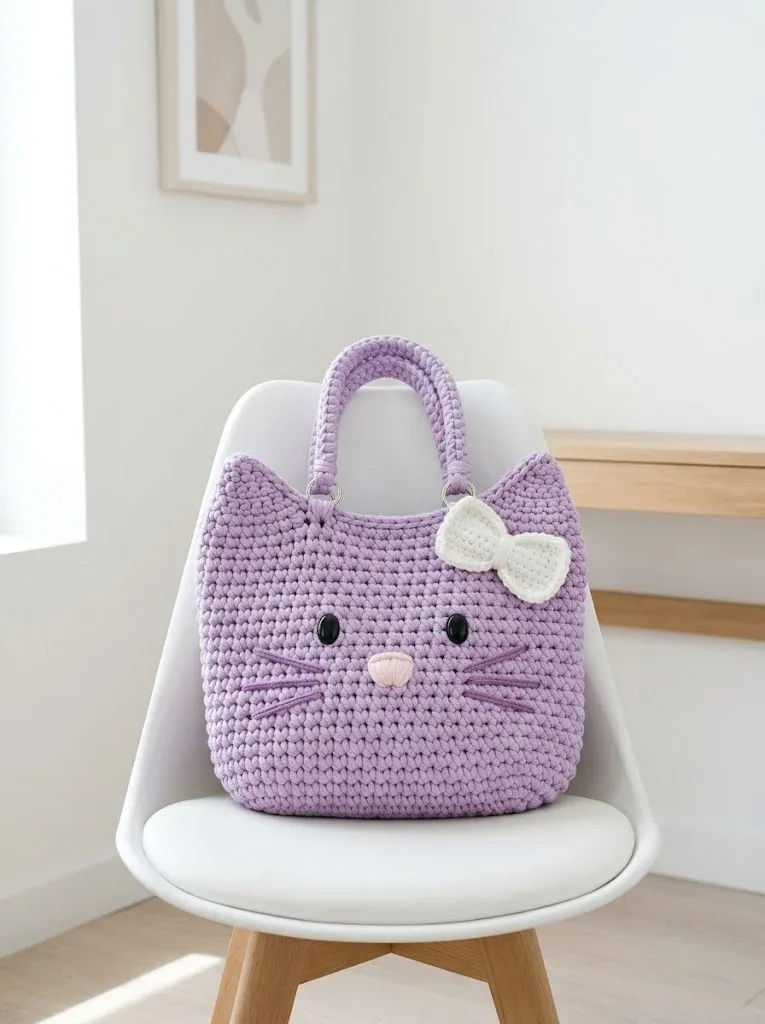
Every photograph on this page was taken by whoever published the pattern, and they are printed in the order the source listed them.
FAQs
Asked and answered
These answers came from whoever first published the pattern, kept word for word.
What yarn works best for this tote?
T-shirt yarn or tube yarn in lavender is the main material, with about 250-300 grams needed for the body. Smaller amounts of cream, pink, and darker purple yarn cover the bow, nose, and whiskers.
Can the nose and whisker yarn be swapped for something else?
Yes, any light pink yarn works for the nose and any darker purple or lavender yarn works for the whiskers. The exact brand does not matter as long as the color contrasts with the main lavender.
Do the safety eyes have to be an exact size?
The pattern calls for eyes around 18-20mm, but slight variation is fine. Keep them in that range so they stay in proportion to the face.
Is gauge important for this bag?
Gauge is not critical for this project. A tighter tension simply produces a sturdier finished bag, so there is room to work at whatever tension feels comfortable.