 STITCH ROUND
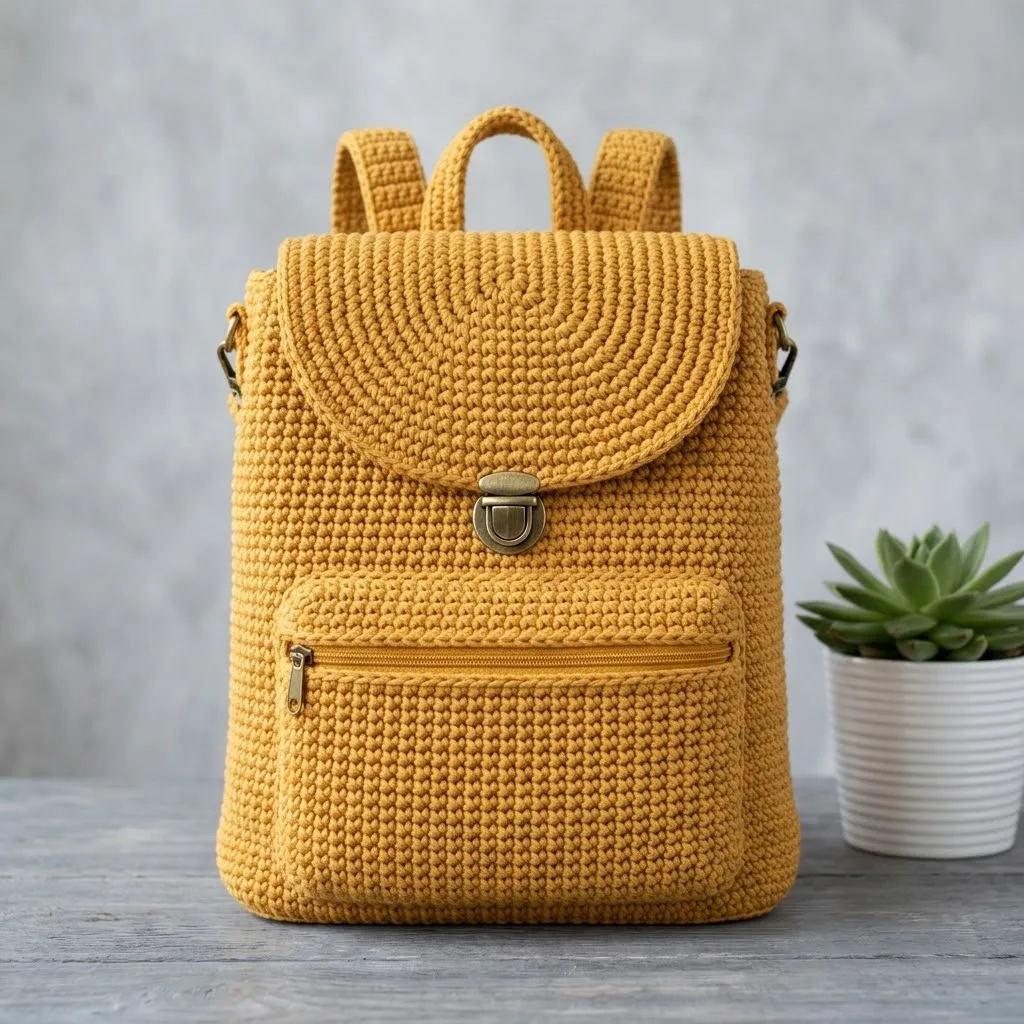
 Mustard yellow crochet backpack with hardware and flap
60 rounds to tick off for a sturdy mustard crochet backpack with flap, D-rings and clasp.
- Skill
- Intermediate
- Rounds
- 25 rounds
- Yarn weight
- Worsted
- Hook
- 4.0 mm
- Time
- 8-12 hours

Intermediate
What the original page called it. Nothing here is graded a second time.

25 rounds
Each one gets its own line, with a box beside it to tick as you go.

Worsted
What the sample was made in. Any weight works — the size moves with it.
About this pattern
This backpack builds up the way most crochet bags do, one long stretch of single crochet at a time. The body alone runs through 60 rounds worked in continuous single crochet, so the bulk of the project is steady, repeatable progress rather than tricky stitch work. Once that cylinder is done, the remaining pieces are short by comparison, which makes the body the real time investment here.
The shaping lives almost entirely in the flap, a rounded piece built in rows that increases outward to form a semicircle over the top opening. Slow down on the first few rows of the flap, since the increase pattern sets the curve for the whole piece and any miscount there shows up clearly once the shape widens. The body's first round also deserves attention, since it works in back loops only to create a defined edge where the base meets the sides.
- Work the base and body as one continuous single crochet tube that climbs through dozens of rounds without joining.
- Keep rounds consistent in height and tension so the cylinder stays even all the way up the body.
- Build the rounded flap separately in turned rows, increasing steadily to form the semicircle that covers the opening.
- Add the hardware pieces, including D-rings and swivel snap hooks, once the main crochet sections are finished.
- Fit a zipper and lining fabric to the interior before the bag is considered wearable.
What goes wrong
- Losing the back-loop-only round Mark the first round above the base clearly and check each stitch goes into the back loop only. Working through both loops here erases the clean edge the pattern is built around.
- Drifting stitch count over 60 rounds Place a contrasting marker every 10 rounds on the body to catch a gained or dropped stitch early. Recounting at the end of 60 rounds is much harder than catching it a few rounds in.
- Miscounting flap increases Check the stitch total at the end of each flap row before turning, since every row builds on the increase pattern set before it. A wrong count early in the flap distorts the semicircle shape later on.
- Loose or uneven cotton tension Swatch for gauge before starting the body, since cotton shows tension changes more than wool does. A floppy swatch means the finished bag will not hold its shape once hardware is attached.
Yarn, hook and the rest
Copied from the source pattern's own materials list.
Yarn
- Approximately 400 to 450 grams of worsted weight cotton yarn (I recommend a sturdy cotton or cotton blend for structure)
Color shown
- Warm mustard yellow/gold
- Look for yarn labeled as "worsted weight" or "medium weight" on the label, usually marked as category 4
Hook
- 4.0 mm (US G/6) crochet hook
- You may need to adjust your hook size to achieve proper gauge
Notions and Hardware
- 2 D-rings, 1 inch (2.5 cm), antique brass
- 2 swivel snap hooks, antique brass
- 1 matching zipper, 6 inches (15 cm), for front pocket
- Tapestry needle for weaving ends
- Stitch markers
- Sewing needle and matching thread for attaching hardware and zipper
Optional
- Fabric for lining the interior
- Gauge
- 18 stitches and 20 rows = 4 inches (10 cm) in single crochet worked in continuous rounds
Progress tracker
0 of the 25 rounds on this page are ticked.
The pattern, round by round
Kept in the order and the wording the source used. Tick a round as you finish it; the ticks stay on this device.
Notions and Hardware
1 push lock clasp (also called a thumb lock or tuck lock), antique brass finish 2 D-rings, 1 inch (2.5 cm), antique brass
2 swivel snap hooks, antique brass 1 matching zipper, 6 inches (15 cm), for front pocket Tapestry needle for weaving ends
Stitch markers Sewing needle and matching thread for attaching hardware and zipper Optional: Fabric for lining the interior
Gauge 18 stitches and 20 rows = 4 inches (10 cm) in single crochet worked in continuous rounds
Why gauge matters here: For a bag, getting close to gauge ensures your backpack ends up the right size and has the proper stiffness. Too loose and your bag will be floppy. Too tight and it will be stiff and small. Swatch first, I promise it is worth it.
Abbreviations and Stitch Definitions
ch = chain: Wrap yarn over hook, pull through loop on hook. This creates the foundation for your work.
sl st = slip stitch: Insert hook, yarn over, pull through stitch AND loop on hook in one motion. Used for joining rounds.
sc = single crochet: Insert hook into stitch, yarn over, pull up a loop (2 loops on hook), yarn over, pull through both loops. The most basic crochet stitch.
inc = increase: Work 2 single crochet stitches into the same stitch. This adds one stitch to your count. st(s) = stitch(es) rnd(s) = round(s)
Pattern Notes
This backpack is worked in continuous rounds for the body and base. This means you do not join at the end of each round. Instead, you keep spiraling upward. Use a stitch marker to track the beginning of each round.
The flap is worked in rows, back and forth.
The straps are worked flat in rows.
All pieces are worked with a tight tension to create a sturdy, structured fabric.
The front pocket is sewn on after completion.
Step by Step Crochet Backpack Pattern Base of the Backpack The base is worked in an oval shape using continuous rounds.
Ch 21.
Round 1
Starting in 2nd ch from hook, work 1 sc in each of the next 19 ch. Work 3 sc in the last ch (this turns the corner). Now working along the opposite side of the foundation chain, work 1 sc in each of the next 18 ch. Work 2 sc in the last ch. Place marker. (42 sts)
Round 2
Work 1 sc in each of the next 19 sts. Work inc in each of the next 3 sts. Work 1 sc in each of the next 18 sts. Work inc in each of the next 2 sts. (47 sts)
Round 3
Work 1 sc in each of the next 19 sts. (1 sc, inc) 3 times. Work 1 sc in each of the next 18 sts. (1 sc, inc) 2 times. (52 sts)
Round 4
Work 1 sc in each of the next 20 sts. (2 sc, inc) 3 times. Work 1 sc in each of the next 19 sts. (2 sc, inc) 2 times. (57 sts)
Round 5
Work 1 sc in each of the next 21 sts. (3 sc, inc) 3 times. Work 1 sc in each of the next 20 sts. (3 sc, inc) 2 times. (62 sts)
Round 6
Work 1 sc in each of the next 22 sts. (4 sc, inc) 3 times. Work 1 sc in each of the next 21 sts. (4 sc, inc) 2 times. (67 sts)
Round 7
Work 1 sc in each of the next 23 sts. (5 sc, inc) 3 times. Work 1 sc in each of the next 22 sts. (5 sc, inc) 2 times. (72 sts)Continue increasing in this manner for 2 more rounds until you have approximately 82 stitches and your base measures roughly 10 inches long by 4 inches wide.
Body of the Backpack Now you will work straight up without increasing to form the sides.
Part 3
Round 1
Working in back loops only for this round (this creates a clean edge where the base meets the sides), work 1 sc in each st around. (82 sts)
Round 2
through 60: Work 1 sc in each st around, working through both loops. (82 sts) Continue until the body measures approximately 11 to 12 inches from the base. Your exact round count may vary slightly depending on your gauge.
Tip for keeping track: Place a contrasting yarn marker every 10 rounds. This helps you count without losing your mind.
Sl st to next st. Fasten off and weave in ends.
Flap
The flap is that beautiful rounded piece on top. It is worked in rows, increasing to create the semicircle shape.
Ch 2.
Round 1
Work 6 sc in 2nd ch from hook. Ch 1, turn. (6 sts)
Round 2
Work inc in each st across. Ch 1, turn. (12 sts)
Round 3
(1 sc, inc) across. Ch 1, turn. (18 sts)
Round 4
(2 sc, inc) across. Ch 1, turn. (24 sts)
Round 5
(3 sc, inc) across. Ch 1, turn. (30 sts)
Round 6
(4 sc, inc) across. Ch 1, turn. (36 sts)
Round 7
(5 sc, inc) across. Ch 1, turn. (42 sts)
Round 8
(6 sc, inc) across. Ch 1, turn. (48 sts) Continue in this pattern until the flap measures approximately 7 inches across, matching the width of the bag opening.Border Round: Ch 1. Work sc evenly around the entire curved edge of the flap, working approximately 3 sc in each corner to keep it flat. Sl st to first sc. Fasten off.Make 2 flap pieces. Hold them wrong sides together and sc around the curved edge to join, creating a double-thickness flap. Leave the straight edge open for attaching to the bag.Front Pocket Ch 32.
Part 5
Round 1
Sc in 2nd ch from hook and in each ch across. Ch 1, turn. (31 sts)
Round 2
through 25: Sc in each st across. Ch 1, turn. (31 sts) Fasten off. Border: Join yarn at any corner. Work sc evenly around all four sides, working 3 sc in each corner. Sl st to join. Fasten off.
Straps (Make 2)
Ch 8.
Part 6
Round 1
Sc in 2nd ch from hook and in each ch across. Ch 1, turn. (7 sts)
Round 2
through 100 (or desired length): Sc in each st across. Ch 1, turn. (7 sts) Fasten off when straps measure approximately 26 to 30 inches.Top Handle Ch 6.
Part 7
Round 1
Sc in 2nd ch from hook and in each ch across. Ch 1, turn. (5 sts)
Round 2
through 30: Sc in each st across. Ch 1, turn. (5 sts) Fasten off. Strap Loops (Make 2)These small loops attach to the top of the bag and hold the D-rings.Ch 5.
Part 8
Round 1
Sc in 2nd ch from hook and in each ch across. Ch 1, turn. (4 sts)
Round 2
through 12: Sc in each st across. Ch 1, turn. (4 sts) Fasten off.
Assembly Instructions This is where your backpack comes together. Take your time with this part.
Attaching the Flap
Position the flap at the back of the bag opening, centered. The straight edge should overlap the bag by about 1 inch. Using your tapestry needle and yarn, whipstitch the flap securely to the inside top edge of the bag back.
Attaching the Front Pocket
Position the pocket on the front of the bag, approximately 1 inch up from the base. Pin in place. Using sewing needle and thread, carefully sew the zipper to the top edge of the pocket first. Then sew the pocket to the bag body along the sides and bottom, leaving the zippered top open.
Check your count
- Notions and Hardware · Round 2: 47 sts
- Notions and Hardware · Round 4: 57 sts
- Notions and Hardware · Round 6: 67 sts
- Notions and Hardware · Round 7: 72 sts
- Part 3 · Round 1: 82 sts
- Flap · Round 2: 12 sts
Finish
- Weave in every end from the base, body, and flap separately before adding any hardware, since loose tails are harder to reach once lining goes in.
- Sew the lining fabric into the interior by hand, giving the cotton stitches a stable backing and hiding the inside of the hardware attachments.
- Attach the D-rings, swivel snap hooks, clasp, and zipper with sewing needle and matching thread, checking each piece sits flat before trimming thread ends.
Bigger or smaller
- Larger
- Work the body section past the given 60 rounds to add height to the backpack, keeping the same stitch count around. This adds length to the bag without changing its width.
- Smaller or firmer
- Drop to a smaller hook with the same worsted weight cotton for a tighter, more structured fabric, or size up the hook for a slightly looser, more flexible bag. Either change affects overall gauge, so re-check it against the 18 stitches and 20 rows over 4 inches before committing to the full body.
Photographs of this one
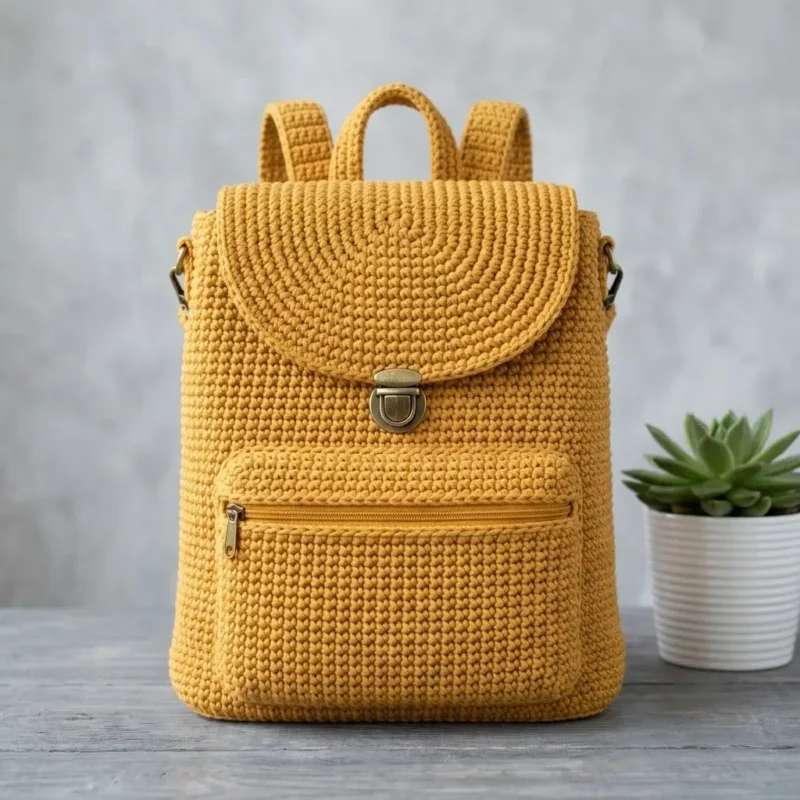
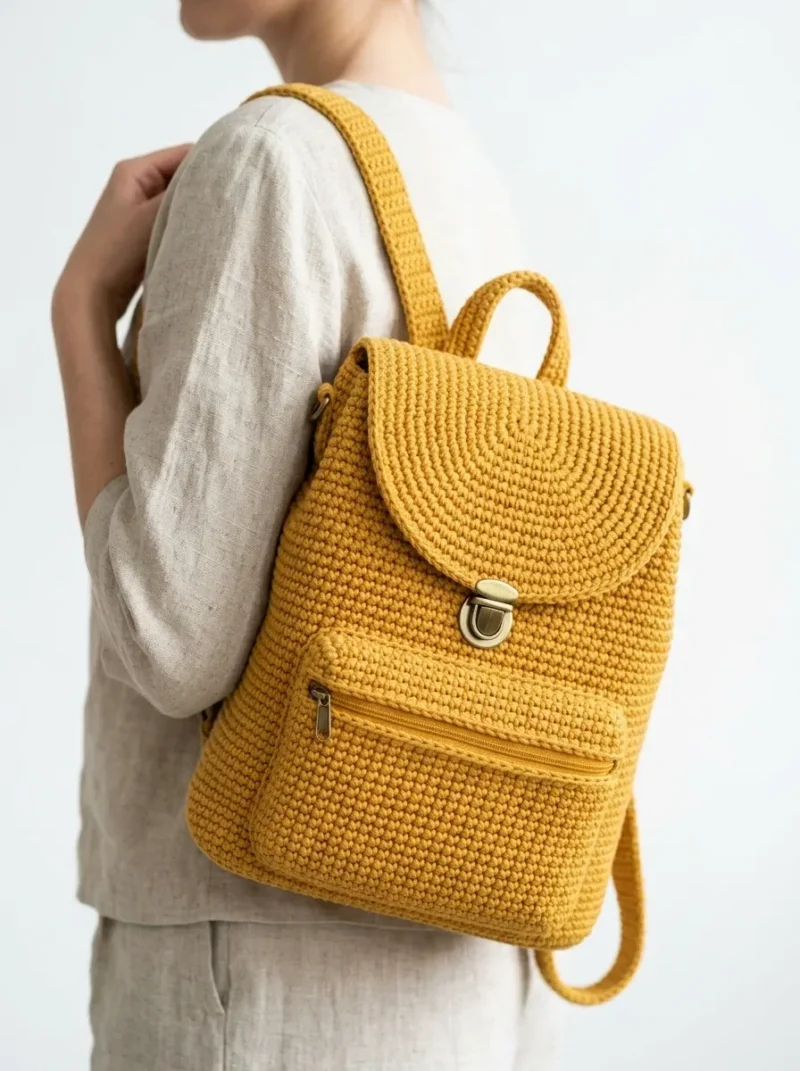
Every photograph on this page was taken by whoever published the pattern, and they are printed in the order the source listed them.
FAQs
Asked and answered
These answers came from whoever first published the pattern, kept word for word.
What yarn works best for this backpack?
Worsted weight cotton or a cotton blend is recommended for structure, since it holds its shape better than wool under the weight of hardware. Around 400 to 450 grams covers the full project.
Why does gauge matter so much for a bag?
Gauge keeps the finished backpack at the intended size and gives the fabric enough body to stay upright. A loose swatch leads to a floppy bag, while a tight one turns small and stiff.
Is lining fabric required?
Lining fabric is listed as optional in the materials but recommended for a cleaner interior and extra support behind the stitches. It also gives the zipper and hardware attachments a sturdier base to sew into.
What is the back loops only round for?
Working the first round of the body in back loops only creates a visible, defined seam where the base meets the sides. Every round after that works through both loops as usual.