 STITCH ROUND
 Crochet a colorful bobble sling bag in six rounds
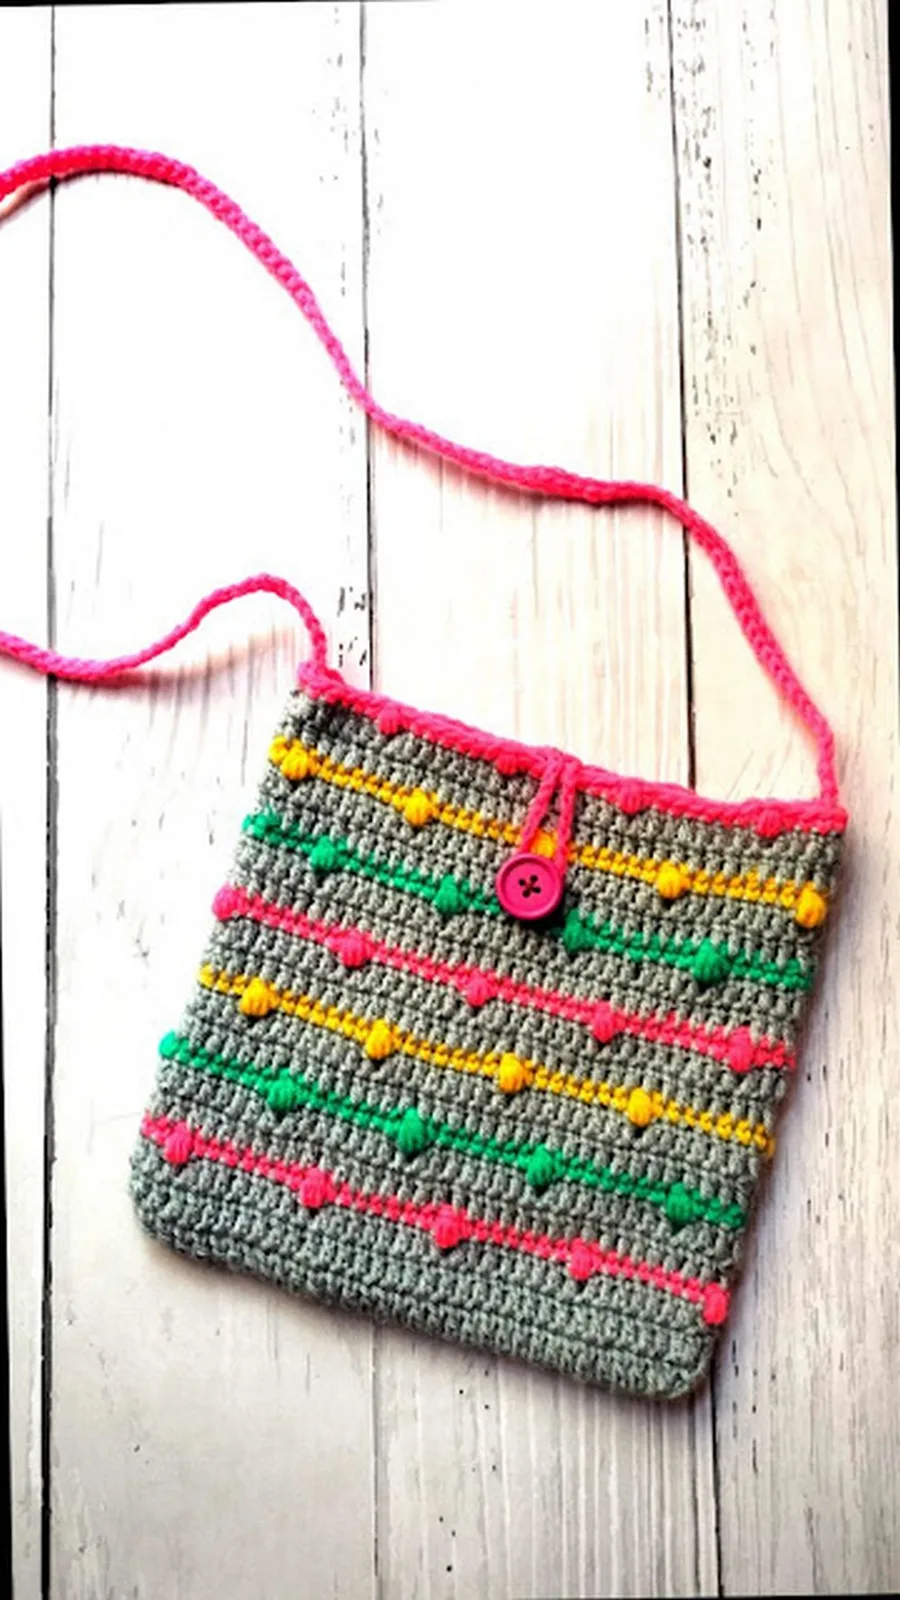
Six rounds tick off this colorful bobble sling bag, worked in sport weight yarn with a button closure.
- Skill
- Intermediate
- Rounds
- 6 rounds
- Yarn weight
- Sport
- Hook
- 3.5 mm
- Time
- 4-6 hours

Intermediate
What the original page called it. Nothing here is graded a second time.

6 rounds
Each one gets its own line, with a box beside it to tick as you go.

Sport
What the sample was made in. Any weight works — the size moves with it.
About this pattern
This sling bag comes together in six rounds of double crochet, starting from a foundation chain that shapes a long oval base. Each round builds outward from that oval using the main color and three complementing colors, so progress is easy to track stitch by stitch. Six rounds is the whole body of the bag, making it a fast project to finish once the color sequence and stitch pattern feel familiar.
The shaping happens at the two ends of the oval, where extra double crochet stitches are worked into a single stitch to keep the base growing evenly on both sides. Round one sets that pattern with five stitches worked into one chain at each tip, and later rounds repeat similar increases at the same points. Slow down at those ends each round, since a missed or extra increase there throws off the symmetry of the whole oval shape.
- Chain a long foundation and work the first round of double crochet around both sides to shape the base.
- Increase at both ends of each round to keep the oval growing evenly as double crochet stacks up.
- Work through the remaining rounds without skipping an increase, since the shape depends on consistent stitch placement.
- Reach the final round and set up the opening that the button will close later.
- Move into finishing once six rounds are complete, ready for weaving in ends and the button closure.
What goes wrong
- Missing the end-of-round increases Mark both tips of the oval before starting each round so the extra stitches land in the right spot. A skipped increase pulls the base out of shape fast.
- Losing track of the join point Mark the third chain used for the join at the start of every round. Without a marker it is easy to join a stitch off and shift the whole round.
- Leaving loose color-change ends Tie off or carry each of the four yarn ends as color changes happen through the six rounds. Left until the end, four colors' worth of ends get tangled and hard to trace.
- Miscounting the starting chain Count the chain of 34 in groups of ten before working round one. A short or long chain throws off both ends of the oval from the very first round.
Yarn, hook and the rest
Copied from the source pattern's own materials list.
- Sport weight yarns in small quantities, specifically in one main color and three complementing colors.
- Crochet hook size 3.5 mm.
- 1 inch diameter button.
- Yarn needle.
Progress tracker
0 of the 6 rounds on this page are ticked.
The pattern, round by round
Kept in the order and the wording the source used. Tick a round as you finish it; the ticks stay on this device.
Main Pattern
Round 1
Use MC (main color) Ch 34 2 dc in the 4th ch from hook Dc in the rest of the chs across except for the last one5 dc in the last ch Dc in the next 29 chs on the other side 2 dc in the last ch Join with a sl st to the 3rd ch at the beginning of the round
Note: The skipped 3 ch at the beginning counts as the first st (68 sts total)
Round 2
Ch 3 (counts as the first st) 2 dc in the next st Dc in the next 31 sts 2 dc in the next stDc in the next st 2 dc in the next st Dc in the next 31 sts 2 dc in the next st Join with a sl st to the third ch (72 sts total)For Round 3 Ch 3 (counts as the first st)Dc in each st around Join with a sl st to the first st Note: still 72 sts total
Round 4
Pull CC1 (complementing color 1) through the loop Sc in the first st 3dc cluster in the next stRepeat [sc in next 7 sts, 3dc cluster in next st] 8 times Sc in the rest of the 6 sts Join with a sl st to the first sc
Round 5
Pull MC through the loop Ch 3 Dc in each st around Join with a sl st to the first stFor Round 6 Ch 3 Dc in each st around Join with a sl st to the first st
Round 7
Pull CC2 through the loop Ch 1 Sc in 5 sts 3dc cluster in the next st Repeat [sc in next 7 sts, 3dc cluster in next st] 8 timesSc in the last 2 sts Join with a sl st to the first sc
Round 8
and Round 9 Using MC, perform 2 rounds of dc in each st around For Rounds 10 through 22Repeat rounds 4 through 9 After completion, cut the yarn and weave in the ends thelazyhobbyhopper
Finish
- Weave in every color change end left over from the main color and three complementing colors.
- Sew the button in place at the point where the closure will fasten the bag shut.
- Block the finished oval flat to even out the double crochet rounds and set the bobble color pattern.
Bigger or smaller
- Larger
- Move up from sport weight yarn and the 3.5 mm hook to a heavier yarn and larger hook so every stitch sits bigger, scaling up the whole bag while keeping the same six rounds.
- Smaller
- Drop to a lighter yarn and a smaller hook than 3.5 mm so the stitches tighten up, shrinking the finished oval without changing the round count.
FAQs
Asked and answered
These answers came from whoever first published the pattern, kept word for word.
What yarn weight does this bag use?
The pattern calls for sport weight yarn in small quantities, worked with a 3.5 mm hook. That combination keeps the double crochet fabric firm enough to hold the bag's shape.
How many colors are needed for the bobble effect?
One main color plus three complementing colors are used across the six rounds. Only small quantities of each are needed, since the piece is compact.
Can the bag be made in a single color?
It can, since the stitch pattern itself does not depend on color changes. Skipping the three complementing colors will mute the bobble effect the pattern is built around.
What size button does the closure need?
A 1 inch diameter button is listed in the materials. Any button close to that size will sit properly in the closure worked into the final rounds.