 STITCH ROUND
 No-sew amigurumi duck crochet pattern with little hat
8 rounds build the head and body of this no-sew amigurumi duck toy.
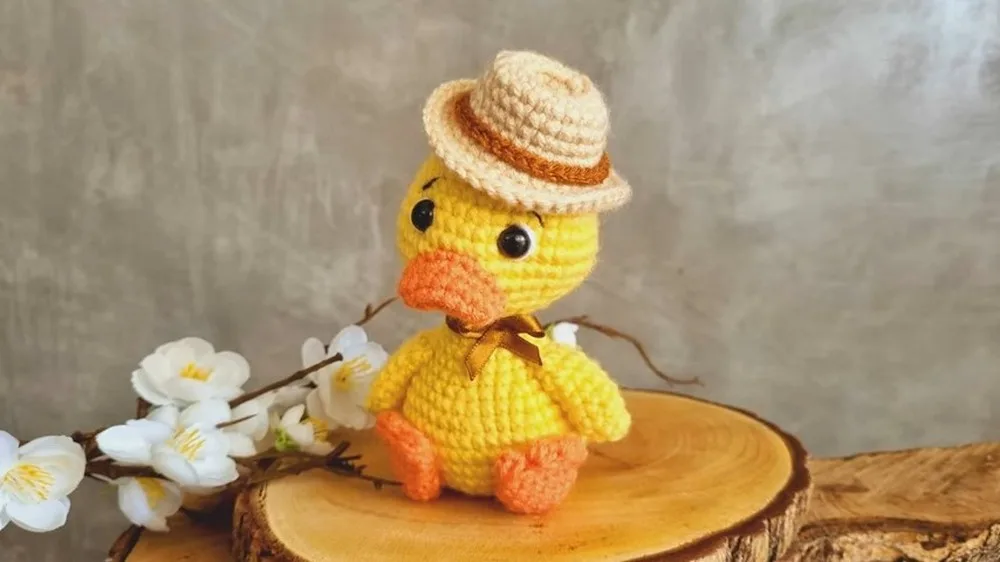
- Skill
- Intermediate
- Rounds
- 18 rounds
- Yarn weight
- Worsted
- Hook
- 3 mm
- Time
- 4-6 hours

Intermediate
What the original page called it. Nothing here is graded a second time.

18 rounds
Each one gets its own line, with a box beside it to tick as you go.

Worsted
What the sample was made in. Any weight works — the size moves with it.
About this pattern
This duck comes together in five separate pieces, with the head and body as the main build at eight rounds. The arms and feet are quick, three rounds apiece and made in pairs, while the beak and tail are the smallest jobs on the list at two rounds each. Nothing here demands a long sitting, which makes the whole project easy to split across a few short sessions without losing track of where things left off.
The head and body shape through a steady run of increase rounds, swelling from a tight magic ring into a full rounded form before settling into plain rounds near the top. Slow down at the increase rounds, since missing one throws the curve off and leaves the shape lopsided. The feet need the same care at the closing round, where a clustered edge replaces plain stitches to form the toes.
- Start the head and body from a magic ring, building it in one continuous piece with no seam.
- Crochet the arms as narrow tubes, then flatten the top of each one by joining both sides together.
- Make the feet the same way, finishing each with a clustered edge that shapes small toes.
- Stitch the beak and tail as their own small pieces, ready to attach once the body is stuffed.
- Bring every piece together onto the stuffed body to complete the no-sew duck.
What goes wrong
- Loose magic ring center Pull the starting tail tight right after the first round closes, or a visible gap will show at the base of the head, feet, and arms.
- Misaligned arm closure Line up both sides evenly before working the flattening round on the arms, or the tube will twist instead of sitting flat.
- Rushed foot cluster round Work each double crochet cluster and slip stitch slowly around the foot opening, since going too fast blurs the toe shape into a messy edge.
- Eyes placed after stuffing Insert the 10mm plastic safety eyes into the head before adding fiberfill, since there is no adjusting them once the stuffing is packed in.
Yarn, hook and the rest
Copied from the source pattern's own materials list.
- 3mm crochet hook
- Markers
- A pair of scissors
- Tapestry needle
- 10mm plastic safety eyes
- Fiberfill stuffing
- Yellow and orange yarn (for the head and body)
- Beige and brown yarn (for the hat)
- White and black yarn (for eye details)
Progress tracker
0 of the 18 rounds on this page are ticked.
The pattern, round by round
Kept in the order and the wording the source used. Tick a round as you finish it; the ticks stay on this device.
Head and Body
Round 1
Start with a magic ring with 6 single crochets (sc). In Round 2: Increase (inc) in each stitch around (12 sc).
Round 3
1 sc, 1 inc repeat around (18 sc).
Round 4
1 sc, 1 inc, 1 sc repeat around (24 sc). In Round 5: 1 sc in each stitch around (24 sc).
Round 6
3 sc, 1 inc repeat around (30 sc).
Round 7
1 sc in each stitch around (30 sc). In Round 8: 2 sc, 1 inc, 2 sc repeat around (36 sc).
Round 9
5 sc, 1 inc repeat around (42 sc).
Round 10
3 sc, 1 inc, 3 sc repeat around (48 sc). In Round 11: 1 sc in each stitch around (48 sc).
Round 12
3 sc, 1 decrease, 3 sc repeat around (42 sc). Place safety eyes between rounds 9 and 10, six stitches apart.Round 13-31: Continue following the pattern, increasing and decreasing as specified, to shape the head and body, filling with stuffing as you go.
Arms (Make 2)
Round 1
Magic ring with 6 sc.
Round 2
1 sc, 1 inc repeat around (9 sc). In Round 3-7: 1 sc in each stitch around (9 sc for each round).
Round 8
Join both sides and make 4 sc (4 sc total).
Feet (Make 2)
Round 1
Magic ring with 6 sc.
Round 2
2 sc in each stitch around (12 sc). In Round 3-6: 1 sc in each stitch around (12 sc for each round).
Round 7
Join both sides, crochet three double crochet together (3-dc cluster) in the first stitch, 1 slip stitch in the second stitch, repeat around.
Beak
Round 1
Chain 8, starting in second chain from hook, 6 sc, 3 sc in the last chain, turn, 5 sc on the other side of the chain, then 1 inc in the same space as the first sc (16 sc total).For Round 2: 1 sc in each stitch around (16 sc).
Round 3
Join both sides and crochet, starting with 3 sc, 1 inc in each of the next 2 stitches, 1 sc in the next 3 stitches (10 sc total).
Tail
Round 1
Magic ring with 6 sc. For Round 2: 2 sc in each stitch around (12 sc).
Rounds 3–5
1 sc in each stitch around, with specific increases in round 4 to shape the tail.
Check your count
- Head and Body · Round 3: 18 sts
- Head and Body · Round 6: 30 sts
- Head and Body · Round 9: 42 sts
- Head and Body · Round 10: 48 sts
- Arms (Make 2) · Round 8: 4 sts
- Beak · Round 1: 16 sts
Finish
- Weave in all loose ends from the magic rings and color changes before any pieces get attached.
- Stuff the head and body firmly while the opening is still wide, packing fiberfill evenly before closing it off.
- Position and attach the arms, feet, beak, and tail onto the body, checking placement before securing each one.
Bigger or smaller
- Larger
- Move up to a thicker yarn with a hook sized to match it, which scales every piece up while keeping the same round count.
- Smaller
- Drop to a finer yarn with a smaller hook for a petite version, keeping all the rounds the same but shrinking the overall size.
Photographs of this one
Every photograph on this page was taken by whoever published the pattern, and they are printed in the order the source listed them.
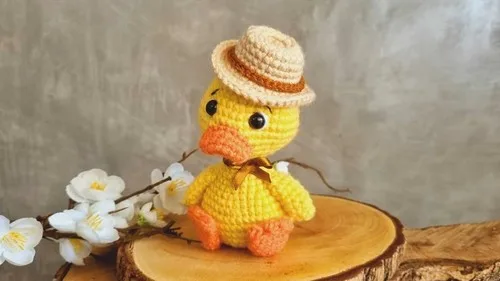
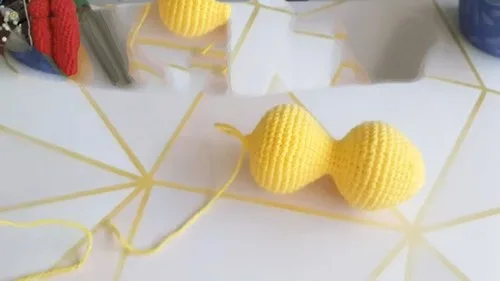
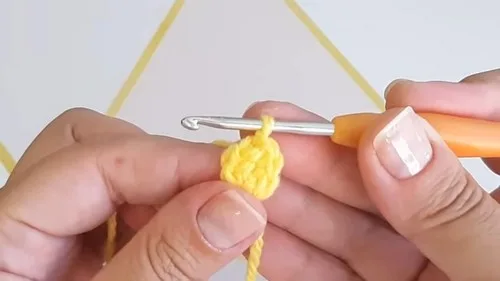
FAQs
Asked and answered
These answers came from whoever first published the pattern, kept word for word.
Does this duck really need no sewing at all?
Correct, every piece closes and joins through crochet techniques like the flattened arm and foot closures. The construction avoids a separate sewing step for assembly.
What hook size does this pattern call for?
A 3mm hook is listed in the materials. It keeps stitches tight enough to hold the fiberfill stuffing in without gaps.
What is the beige and brown yarn for?
Those colors are listed in the materials for a hat detail on the duck. They are not required if a plain head is preferred.
When should the safety eyes go in?
The 10mm plastic safety eyes should snap into place before the head is stuffed. White and black yarn adds extra eye detail afterward.