 STITCH ROUND
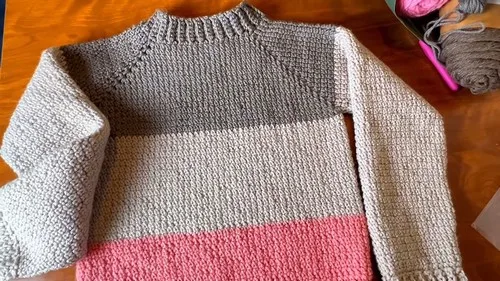
 A relaxed-fit crochet pullover top worked in one piece
Four ribbing rounds tick off this relaxed-fit crochet pullover top worked in one piece.
- Skill
- Intermediate
- Rounds
- 13 rounds
- Yarn weight
- Bulky
- Hook
- 6 mm
- Time
- 6-8 hours

Intermediate
What the original page called it. Nothing here is graded a second time.

13 rounds
Each one gets its own line, with a box beside it to tick as you go.

Bulky
What the sample was made in. Any weight works — the size moves with it.
About this pattern
This lightweight pullover top builds from the collar down into a relaxed, drapey yoke, with ribbing anchoring the hem and both cuffs. The hem ribbing covers 2 rounds, and each set of cuff ribbing rows adds just 1 round apiece, so there are a handful of straightforward rounds to tick off before the finishing touches. The collar and yoke carry the rest of the shaping, built from extended single crochet and V-stitches rather than counted rounds.
Shaping lives in the V-stitches set between the sleeves, front, and back, where half double crochet pairs open the fabric for ease across the body. Slow down when working the extended single crochet sleeve sections and the front panel, since missing a V-stitch placement throws the whole repeat out of alignment. The trickiest moment comes at ribbing attachment, where slip stitches join through both the front and back loops of opposite edges to close the piece neatly.
- Begin at the collar, working single crochet evenly around and joining with a slip stitch to close the loop.
- Build the yoke directly from the collar, alternating extended single crochet sections with V-stitches at each sleeve and shoulder line.
- Let the V-stitches mark where the sleeves split from the body, shaping the neckline into a relaxed drop, then connect the sleeve openings and continue the body in color blocks of dark gray, light gray, and coral pink.
- Add ribbing at the hem, slip stitching it into the body stitches so the two pieces meet edge to edge.
- Work each sleeve in rounds of extended single crochet with decreases at the underarm, then repeat the same ribbing method at each sleeve cuff, joining it into the sleeve stitches as you go.
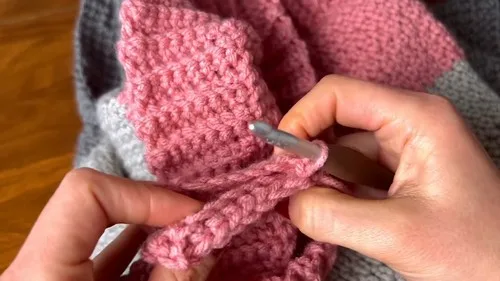
- Finish by folding the ribbing to the inside and slip stitching the layers together through both loops.
What goes wrong
- Losing track of V-stitch placement Mark each V-stitch position with a stitch marker before starting the yoke round, since the sleeves and front sections depend on starting and ending in exactly the right stitch.
- Working into both loops on ribbing Ribbing rows call for back loop only single crochet; working into both loops flattens the ribbed texture and makes the cuffs and hem lose their stretch.
- Skipping the slip stitch into body stitches When ribbing joins the body or sleeve, slip stitch into the next stitches as directed before turning, or the ribbing drifts out of alignment with the edge it is meant to meet.
- Joining ribbing through the wrong loops Flip the ribbing to the inside first, then slip stitch through the front loop and back loop of the opposite sides together; skipping this step leaves a visible gap or a twisted seam.
Yarn, hook and the rest
Copied from the source pattern's own materials list.
- Big Twist Jar (6 oz/170g yarn) - dark gray, light gray, and coral pink for color-change sections
Crochet hook sizes
- 6 mm and 7 mm
Progress tracker
0 of the 13 rounds on this page are ticked.
The pattern, round by round
Kept in the order and the wording the source used. Tick a round as you finish it; the ticks stay on this device.
Collar
Using 6 mm hook
Chain 7
Row 1
Skip the first chain. Single crochet in the second chain and across (6 sc total)
Rows 2–56
Chain 1, turn. Skip first stitch. Single crochet in the back loop only across all stitches (6 sc total)Fold the collar to bring the two short edges together. Slip stitch across both edges (insert hook into first stitch of one side and back loop of the corresponding stitch on the other side). Chain 1 and flip the collar right-side out.
Yoke
Using 7 mm hook
Foundation Row
Work 1 single crochet into each of the 56 rows around the collar (56 sc). Slip stitch to join.Shaping with V-Stitches and Extended Single Crochets: this round introduces the V-stitch, begun with a chain 3 and 1 half double crochet in the same stitch to form the first V-stitch, combined with extended single crochet to shape the sleeves, front, and back sections of the yoke in one continuous round.
Round 1 (Yoke)
Chain 3. Work 1 half double crochet in the same stitch to form first V-stitch. First Round Breakdown: 8 extended single crochet (first sleeve), 1 V-stitch (half double crochet, chain 1, half double crochet in same stitch), 18 extended single crochet (front), 1 V-stitch, 8 extended single crochet (second sleeve), 1 V-stitch, 18 extended single crochet (back). Slip stitch to join.
Rows 2–16
Chain 3, hdc in same stitch (V-stitch). In each following row, increase by adding: 2 stitches for the front, 2 stitches for the back, 2 stitches for each sleeve (1 per edge of each sleeve section). Work for a total of 16 rows (can switch to dark gray yarn for these rows).At row 15 or 16, slip stitch in the V-stitch, then chain 2. Insert the hook into the corresponding V-stitch on the other side of the sleeve opening and make an extended single crochet to connect the sleeves. Continue with extended single crochet across the body until the next sleeve, repeat the sleeve connection process, then finish the round with extended single crochet.
Body Section
Using 7 mm hook, continue in rounds with extended single crochet in each stitch. Color changes as follows: 16 rows in dark gray, 16 rows in light gray, 16 rows in coral pink.
Bottom Ribbing Prep
Switch to 6 mm hook. Work 1 single crochet in every stitch around the bottom edge. Slip stitch to join.Chain 9
Row 1
Skip first chain, single crochet in remaining chains (8 sc) Slip stitch into next 2 stitches of body, turnSkip slip stitches, work 8 back loop only sc Chain 1, turn Skip first stitch, back loop only sc across (8 sc)Repeat the ribbing process all around the bottom of the pulloverFlip work inside out. Slip stitch across ribbing edges to join (through front loop of one side and back loop of the other).
Sleeves
Start Start with 7 mm hook and light gray yarn.
First Round
Secure yarn to sleeve opening. Chain 1. Extended single crochet decrease over first 2 stitches. Work extended single crochet around to last 2 stitches. Extended single crochet decrease over last 2 stitches.
Main Sleeve Rounds
Slip stitch to join each round. Chain 1, work 1 extended single crochet in every stitch. Work 24 rounds total.
Shaping
After 24 rows: Decrease over first 2 and last 2 stitches. Work 10 rows of extended single crochet. Make another decrease row (same as above). Work 4 more rows in extended single crochet. Total sleeve length: 35 rows.
Sleeve Ribbing Prep
Switch to 6 mm hook. Single crochet around the edge of the sleeve. Slip stitch to join.Slip stitch, chain 9
Row 1
Skip first chain, sc in next 8 chains (8 sc) Slip stitch into next 2 sleeve stitches, turnWork 8 back loop only sc Chain 1, turn Skip first stitch, work back loop only sc (8 sc)Repeat all around the sleeveFlip ribbing to inside. Slip stitch across to join both edges together (through front loop and back loop of opposite sides).
Check your count
- Collar · Row 1: 6 sts
- Collar · Rows 2–56: 6 sts
- Yoke · Foundation Row: 56 sts
- Yoke · Row 1: 8 sts
- Sleeves · Row 1: 8 sts
Finish
- Weave in all loose ends from the collar, yoke, and both ribbing sections before closing anything up.
- Block the finished pullover lightly to relax the Big Twist Jar yarn and let the V-stitches and extended single crochet settle into shape.
Bigger or smaller
- Larger
- Work with the 7 mm hook and a heavier-weight yarn than the Big Twist Jar called for, which opens the stitches and scales the whole top up.
- Smaller
- Work with the 6 mm hook and a lighter yarn, or repeat fewer of the back loop only ribbing rows before joining, to tighten the fabric and shorten the ribbed edges.
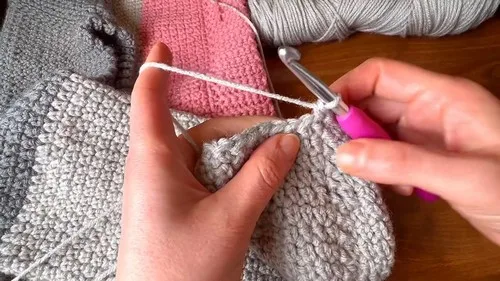
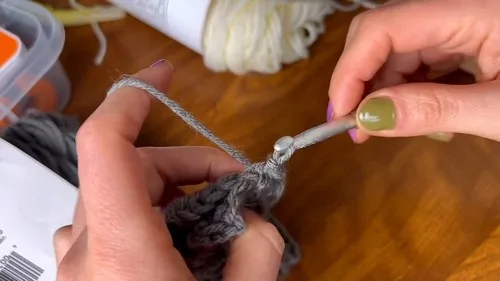
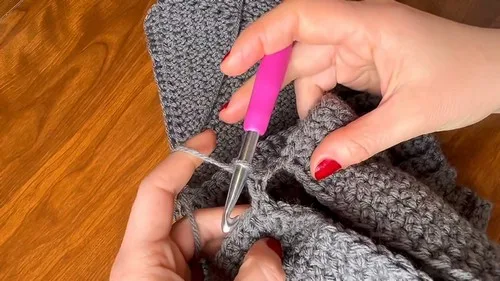
Photographs of this one
Every photograph on this page was taken by whoever published the pattern, and they are printed in the order the source listed them.
FAQs
Asked and answered
These answers came from whoever first published the pattern, kept word for word.
What makes this pullover top relaxed fitting rather than fitted?
The V-stitches set between the sleeves, front, and back open extra ease into the yoke without adding separate increase rounds. That gap, paired with the lightweight Big Twist Jar yarn, gives the top its loose drape.
Does the collar need blocking before the yoke is worked?
Not necessarily, though a light block after joining the collar's single crochet round can help it sit flat before building the yoke on top of it. Skipping this step will not affect the stitch count, only the initial shape.
Why does the ribbing get worked separately and then joined?
The hem and cuff ribbing are each worked as flat strips using back loop only single crochet, then slip stitched into the body or sleeve edge as they go. This keeps the ribbing stretchy while the rest of the yoke stays in pattern stitch.
Can a different hook size be used for the two yarn weights listed?
The pattern calls for both a 6 mm and a 7 mm hook, typically one for the ribbing and one for the more open yoke stitches. Swapping either hook size changes gauge and finished size, so work a short test swatch before committing to the whole top.