 STITCH ROUND
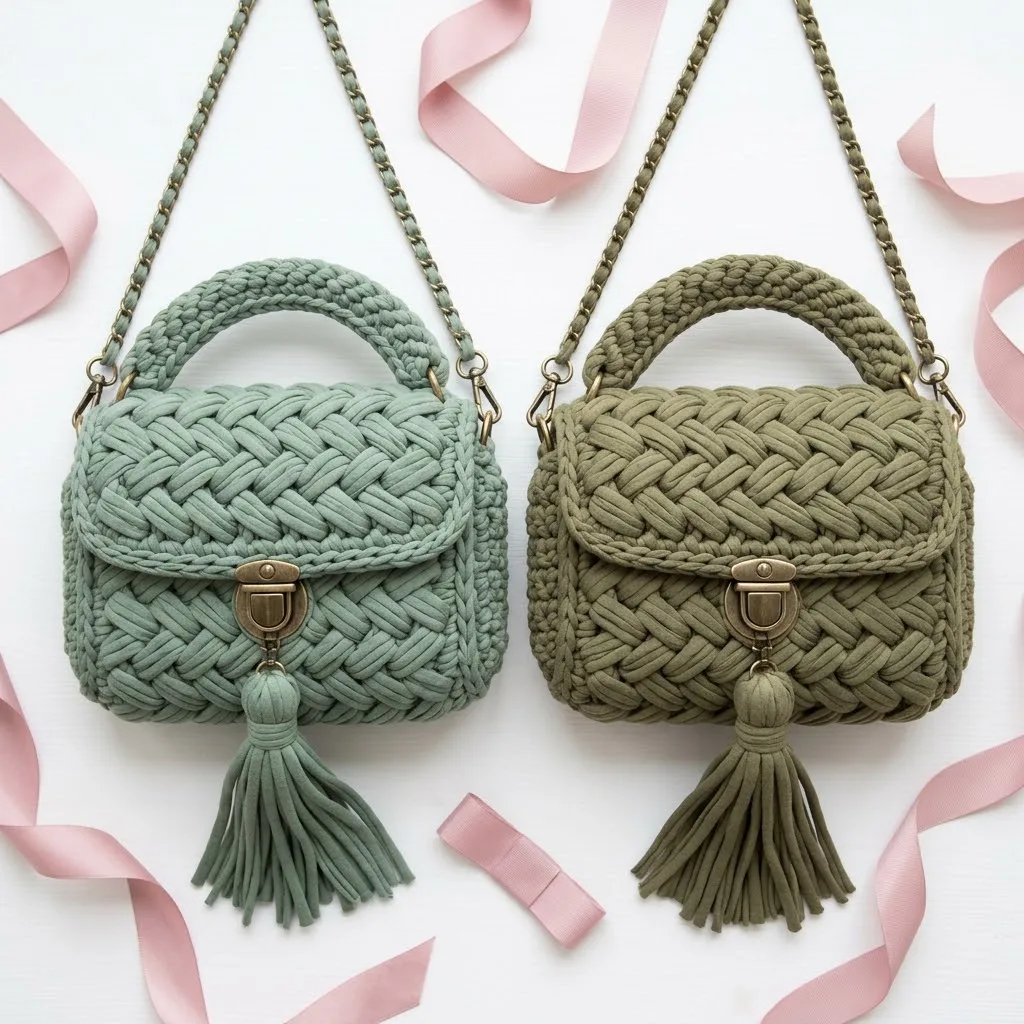
Sage green boho braided bag crochet pattern
18 rounds build this sage green braided bag with a ribbed back panel and tassel finish.
- Skill
- Intermediate
- Rounds
- 18 rounds
- Yarn weight
- T-shirt Yarn (Jumbo)
- Hook
- 9 mm
- Time
- 4-6 hours

Intermediate
What the original page called it. Nothing here is graded a second time.

18 rounds
Each one gets its own line, with a box beside it to tick as you go.

T-shirt Yarn (Jumbo)
What the sample was made in. Any weight works — the size moves with it.
About this pattern
This braided boho bag is built across five labeled parts for eighteen rounds in total, with an optional three-round lining and insert section for anyone who wants a sturdier base. The main body comes together in Part 4's six rounds, the back opening gets its own six-round panel in Part 5, and a three-round border closes out the shaping before hardware goes on.
- Work the optional lining and base insert first if extra structure matters to the finished bag.
- Build the main rectangle base and sides in Part 4, moving from single crochet into double crochet.
- Shift to Part 5 to shape a ribbed panel across the back opening using front and back post stitches.
- Finish the top edge with the Border Round to clean up the opening before hardware goes on.
- Attach the tassel as a final detail once the body and border are complete.
- Fit D-rings or swivel clasps and thread the chain strap through for carrying.
What goes wrong
- Stitches too tight in t-shirt yarn Go up from a 9mm to a 10mm hook if the chunky yarn feels stiff to work through, since tight stitches make the braided texture look flat.
- Losing the stitch marker between rounds Move the marker up into the first stitch at the start of every new round in Part 4, since the joined rounds make it easy to lose track of where the round began.
- Flipping the FPdc/BPdc rib by mistake Check Row 3 against Row 4 in Part 5 before starting, since the rib pattern simply swaps which post stitch goes where and one wrong post throws off the whole texture.
- Back panel attached to the wrong edge Attach the yarn for Part 5 at the back center of the bag opening only, not around the full perimeter, since this panel works flat across one edge.
Yarn, hook and the rest
Copied from the source pattern's own materials list.
- 200 grams (approximately 130 yards) of t-shirt yarn in your chosen color. I used a sage green shade. Brands like Hoooked Zpagetti, Bobbiny, or Yarn Art Maccrame work beautifully.
- 9mm or 10mm crochet hook . T-shirt yarn requires larger hooks. Go up a size if your stitches feel tight.
- 2 D-rings or swivel clasps (approximately 20mm)
- 1 chain strap with leather or fabric woven through (approximately 120cm for crossbody length)
- 2 lobster clasps or snap hooks for attaching the chain
- Tapestry needle for weaving ends
- Scissors
Progress tracker
0 of the 18 rounds on this page are ticked.
The pattern, round by round
Kept in the order and the wording the source used. Tick a round as you finish it; the ticks stay on this device.
Optional
Fabric for lining Magnetic snap (alternative to push lock)
Bag base insert for extra structure Stitch Abbreviations and Definitions Let me explain every stitch you need for this step by step crochet pattern:
Ch = Chain. Wrap yarn over hook, pull through loop on hook. This creates your foundation.
Sl st = Slip stitch. Insert hook, yarn over, pull through stitch AND loop on hook in one motion. Used for joining and invisible movement.
Sc = Single crochet. Insert hook into stitch, yarn over, pull up a loop (2 loops on hook), yarn over, pull through both loops. Creates a short, tight stitch.
Dc = Double crochet. Yarn over, insert hook into stitch, yarn over, pull up a loop (3 loops on hook), yarn over, pull through 2 loops, yarn over, pull through remaining 2 loops. Creates a taller stitch.
FPdc = Front post double crochet. Yarn over, insert hook from front to back to front around the POST (vertical part) of the stitch below, complete as regular dc. This pushes the stitch toward you.
BPdc = Back post double crochet. Yarn over, insert hook from back to front to back around the POST of the stitch below, complete as regular dc. This pushes the stitch away from you.
St(s) = Stitch(es)
Rep = Repeat Gauge Information With 9mm hook and t-shirt yarn: 8 stitches and 6 rows = 4 inches in double crochet
Gauge matters for bags because it affects final size and structure. If your bag comes out too floppy, go down a hook size. If your stitches are too tight and the fabric feels stiff, go up a hook size.
Skill Level
This crochet bag pattern is intermediate beginner friendly . If you understand double crochet and feel comfortable trying post stitches, you can make this bag. Post stitches sound intimidating but they simply mean you work around the vertical bar of a stitch instead of into the top loops.
I will walk you through every row. Take your time with the first braided row and the rest will click.
Round 1
Ch 13. Sc in 2nd ch from hook and each ch across. (12 sc)
Round 2
Ch 1, turn. Sc in each st across. (12 sc)
Round 3
through 8: Repeat Row 2. (12 sc) You now have a rectangle approximately 6 inches by 3 inches. This forms the bottom of your bag.
Building the Bag Body (Working in Rounds)
Now you will work around the entire edge of your base to build the walls upward. This is where it gets exciting.
Part 4
Round 1
Foundation Round Ch 1, do not turn. Working around all edges of the rectangle: Sc 12 across the short edge you just finishedSc 8 evenly along the long side edge Sc 12 across the starting chain edge Sc 8 evenly along the remaining long side edgeSl st to first sc to join. (40 sc)Place a stitch marker in the first stitch of the round. Move it up each round.
Round 2
(Transition Round): Ch 2 (counts as first dc here and throughout). Dc in each st around. Sl st to top of ch 2 to join. (40 dc)
The Braided Stitch Pattern
Here is where the magic happens. The braided effect comes from alternating front and back post stitches in a specific pattern. Do not worry if it feels awkward at first. By Round 4, your hands will know what to do.
Round 3
First Braided Round Ch 2. *FPdc around next st, BPdc around next st.* Rep from * to * around. Sl st to top of ch 2 to join. (40 sts)
Round 4
Ch 2. *BPdc around the FPdc from previous round, FPdc around the BPdc from previous round.* Rep from * to * around. Sl st to join. (40 sts)
Notice you are doing the OPPOSITE of what you did before over each stitch. This crossing creates the braided look.
Round 5: Repeat Round 3.
Round 6: Repeat Round 4.
Round 7: Repeat Round 3.
Round 8: Repeat Round 4.
Round 9: Repeat Round 3.
Round 10: Repeat Round 4. You should now have approximately 4 inches of braided body. The texture should show beautiful diagonal ridges crossing each other.
Top Edge and Hardware Placement
Round 11
Ch 1. Sc in each st around. Sl st to join. (40 sc)
Round 12
Ch 1. Sc in each st around. At each side corner (stitches 10 and 30 approximately), ch 3 instead of working into that stitch to create small openings for your D-rings or hardware attachment. Sl st to join. (40 sts including chains)Fasten off. Weave in your end.
The Flap The flap covers the front of the bag and holds your push lock clasp.
Part 5
Round 1
Attach yarn to the back center of the bag opening. Ch 1, sc 12 across the back edge only. (12 sc)
Round 2
Ch 2, turn. Dc in each st across. (12 dc)
Round 3
Ch 2, turn. *FPdc around next st, BPdc around next st.* Rep across. (12 sts)
Round 4
Ch 2, turn. *BPdc around the FPdc, FPdc around the BPdc.* Rep across. (12 sts)Row 5: Repeat Row 3.Row 6: Repeat Row 4.
Round 7
Ch 2, turn. Dc2tog, dc across to last 2 sts, dc2tog. (10 sts) This creates a slight taper so the flap curves nicely over the front.
Round 8
Ch 1, turn. Sc in each st across. (10 sc)
Border Round
Ch 1, do not turn. Sc evenly around the entire flap edge, working 3 sc in each corner to keep it flat. Sl st to first sc. Fasten off.
The Handle The top handle is a simple crocheted strap.
Round 1
Ch 25. Sc in 2nd ch from hook and each ch across. (24 sc)
Round 2
Ch 1, turn. Sc in each st across. (24 sc)
Round 3
Ch 1, turn. Sc in each st across. (24 sc) Fasten off, leaving a long tail for sewing.
The Tassel The tassel adds that perfect boho finishing touch.
1. Cut 20 strands of t-shirt yarn, each approximately 8 inches long.
2. Fold all strands in half.
3. Cut a separate small piece. Thread it through the folded loops and tie tightly to create the tassel head.
4. Cut another piece and wrap it around the tassel about 1 inch below the top, wrapping several times. Tie off and tuck the ends inside.
5. Trim the bottom ends evenly.
Assembly Instructions
Attaching the Tassel
Thread the tassel tie through your push lock clasp or create a small jump ring attachment below the clasp.
Customization Ideas for Your Crochet Bag This beginner friendly pattern adapts beautifully to different looks:
Color Options: Olive green, dusty rose, cream, black, and terracotta all look stunning in this design. Two-tone versions with a contrasting flap create visual interest.
Size Adjustments: For a larger bag, start with 16 chain stitches and adjust your round counts proportionally. For a clutch without straps, simply skip the hardware and add a wrist loop.
Alternative Closures: Magnetic snaps are easier to install than push locks. A simple button and loop closure works for a more casual look.
Lining: Cut fabric pieces matching your base and body, sew them together, and hand stitch the lining inside for a polished interior.
Troubleshooting Common Issues My braided stitches look flat, not dimensional.
You might be working too tightly. Loosen your tension and let the post stitches pop forward and backward. T-shirt yarn needs room to breathe.
The bag is too floppy.
Go down one hook size and try again. You can also insert a plastic canvas base cut to size for extra structure.
My sides are uneven.
Count your stitches at the end of every round. It is easy to accidentally skip a stitch when working post stitches. Stitch markers help tremendously.
I cannot find the post of my stitches.
Look at your work from the side. See those vertical bars below the V-shaped tops? Those are the posts. You insert your hook around them, not through them.
Care Instructions
T-shirt yarn bags are wonderfully durable. Spot clean with a damp cloth for small marks. For deeper cleaning, hand wash in cool water with mild detergent, reshape, and lay flat to dry. Avoid machine washing as it can stretch the yarn and loosen your stitches.
Store your bag stuffed with tissue paper to maintain its shape when not in use.
Final Thoughts on This Boho Braided Bag Crochet Pattern
This sage green boho braided bag combines style, function, and handmade charm into one satisfying project. The braided stitch pattern creates designer-level texture while remaining accessible to crafters ready to try something beyond basic stitches.
I hope you enjoy making this bag as much as I enjoyed designing it. The finished piece makes a wonderful gift for friends who appreciate handmade accessories, or keep it for yourself because you absolutely deserve a beautiful new bag.
Thank you so much for choosing this pattern. If you make one, I would genuinely love to see it. Tag me on Instagram or share a photo in my Facebook group. Seeing your creations brings me so much joy.
If this boho braided bag pattern inspired you, go ahead and save it to your Pinterest boards so you can find it whenever you are ready to start. And please drop a comment below if you give it a try. I read every single one and love hearing how your projects turn out.
Check your count
- Optional · Round 1: 12 sts
- Optional · Round 2: 12 sts
- Part 4 · Round 2: 40 sts
- Part 4 · Round 3: 40 sts
- Part 4 · Round 4: 40 sts
- Part 4 · Round 11: 40 sts
Finish
- Weave every yarn tail from the base, side panels, and back rib into the thick t-shirt yarn with a tapestry needle so nothing pokes through the braided texture.
- Fit the magnetic snap or push lock closure to the bag opening before attaching the D-rings, so the hardware lines up evenly on both sides.
- Clip the chain strap to the D-rings with the lobster clasps or snap hooks, then attach the tassel as the last detail.
Bigger or smaller
- Smaller or taller
- Repeat the Border Round an extra time for a deeper opening, or work fewer repeats of the Part 5 rib rows for a shorter back panel.
Photographs of this one
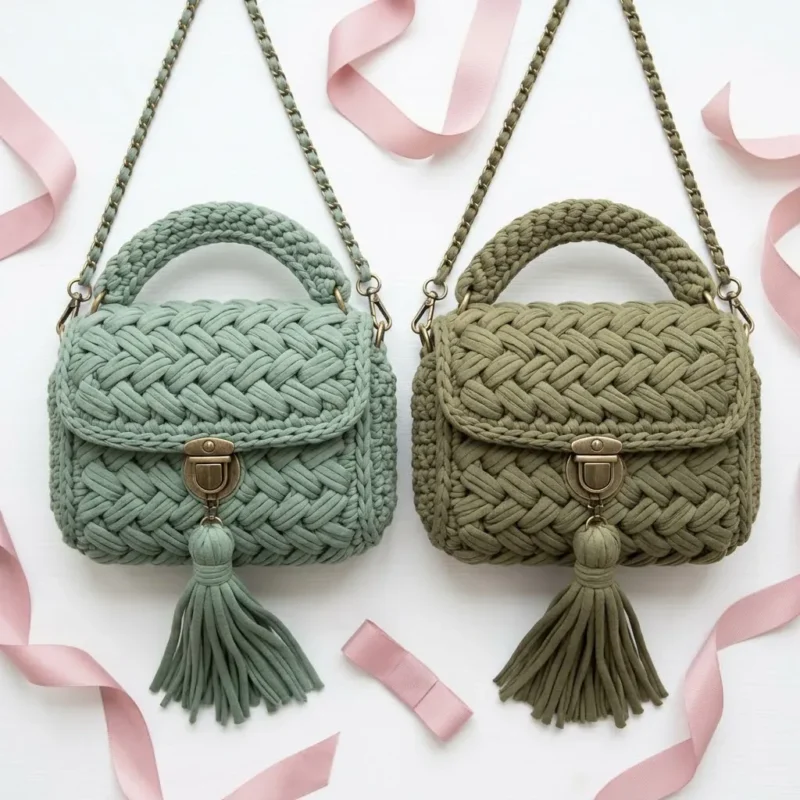
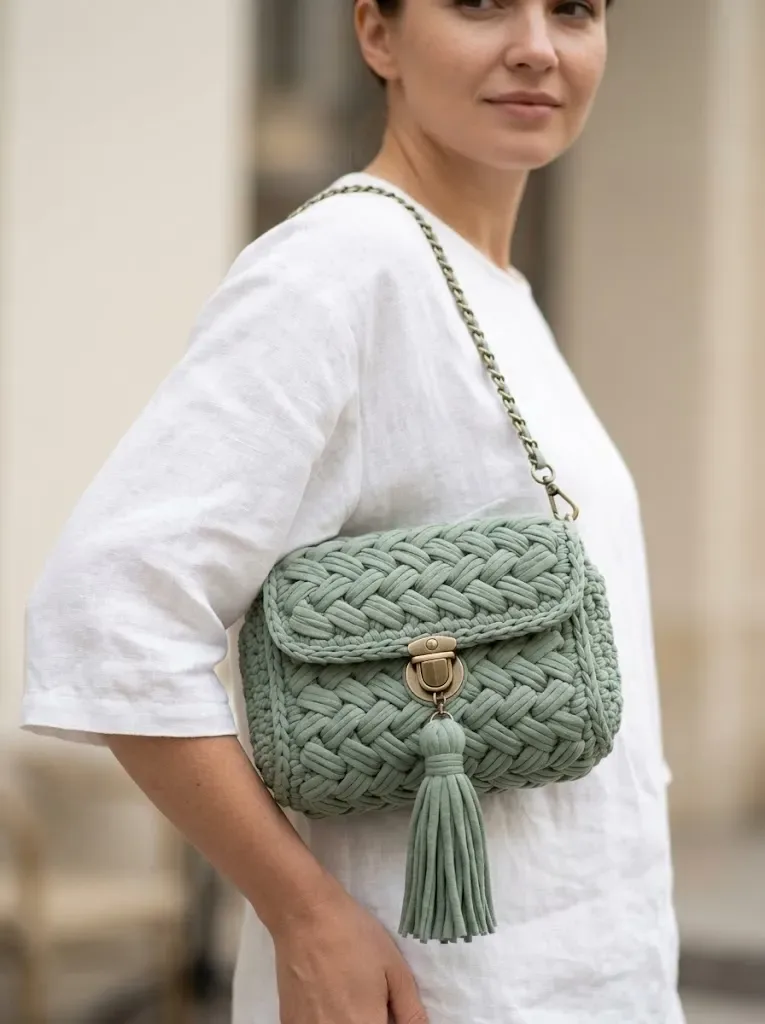
Every photograph on this page was taken by whoever published the pattern, and they are printed in the order the source listed them.
FAQs
Asked and answered
These answers came from whoever first published the pattern, kept word for word.
Can other t-shirt yarn brands be used instead of the ones listed?
Yes, any t-shirt yarn with similar thickness to Hoooked Zpagetti, Bobbiny, or Yarn Art Maccrame will work. Match the hook size to the yarn's actual thickness rather than the brand name.
Is the lining section necessary?
No, the lining and base insert are listed as optional in Part 1. Skip straight to Part 4 for the main body if extra structure is not needed.
What length chain strap does this bag need?
The materials list calls for approximately 120cm of chain with leather or fabric woven through, sized for crossbody wear. Use the lobster clasps to attach it to the D-rings once the bag is complete.
Why does Part 5 only cover the back of the bag?
Part 5 builds a ribbed panel across the back opening edge only, using FPdc and BPdc stitches for texture and reinforcement near the closure. The front and sides are already shaped in Part 4 and the Border Round.