 STITCH ROUND
 Shell Stitch Baby Hat Pattern for Newborn to 6-12 Months
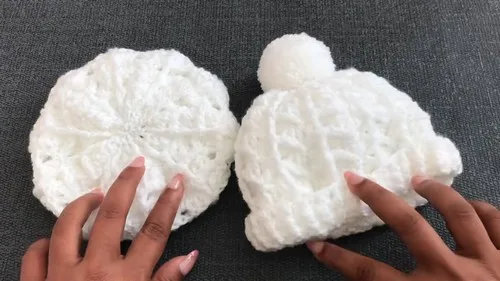
Tick off every round — including three decrease rounds — to make a shell-stitch baby hat sized newborn to 6-12 months.
- Skill
- Intermediate
- Rounds
- 10 rounds
- Yarn weight
- DK
- Hook
- 4 mm
- Time
- 4-6 hours

Intermediate
What the original page called it. Nothing here is graded a second time.

10 rounds
Each one gets its own line, with a box beside it to tick as you go.

DK
What the sample was made in. Any weight works — the size moves with it.
About this pattern
This is a ribbed-brim baby beanie built from a shell-stitch body worked flat in rounds, then closed at the crown. The Foundation Row & Ribbon sets up the FPDC and BPDC rib over its first rounds, the Main Pattern repeats Rounds 2 and 3 to build the shell body to the right height for the chosen size, the Decrease Rounds narrow the shells toward the crown, and the Final Closing Rounds bring it to Round 15 before the tail pulls the top shut. Each round has a clear finish line, so progress is easy to track even mid-project.
The shaping lives in the shell stitch itself: 7 DC fans open the pattern, FPDC posts lock the ribbing into place, and the chain-1 spaces between shells need to stay open for the next round to seat correctly. Slow down through the Decrease Rounds near the crown, where shell counts drop and FPDC groups shrink from 3 to 2 to 1 per side. Losing a stitch here throws off the symmetry of the closing rounds that follow.
- Chain a foundation row sized for the chosen age, then work a DC row across it.
- Build the FPDC and BPDC ribbing rounds to set the brim before the shell body starts.
- Work the shell-stitch Main Pattern, repeating Rounds 2 and 3 until the body reaches the right height.
- Move into the three Decrease Rounds, shrinking the shells and FPDC groups toward the crown.
- Close the crown with the Final Closing Rounds, then pull the tail tight to finish the top.
- Weave in the starting and ending tails to leave a clean, wearable edge.
What goes wrong
- Losing track of turn vs. do not turn Check each round heading before starting it, since Round 2 turns while Round 3 and the closing rounds do not. Working a round in the wrong direction twists the shell pattern out of alignment.
- Skipping the chain-1 space between shells Keep the chain-1 space open rather than working into it, since the next round's 3 DC and FPDC land inside that gap. Closing it over makes the shells crowd and distort.
- Miscounting FPDC in the Decrease Rounds Recount the FPDC per side before moving to the next stitch, since the pattern drops from 3 to 2 to 1 across the three Decrease Rounds. One extra or missing FPDC throws off the shell spacing for the rest of the crown.
- Front and back posts worked into the wrong stitch Slot the hook around the post of the DC below, not into the top of the stitch, when working FPDC and BPDC in the ribbing round. Working into the stitch top flattens the rib texture.
Yarn, hook and the rest
Copied from the source pattern's own materials list.
- Double Knitting (DK) Weight Yarn
- 4 mm crochet hook
Progress tracker
0 of the 10 rounds on this page are ticked.
The pattern, round by round
Kept in the order and the wording the source used. Tick a round as you finish it; the ticks stay on this device.
Foundation Row & Ribbon (Rounds 1–3)
Chain the required number of stitches for your size.
Skip the first 3 chains (counts as 1 Double Crochet, DC).
Work 1 DC into the 4th chain from the hook and into every chain across.
Join with a Slip Stitch (SS) to the top of the starting chain-3.
Round 2
Chain 3, work 2 FPDC around the next two posts, 2 BPDC around the next two posts , repeat around, SS to join.
Round 3
Chain 3, FPDC on FPDC and BPDC on BPDC, SS to join.
Main Pattern
Round 1
Chain 1, SC in first stitch, skip 2 stitches, work 7 DC in next stitch, skip 2 stitches, SC in next stitch , repeat around, SS to first SC.
Round 2
Turn, SS into next stitches to position over third DC of shell, chain 3 (counts as FPDC), FPDC around next 2 DC, chain 1, skip the middle DC, FPDC around last 3 DC, skip SC, repeat pattern , SS to top of chain-3.
Round 3
Do not turn, SC between FPDC groups, skip 3 FPDC, in chain-1 space work 3 DC, 1 FPDC around skipped DC from Round 1, 3 DC in same space, SC between shells, repeat around, SS to first SC.Repeat Rounds 2 and 3 until the body reaches the correct number of shell rounds for your size.
Decrease & Closing Rounds
Decrease Round 1
Follow Round 3 but make 2 DC instead of 3 DC per side of each shell. SC between shells, SS to join.
Decrease Round 2
Follow Round 2 but make 2 FPDC instead of 3 FPDC. Turn, SS into next stitches, chain 3, FPDC around next DC, chain 1, skip next FPDC, FPDC around last 2 DC, repeat, SS to join.
Decrease Round 3
Follow Round 3 but make 1 DC instead of 2 DC per side. Do not turn, SC between shells, repeat pattern, SS to join.
Final Closing Rounds
Round 14
Chain 1, SC in every stitch and space around, SS to join.
Round 15
Chain 1, SC in first stitch, skip 1 stitch, SC in next , repeat around, SS to join.Cut yarn, leave a tail, thread through remaining stitches, pull tight to close, and secure.
Finish
- Weave in the starting tail from the foundation chain and the working yarn end from the last round, running each through several stitches to lock it.
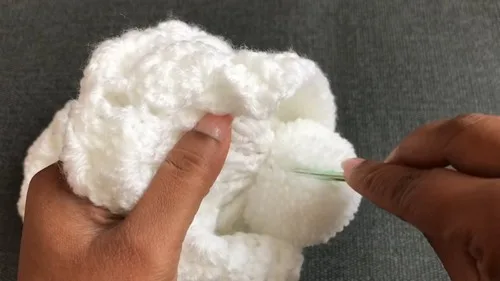
- Pull the cut tail from the Final Closing Rounds through the remaining stitches and draw it tight to seal the crown, then knot off inside the hat.
- Steam or lightly wet-block the FPDC and BPDC ribbing so the brim sits flat and stretches evenly around a baby's head.
Bigger or smaller
- Newborn
- Chain 56 (54 DC in Row 1, 9 shells, 4 3D shells tall, total 8 body rows).
- 0-3 Months
- Chain 62 (60 DC, 10 shells, 5 3D shells, 10 body rows).
- 3-6 Months
- Chain 68 (66 DC, 11 shells, 6 3D shells, 12 body rows).
- 6-12 Months
- Chain 74 (72 DC, 12 shells, 7 3D shells, 14 body rows).
- Larger
- Move up a hook size and use a heavier yarn than the DK weight called for, which loosens the shell stitch and widens both the brim and the crown.
- Smaller or larger by height
- Repeat the Rounds 2 and 3 pair fewer or more times in the Main Pattern before starting the Decrease Rounds, which shortens or lengthens the body between the ribbing and the crown.
Photographs of this one
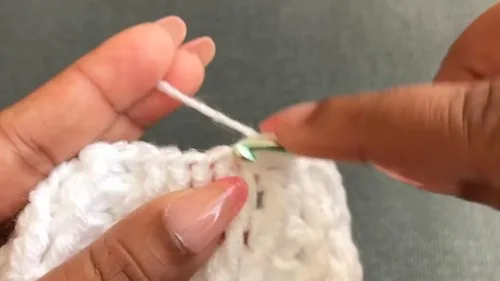
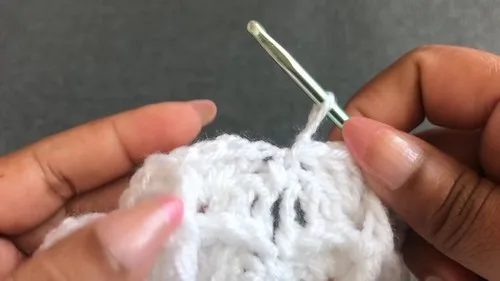
Every photograph on this page was taken by whoever published the pattern, and they are printed in the order the source listed them.
FAQs
Asked and answered
These answers came from whoever first published the pattern, kept word for word.
Can this hat be made in a size other than newborn to 3-6 months?
The notes give chain counts and shell numbers for newborn, 0-3 month, 3-6 month, and 6-12 month sizes. Scaling beyond that means adjusting the starting chain and shell count to match a larger head circumference before working the same round structure.
What yarn weight and hook does this pattern use?
The pattern calls for DK weight yarn worked with a 4 mm crochet hook. Swapping either one changes gauge, which shifts the finished size away from the newborn to 6-12 month range given in the notes.
Why does the ribbing use both FPDC and BPDC?
Alternating front post and back post double crochet in the Foundation Row & Ribbon rounds creates the stretchy, ribbed brim that hugs a baby's head. This texture also anchors the shell stitches that follow in the Main Pattern.
How does the crown close without a separate seam?
The Final Closing Rounds work two SC rounds that narrow the opening, then the cut tail threads through the remaining stitches and pulls tight. This draws the top shut without any additional stitching or seaming.