 STITCH ROUND
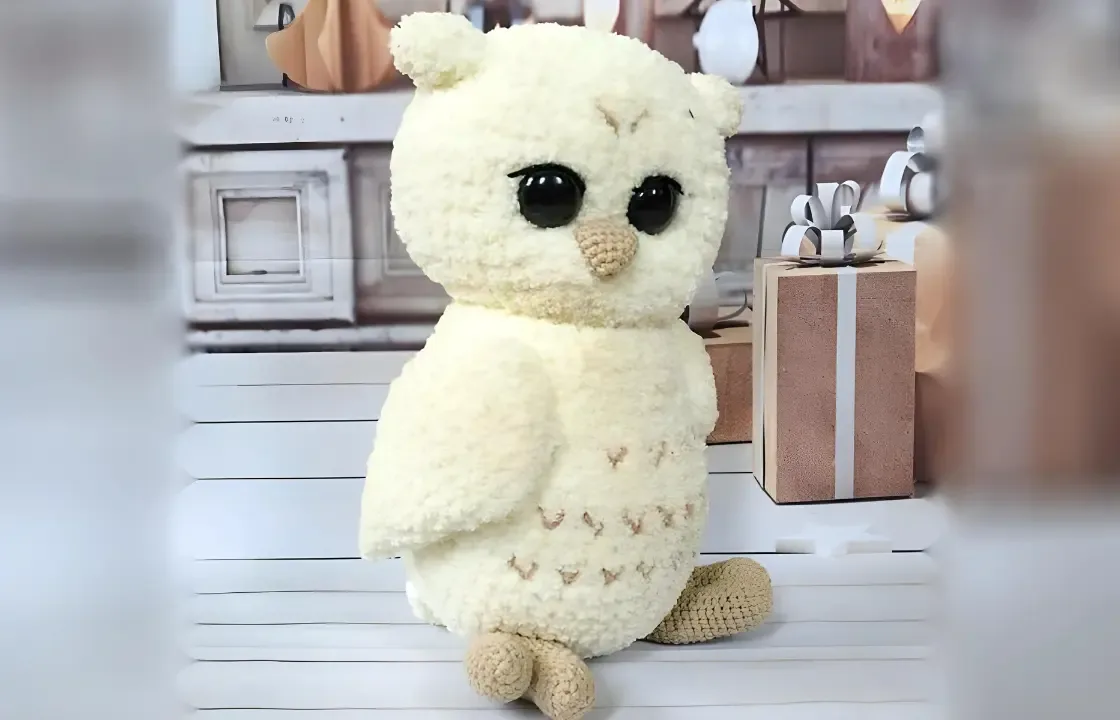
 Soft Plush Owl Amigurumi Head and Beak Pattern
12 rounds shape the head, 4 more the beak, for a plush owl amigurumi.
- Skill
- Intermediate
- Rounds
- 16 rounds
- Yarn weight
- Bulky
- Hook
- 3.5 mm
- Time
- 4-6 hours

Intermediate
What the original page called it. Nothing here is graded a second time.

16 rounds
Each one gets its own line, with a box beside it to tick as you go.

Bulky
What the sample was made in. Any weight works — the size moves with it.
About this pattern
This owl comes together in two pattern pieces: a head worked over 12 rounds and a beak finished in just 4. The head carries the bulk of the shaping, built up in plush yarn on a 3.5mm hook, while the beak is a quick fine-yarn add-on worked with a much smaller 1.5mm hook. Between the two pieces, the whole face of the owl is covered before any sewing or detail work begins.
- Start the head from a magic ring and build outward through a run of increase rounds
- Move into plain rounds once the head reaches its widest point and hold that width steady
- Set the plastic or glass eyes into the head before the opening closes too far to reach them
- Work the beak on its own in fine yarn, tapering it down toward the final rounds
- Stuff the head as the last rounds close it in, packing filler evenly before the top seals
- Sew the finished beak onto the face using the tail left for that purpose
What goes wrong
- Loose magic ring at the start Pull the starting tail tight before working the first round so no gap opens at the top of the head.
- Eyes placed before checking spacing Hold the eyes against the head and compare positions from the front before pushing the posts through, since gaps close up fast in later rounds.
- Beak worked with the wrong hook Use the 1.5mm hook for the beak rather than the 3.5mm head hook, so the small piece stays tight and holds its shape.
Yarn, hook and the rest
Copied from the source pattern's own materials list.
- Yarn Alize Softy 2-3 skeins main color (we crochet in two threads) and quite a bit additional color, for decoration. Or Alize Softy Plus 1 skein of the main color (we crochet in one thread). White owlet is crocheted from Alize Softy Plus, hook No. 3.5 mm. chocolate owlet crocheted from Alize Softy in two strands, hook No. 3.5 mm. Or any other yarn
- Hook #4mm, #3.5mm or #3mm (I use #3.5mm)
- A pair of peepholes 20 mm plastic or glass (I use glass)
- Hook No. 1.5mm for paws and beak
- Scissors
- Long needle
- Filler (holofiber, synthetic balls, etc.)
Progress tracker
0 of the 16 rounds on this page are ticked.
The pattern, round by round
Kept in the order and the wording the source used. Tick a round as you finish it; the ticks stay on this device.
Head
(Main thread color, hook No. 3.5 mm)
Step by step: (Main thread color, hook No. 3 mm).
Round 1
7sc in MRStep by step: Rnd 2. 7inc (14sc).Rnd 2. 7inc (14sc)
Round 3
(1sc, inc)*7 (21sc)
Round 4
(2sc, inc)*7 (28sc)
Round 5
(3sc, inc)*7 (35sc)
Round 6
(4sc, inc)*7 (42sc)Step by step: Rnd 7-11. 42sc (5 rnds); 15sc, (1sc, inc)*6, 15sc (48sc).
Round 7
(5sc, inc)*7 (49sc)Rnd 8-12. 49sc (5 rnds)Rnd 13. We put additional markers for the eye: on 22sc, 28sc (49sc)Rnd 14-15. 49sc (2 rnd)
Round 16
(5sc, dec)*7 (42sc)
Round 17
(5sc, dec)*6 (36sc) Fasten the eyes over the markers. There should be 5 sc between the eyes.
Round 18
(4sc, dec)*6 (30sc)
Round 19
(3sc, dec)*6 (24sc)
Round 20
(2sc, dec)*6 (18sc) We stuff the part quite tightly, paying special attention to the cheeks. Distribute the filler well around the circumference. We insert the disk or joint, do not stuff the part further. If you don’t want to use the pin fastening, continue to crochet according to the pattern, stuffing the part as you crochet.
Round 21
(1sc, dec)*6 (12sc)
Rnd 22. 6dec
Beak
(Thread color optional, cotton yarn, hook No. 1.5 mm)
Round 1
6sc in MR
Round 2
(1sc, inc)*3 (9sc)Step by step: Rnd 3. 9sc.(2sc, inc)*3 (12sc) Cut the thread, fasten, leaving the end for sewing. Sew the ears to the head.
Round 3
(2sc, inc)*3 (12sc)Rnd 4. 12sc
Round 5
(3sc, inc)*3 (15sc) Fold the part in half and crochet 7 sc for both walls (together). Cut the thread, fasten, leaving the end for sewing. Sew the beak to the head. Can be issued beak as shown in photo 2. The scheme is the same, just do not crochet 7 sc together. In such a beak, we add quite a bit of filler. Thank you for choosing amigurumireceitas.com.
Check your count
- Head · Round 5: 35 sts
- Head · Round 16: 42 sts
- Head · Round 21: 12 sts
- Beak · Round 2: 9 sts
- Beak · Round 3: 12 sts
Finish
- Weave in the starting tail from the magic ring on both the head and the beak so no loose ends show on the finished piece.
- Stuff the head firmly as the closing rounds work down, pushing filler well into the crown before the last stitches pull it shut.
- Sew the beak onto the face with its own sewing tail, centering it low on the head where the closing rounds narrow.
Bigger or smaller
- Larger
- Move up from the 3.5mm hook toward the listed 4mm option and keep the yarn as-is, which loosens the stitches and produces a bigger head and beak without changing the round count.
- Smaller
- Drop down to the 3mm hook instead of 3.5mm, tightening the stitches so the same number of rounds yields a more compact owl.
FAQs
Asked and answered
These answers came from whoever first published the pattern, kept word for word.
Can the head be made with a single strand of yarn instead of two?
Yes, the pattern already offers this option by swapping to Alize Softy Plus worked in one thread instead of Alize Softy held double. Both routes are sized to give a similar plush finish.
What size eyes does this owl need?
The pattern calls for a pair of 20mm eyes, either plastic or glass. Either material works, so the choice comes down to preferred finish.
Which hook size should be used for the head?
The pattern lists 4mm, 3.5mm or 3mm as options, with 3.5mm noted as the size actually used. Any of the three will work with the yarn suggested.
Why does the beak need a separate, much smaller hook?
The beak is worked in finer yarn than the head, so the 1.5mm hook keeps its stitches tight and the shape crisp. Using the larger head hook here would leave the beak loose and out of proportion.