 STITCH ROUND
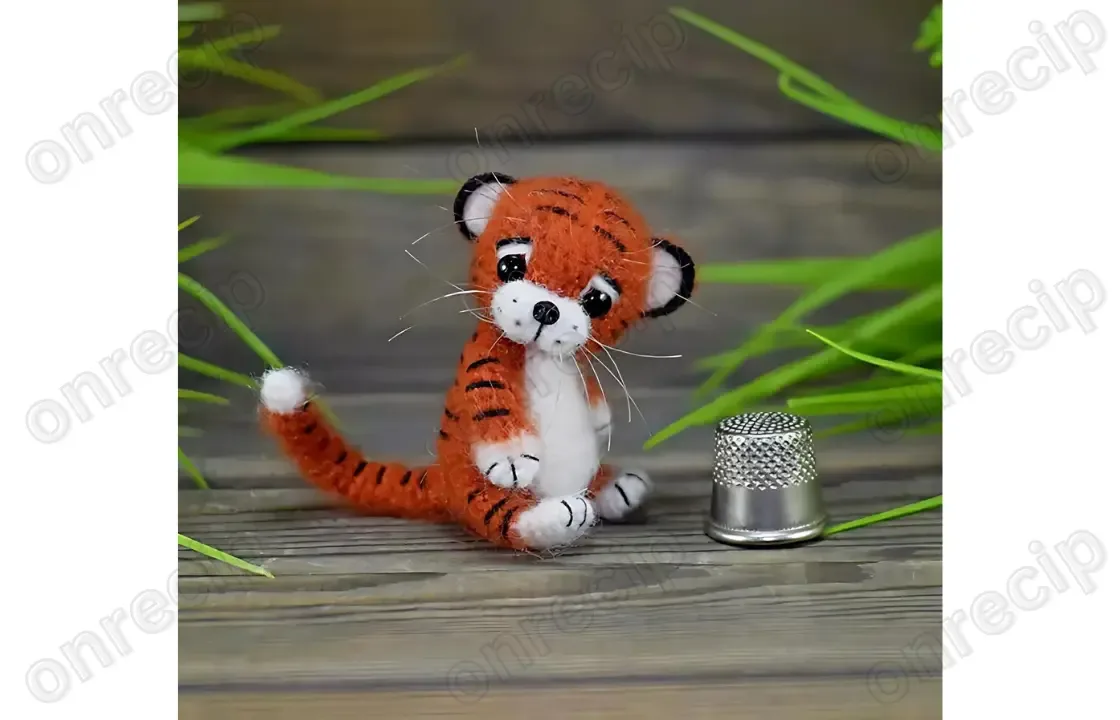
 Amigurumi tiger muzzle pattern worked in five rounds
Five rounds tick off a small amigurumi tiger muzzle, shaped with increases from a short starting chain.
- Skill
- Intermediate
- Rounds
- 5 rounds
- Yarn weight
- Fingering
- Hook
- 0.8 mm
- Time
- 1-2 hours

Intermediate
What the original page called it. Nothing here is graded a second time.

5 rounds
Each one gets its own line, with a box beside it to tick as you go.

Fingering
What the sample was made in. Any weight works — the size moves with it.
About this pattern
This piece is the muzzle for a small amigurumi tiger, and it ticks off in five rounds worked in a continuous spiral. It starts from a short chain rather than a magic ring, giving the base its oval rather than round shape. Five short rounds is a fast commitment, making the muzzle a good testing ground before starting the rest of the tiger.
The oval start sets the shape for everything after it, so the first round deserves care: both sides of the chain get worked, with extra stitches packed into the loop at each end to turn a flat line into a rounded shape. From there, increases shift position every round, spreading width unevenly rather than in a neat repeating pattern. Slow down through rounds three and four, where increase counts and placement change together and a skipped stitch is easy to miss.
The size of the finished toy is about 7 cm.
When using mohair, it helps to crochet it together with a simple thin sewing thread in the same color as the yarn, since the stitches turn out more even that way.
- Chain a short starting length and work into it from both sides to form an oval base.
- Pack extra stitches into the end loops to round off the tips of the oval.
- Build outward with increase rounds, spreading the increases across different points each time.
- Watch the balance between increase stitches and single crochet stitches as the muzzle widens.
- Finish the final round, then set the piece aside ready for stuffing and attaching to the head.
What goes wrong
- Missing stitches on the chain start Count carefully when working back along the second side of the starting chain, since it is easy to skip the last loop and lose a stitch on that end.
- Uneven end caps on the oval Keep the three single crochet stitches worked into one loop snug and even, since loose stitches there leave a visible gap at the tip of the muzzle.
- Losing track of shifting increases Mark the start of each round with a stitch marker, since increase positions move every round and there is no repeating pattern to fall back on.
- Tension too tight for the small hook Ease up on tension when working with the fine yarn and small hook, since overly tight stitches make the fabric stiff and harder to shape when stuffed.
Yarn, hook and the rest
Copied from the source pattern's own materials list.
- Alize Kid Royal yarn 50: orange and white
- YarnArt Canarias yarn: black (for embroidery)
- 0.8 mm crochet hook
- 4-5 mm eyes for toys
- Toy filler
- Sewing threads
- Polymer clay (for the nose)
- 1-1.5 mm wire
- Glue
- Needle for sewing parts
- Scissors
- Pliers
- Wire cutters
Progress tracker
0 of the 5 rounds on this page are ticked.
The pattern, round by round
Kept in the order and the wording the source used. Tick a round as you finish it; the ticks stay on this device.
Muzzle
Crochet in a circle, tight crocheting.
Round 1
chain of 6 ch
Round 2
in the second loop from the hook inc, 3 sc, 3 sc in one loop, continue crocheting the chain of ch in a circle, 3 sc, inc (13)
Round 3
2 inc, 3 sc, 3 inc, 5 sc (18)
Round 4
inc, 9 sc, inc, 7 sc (20)
Round 5
sc, 2 inc, 8 sc, 2 inc, 7 sc (24)Leave the thread, sew the muzzle.
Check your count
- Muzzle · Round 2: 13 sts
- Muzzle · Round 3: 18 sts
- Muzzle · Round 4: 20 sts
- Muzzle · Round 5: 24 sts
Finish
- Weave in the starting and ending tails along the inside of the muzzle before adding stuffing.
- Stuff lightly and evenly so the oval shape stays smooth without pulling the stitches tight.
- Close the last round and set the muzzle onto the head, positioning it before sewing so the eyes sit level and the black yarn embroidery for the nose and mouth lines up centered.
Bigger or smaller
- Smaller
- Drop to a finer yarn with a smaller hook to tighten the stitches, producing a denser, more compact muzzle without changing the round count.
FAQs
Asked and answered
These answers came from whoever first published the pattern, kept word for word.
Why does the muzzle start with a chain instead of a magic ring?
The chain start creates an oval base rather than a circle, which suits the elongated shape of a muzzle. Working both sides of the chain and packing stitches into the end loops is what rounds off the tips.
How much stuffing does the muzzle need?
Light, even stuffing is enough to hold the oval shape without stretching the stitches. Overstuffing at this scale can distort the smooth line of the piece.
Can a different yarn weight be used instead of the one listed?
Yes, though the finished muzzle will scale up or down with the yarn thickness and hook size chosen. Keeping the hook and yarn close in weight to each other keeps the fabric dense enough to hold stuffing.
Does this pattern include the rest of the tiger?
Only the muzzle piece is covered here, worked in five rounds. Other parts of the tiger are handled separately.