 STITCH ROUND
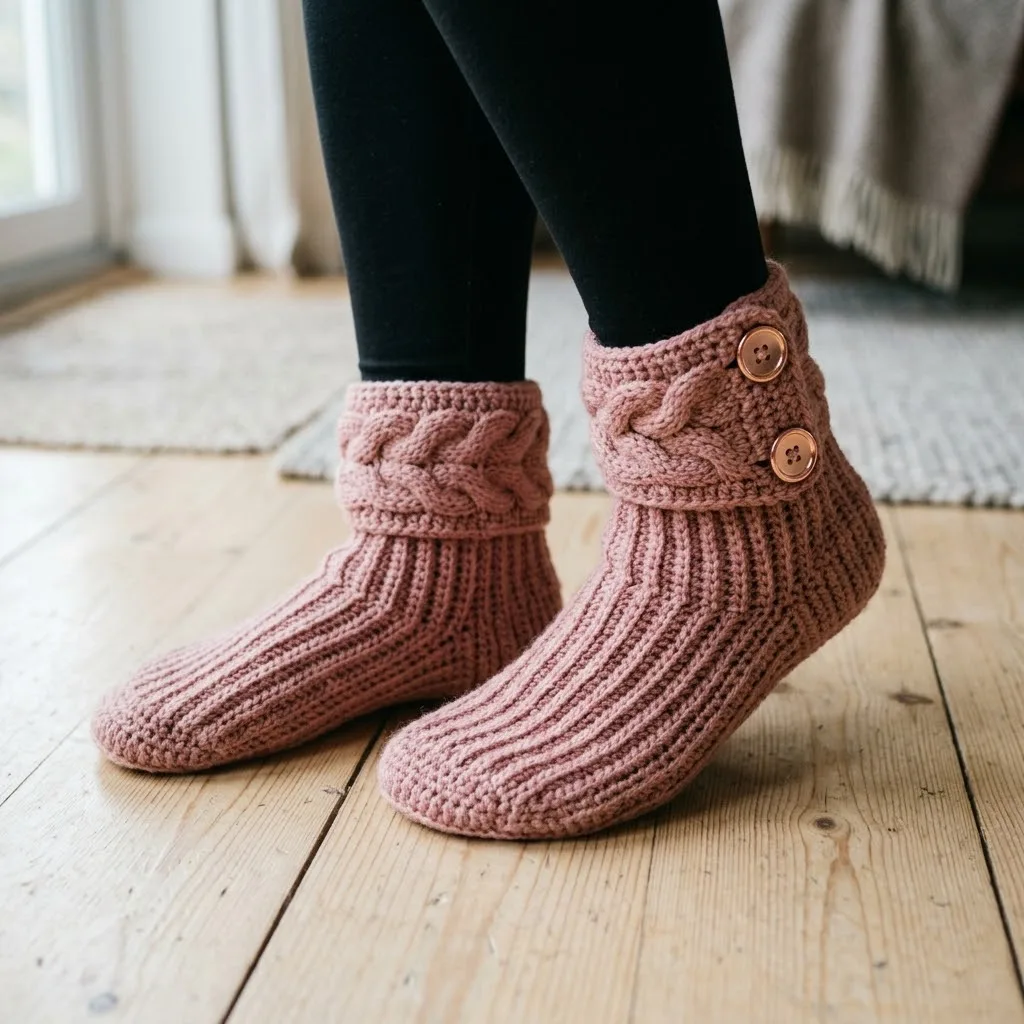
Cable cuff slipper boots crochet pattern with button trim
Follow every row and round from the flat sole to the braided cable cuff to crochet these buttoned slipper boots.
- Skill
- Intermediate
- Rounds
- 20 rounds
- Yarn weight
- Worsted
- Hook
- 5.0 mm
- Time
- 4-6 hours

Intermediate
What the original page called it. Nothing here is graded a second time.

20 rounds
Each one gets its own line, with a box beside it to tick as you go.

Worsted
What the sample was made in. Any weight works — the size moves with it.
About this pattern
This slipper boot builds from the sole up: a flat sole worked in rows, a ribbed foot and ankle built in joined rounds, and tapered toe shaping rows, all worked before the cable cuff ever comes into play. The bulk of the sitting-and-stitching happens before a single cable crosses.
The shaping lives in two places: the back-loop-only ribbing that climbs the foot, and the hdc2tog decreases that pull the toe in row by row. Slow down at the cable cross row in the cuff, where stitches get worked out of order to create the twist, and at the final toe rows where decreases land at both ends of the row.
This pattern is rated intermediate, so you should be comfortable with basic stitches and reading pattern instructions before starting.
- Build the sole and ribbed body first, working back-loop-only hdc rounds to form the vertical ribbing up the foot.
- Shape the toe with paired decreases at each end of the row until the point narrows to the final width.
- Set the toe rows aside and make the cable cuff separately as its own flat panel.
- Work the post stitches that frame the cable, then cross the center stitches out of order on the designated row to twist them.
- Join the finished cuff to the top of the boot body and seam it into place.
- Finish by adding the wooden buttons so the cuff can wrap and close over the foot.
What goes wrong
- Working into both loops instead of back loop The ribbed body relies on back-loop-only hdc to form the vertical ridges. Check the first few stitches of each round and frog back if the ribbing looks flat instead of raised.
- Losing track of the toe decreases The hdc2tog decreases land at both ends of the toe rows, and it is easy to decrease on only one side by mistake. Count the stitch total at the end of each row against the pattern before moving on.
- Crossing the cable stitches in the wrong order The cable cross row asks for the second set of three stitches to be worked before going back for the first set in front of them. Work slowly through that one row and resist the urge to work the stitches in the order they appear.
Yarn, hook and the rest
Copied from the source pattern's own materials list.
- Approximately 250 to 300 yards of worsted weight yarn (weight category 4)
- Wool blend or acrylic yarn with good stitch definition recommended; dusty rose color shown creates a beautiful shadow in the ribbing (color optional)
- 5.0mm (H/8) crochet hook for the main body
- 5.5mm (I/9) crochet hook for the cable cuff (optional, for looser tension on cables)
- 4 wooden buttons, approximately 20mm diameter
- Tapestry needle for weaving ends and seaming
- Scissors
- Stitch markers (at least 4)
Progress tracker
0 of the 20 rounds on this page are ticked.
The pattern, round by round
Kept in the order and the wording the source used. Tick a round as you finish it; the ticks stay on this device.
The Sole
The sole is worked flat in rows, then you will work around the edges to build up the foot.
Row 1
Ch 32. Sc in 2nd ch from hook and in each ch across. (31 sc)
Row 2
Ch 1, turn. Sc in BLO of each st across. (31 sc)
Rows 3–8
Repeat Row 2. (31 sc)
At this point, you have a rectangular sole base. Now we shape it.
Row 9
Heel shaping Ch 1, turn. Sc2tog, sc in BLO across to last 2 sts, sc2tog. (29 sc)
Row 10
Ch 1, turn. Sc in BLO of each st across. (29 sc)
Rows 11–12
Repeat Rows 9-10. (27 sc after Row 11)Fasten off and weave in the end. Your sole should have a slight taper at one end for the heel.
Setting up
With right side of sole facing you, join yarn at the center back heel. You will work around the entire perimeter of the sole.
Round 1
Ch 1. Work 60 sc evenly around the entire sole edge, placing 1 sc in each row end along the sides and 1 sc in each stitch along the toe and heel. Sl st to first sc to join. Place marker. (60 sc)Do not stress about getting exactly 60 stitches. Anywhere from 58 to 62 works. Just keep it even.
Round 2
Ch 2 (does not count as a stitch here). Hdc in BLO of each st around. Sl st to first hdc to join. (60 hdc)
Rounds 3–8
Repeat Round 2. (60 hdc) You should see vertical ribbing forming beautifully. Keep your tension even for the cleanest look.
Toe Shaping
Time to shape the toe. This is worked in rows, turning back and forth across the front section only.
Place markers at stitches 15 and 45 (counting from center back). The 30 stitches between these markers are your toe area.
Row 1
Toe Starting at marker, ch 2. Hdc in BLO of next 28 sts, hdc2tog. Turn. Leave remaining sts unworked. (29 hdc)
Row 2
Ch 2, skip first st (counts as decrease), hdc in BLO of each st to last 2 sts, hdc2tog. Turn. (27 hdc)
Rows 3–6
Repeat Row 2, decreasing at each end. (19 hdc after Row 6)
Row 7
Ch 2. Hdc in BLO of each st across. Do not turn. (19 hdc)
Foundation
This is worked separately and attached at the end. The cable is a simple 6-stitch braid that looks intricate but follows a predictable repeat.
Foundation
Ch 14.
Row 1
Wrong side Dc in 4th ch from hook and in each ch across. Turn. (12 dc, counting turning ch as 1 dc)
Row 2
Right side Ch 3. Skip first st. BPdc around next 2 sts, FPdc around next 6 sts (this is your cable section), BPdc around next 2 sts, dc in top of turning ch. Turn. (12 sts)
Row 3
Ch 3. Skip first st. FPdc around next 2 sts, BPdc around next 6 sts, FPdc around next 2 sts, dc in turning ch. Turn. (12 sts)
Row 4
Cable cross row Ch 3. Skip first st. BPdc around next 2 sts. Now for the cable cross: skip next 3 sts, FPdc around the following 3 sts, then working in front of those stitches you just made, FPdc around the 3 skipped sts. BPdc around next 2 sts, dc in turning ch. Turn. (12 sts)
The cable cross sounds complicated, but basically you are working the second set of 3 stitches first, then going back and working the first set in front of them. This creates the twist.
Row 5: Repeat Row 3.
Row 6: Repeat Row 2.
Row 7: Repeat Row 3.
Row 8: Repeat Row 4 (cable cross). Continue this 8-row repeat until the band measures approximately 10 inches or wraps comfortably around the top of your boot with a 1-inch overlap.
Fasten off, leaving a long tail for seaming.
Hook
5.0mm (H/8) crochet hook for the main body 5.5mm (I/9) crochet hook for the cable cuff (optional, for looser tension on cables)
Notions
4 wooden buttons, approximately 20mm diameter Tapestry needle for weaving ends and seaming Stitch markers (at least 4)
Scissors
Gauge
14 stitches and 16 rows = 4 inches in half double crochet ribbing Gauge matters for fit! Take time to check yours.
Techniques used
Working in rows and rounds Back loop only stitches (creates the ribbing)
Front post and back post stitches (for the cable)
Increasing and decreasing Seaming pieces together
If you have never done post stitches before, do not panic. I will walk you through them step by step, and they are easier than they sound once your hook finds the right spot.
To adjust size
For smaller sizes, reduce starting chain by 4 stitches For larger sizes, increase starting chain by 4 stitches Adjust length by adding or removing rows in the foot section
Continuing Round
Continuing Round
Work sc evenly across the side of the toe shaping (approximately 6 sc), sc across the heel section stitches you left unworked earlier, sc evenly up the other side of toe shaping. Sl st to join. (approximately 50-52 sts)
Ankle Rounds 1-12
Ch 2. Hdc in BLO of each st around. Sl st to join. (50-52 hdc)
Your boot should now reach mid-ankle height. The ribbing runs continuously, creating that lovely stretchy texture that hugs the foot.
Fasten off and weave in ends.
Attaching the cuff
1. Wrap the cable band around the top of the boot ankle, overlapping ends by about 1 inch at the outer ankle area.
2. Using your tapestry needle and yarn tail, whip stitch the bottom edge of the cable band to the top round of the ankle section. Work from the inside so stitches do not show.
3. Sew the overlapped ends together securely.
Adding buttons
1. Position two buttons on the outside of each boot where the cable band overlaps.
2. Sew buttons through all layers using matching thread or yarn.
3. The buttons are decorative but also help secure the overlap.
Final touches
Weave in all remaining ends Steam block gently if desired (do not press the cables flat)
Try them on and do a happy dance
Check your count
- The Sole · Row 2: 31 sts
- The Sole · Row 9: 29 sts
- The Sole · Rows 11–12: 27 sts
- Setting up · Round 1: 60 sts
- Setting up · Round 2: 60 sts
- Toe Shaping · Row 1: 29 sts
Finish
- Weave in every yarn end from the sole join, the ribbing color changes if any, and the cable cuff panel before seaming anything together.
- Attach the cable cuff to the boot opening, lining up the panel evenly around the top edge before stitching it down.
- Sew the four wooden buttons to the cuff where it wraps closed, checking that the boot sits snug but not tight on the foot.
Bigger or smaller
- Finished size
- Written for Women's Medium (US shoe size 7-8). Finished foot length is approximately 9.5 inches, ankle height is approximately 5 inches, and the cuff adds another 2.5 inches.
- Taller or shorter boot
- Repeat the ribbed body round (Round 2) more or fewer times than written to add or remove height in the leg of the boot before starting the toe shaping.
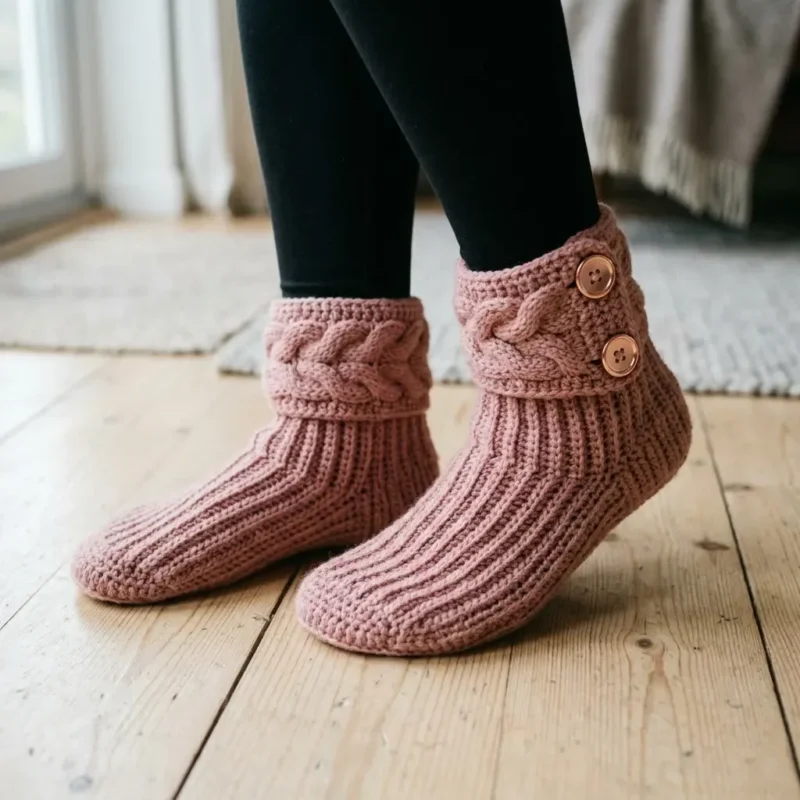
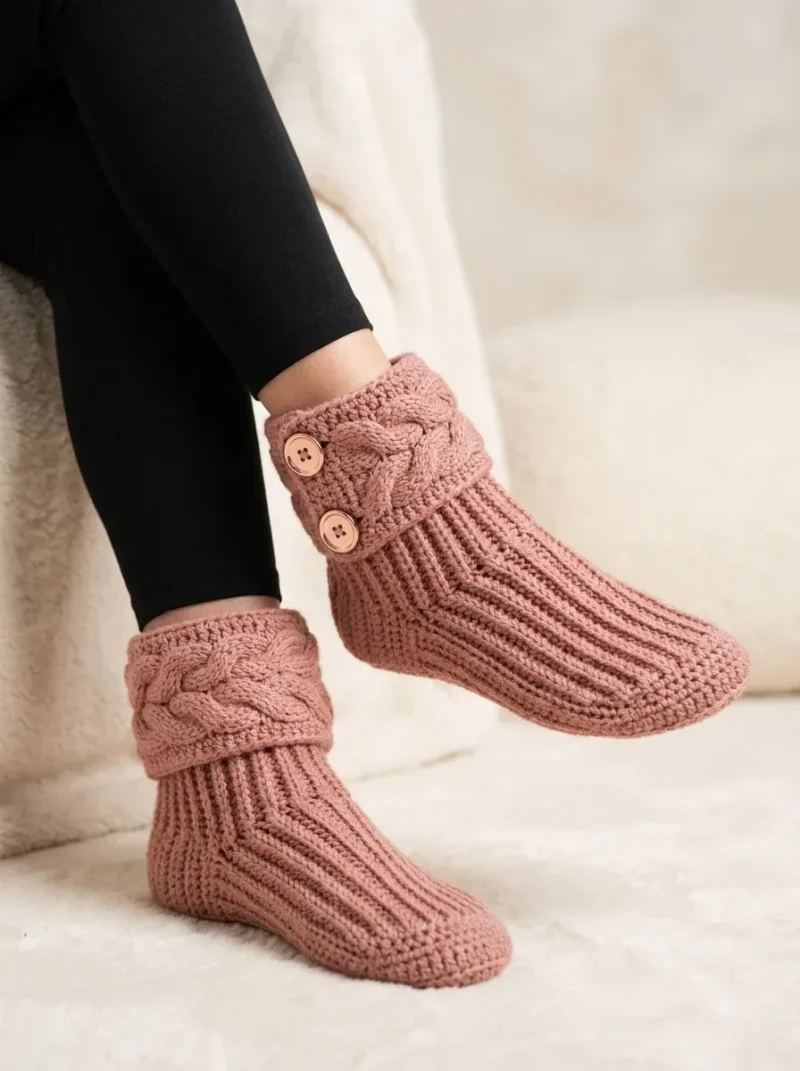
Photographs of this one
Every photograph on this page was taken by whoever published the pattern, and they are printed in the order the source listed them.
FAQs
Asked and answered
These answers came from whoever first published the pattern, kept word for word.
Why does the pattern call for two different hook sizes?
The 5.0mm hook keeps the main body and ribbing firm, while the optional 5.5mm hook is there for the cable cuff so the post stitches do not pull too tight. Stick with one hook throughout if the tension already feels comfortable.
What yarn works best for this project?
A worsted weight wool blend or acrylic with good stitch definition is recommended, since the back-loop ribbing and the raised cable crosses both depend on stitches holding their shape. A fuzzy or very soft yarn will blur the ribbing and the cable texture.
Is the cable cross difficult for a first-time cable crocheter?
It involves working the second group of three stitches before circling back to work the first group in front of them, which feels backward at first. Working it slowly on the first repeat makes the second and third repeats much faster.
Can the wooden buttons be swapped for something else?
Yes, any button around 20mm in diameter will fit the spacing on the cuff. Toggle buttons or plastic buttons work just as well if wood is not on hand.